
Click-through prototypes are something that we're already pretty familiar with in apps like Figma, Sketch and Adobe DX —creating screen-to-screen connections that mimic interactions, animations and flows. But when you want to go deeper with micro-interactions, animations and trigger-based prototyping you need software that's a little bit more advanced and you can achieve this with Figma and this amazing tool called ProtoPie.
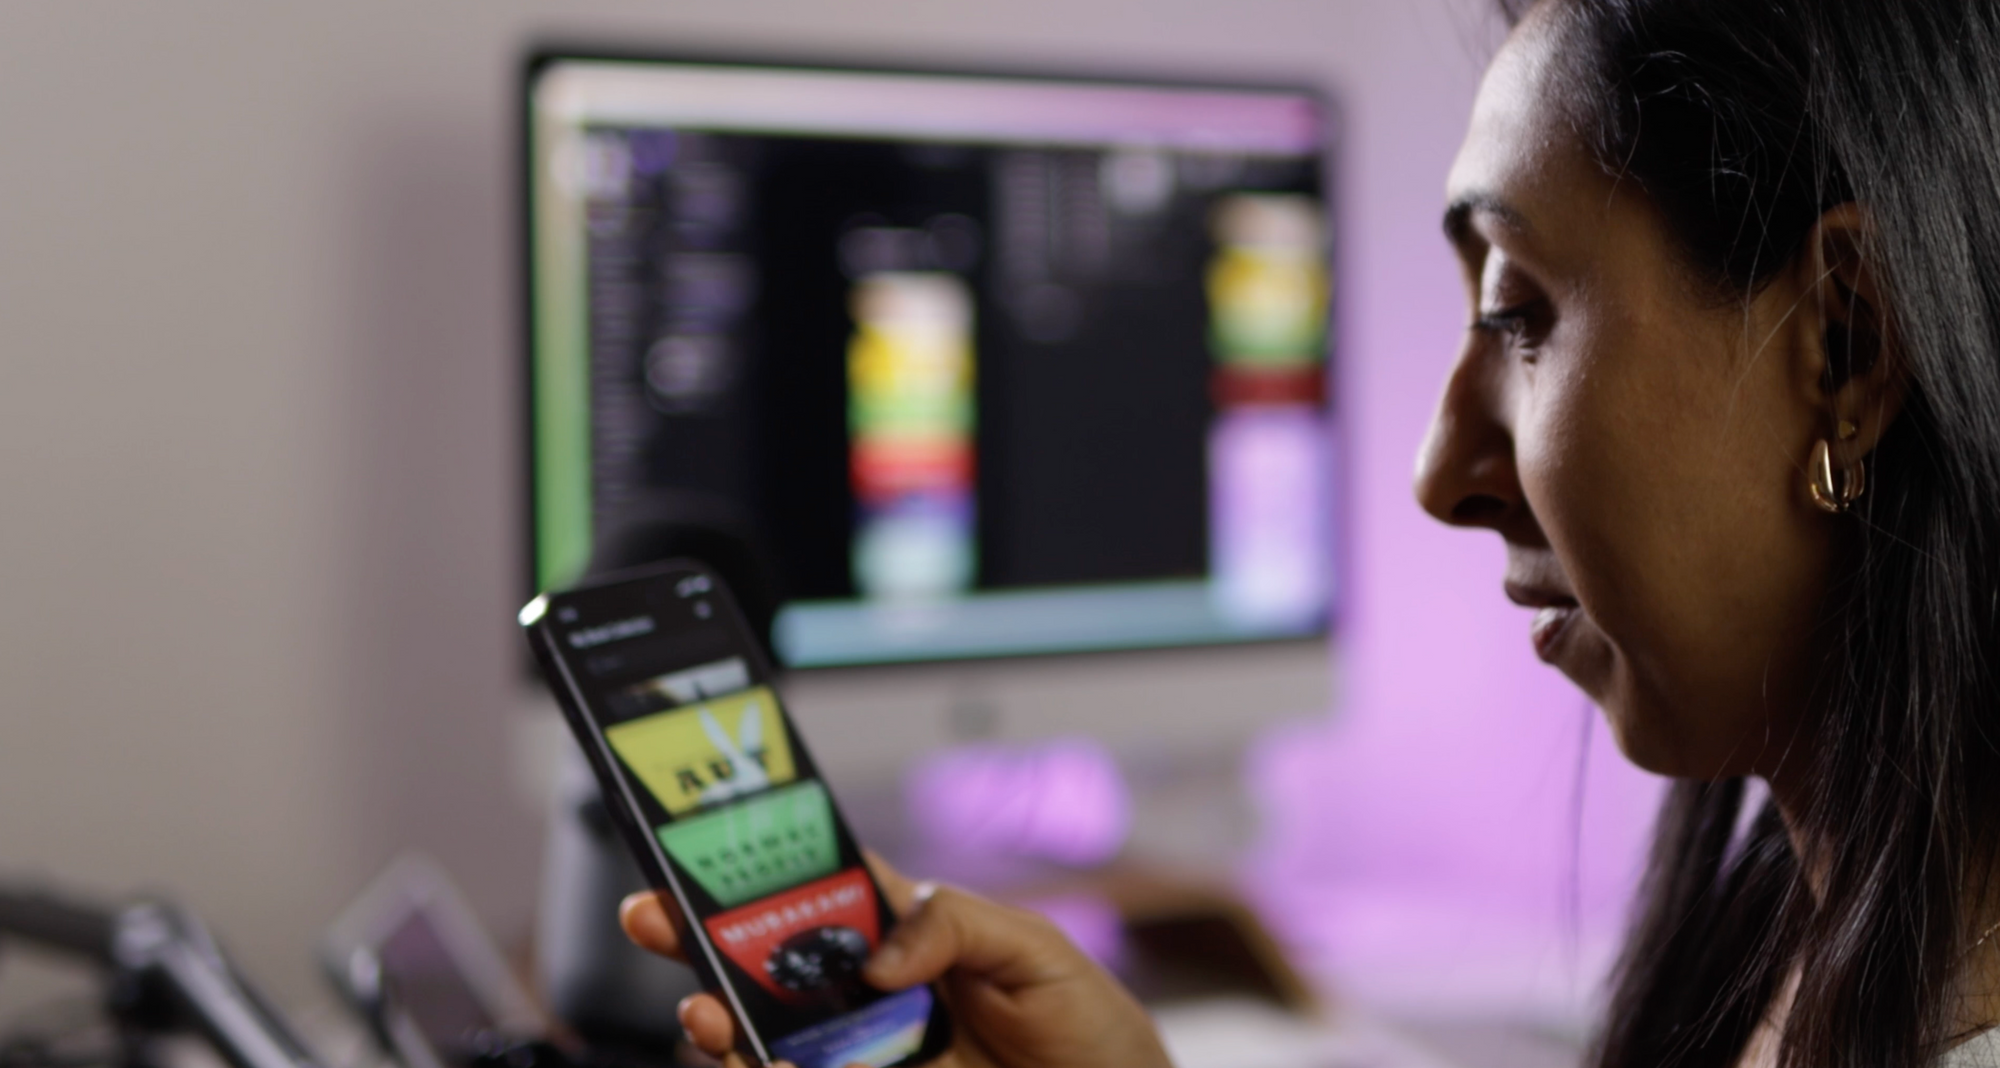
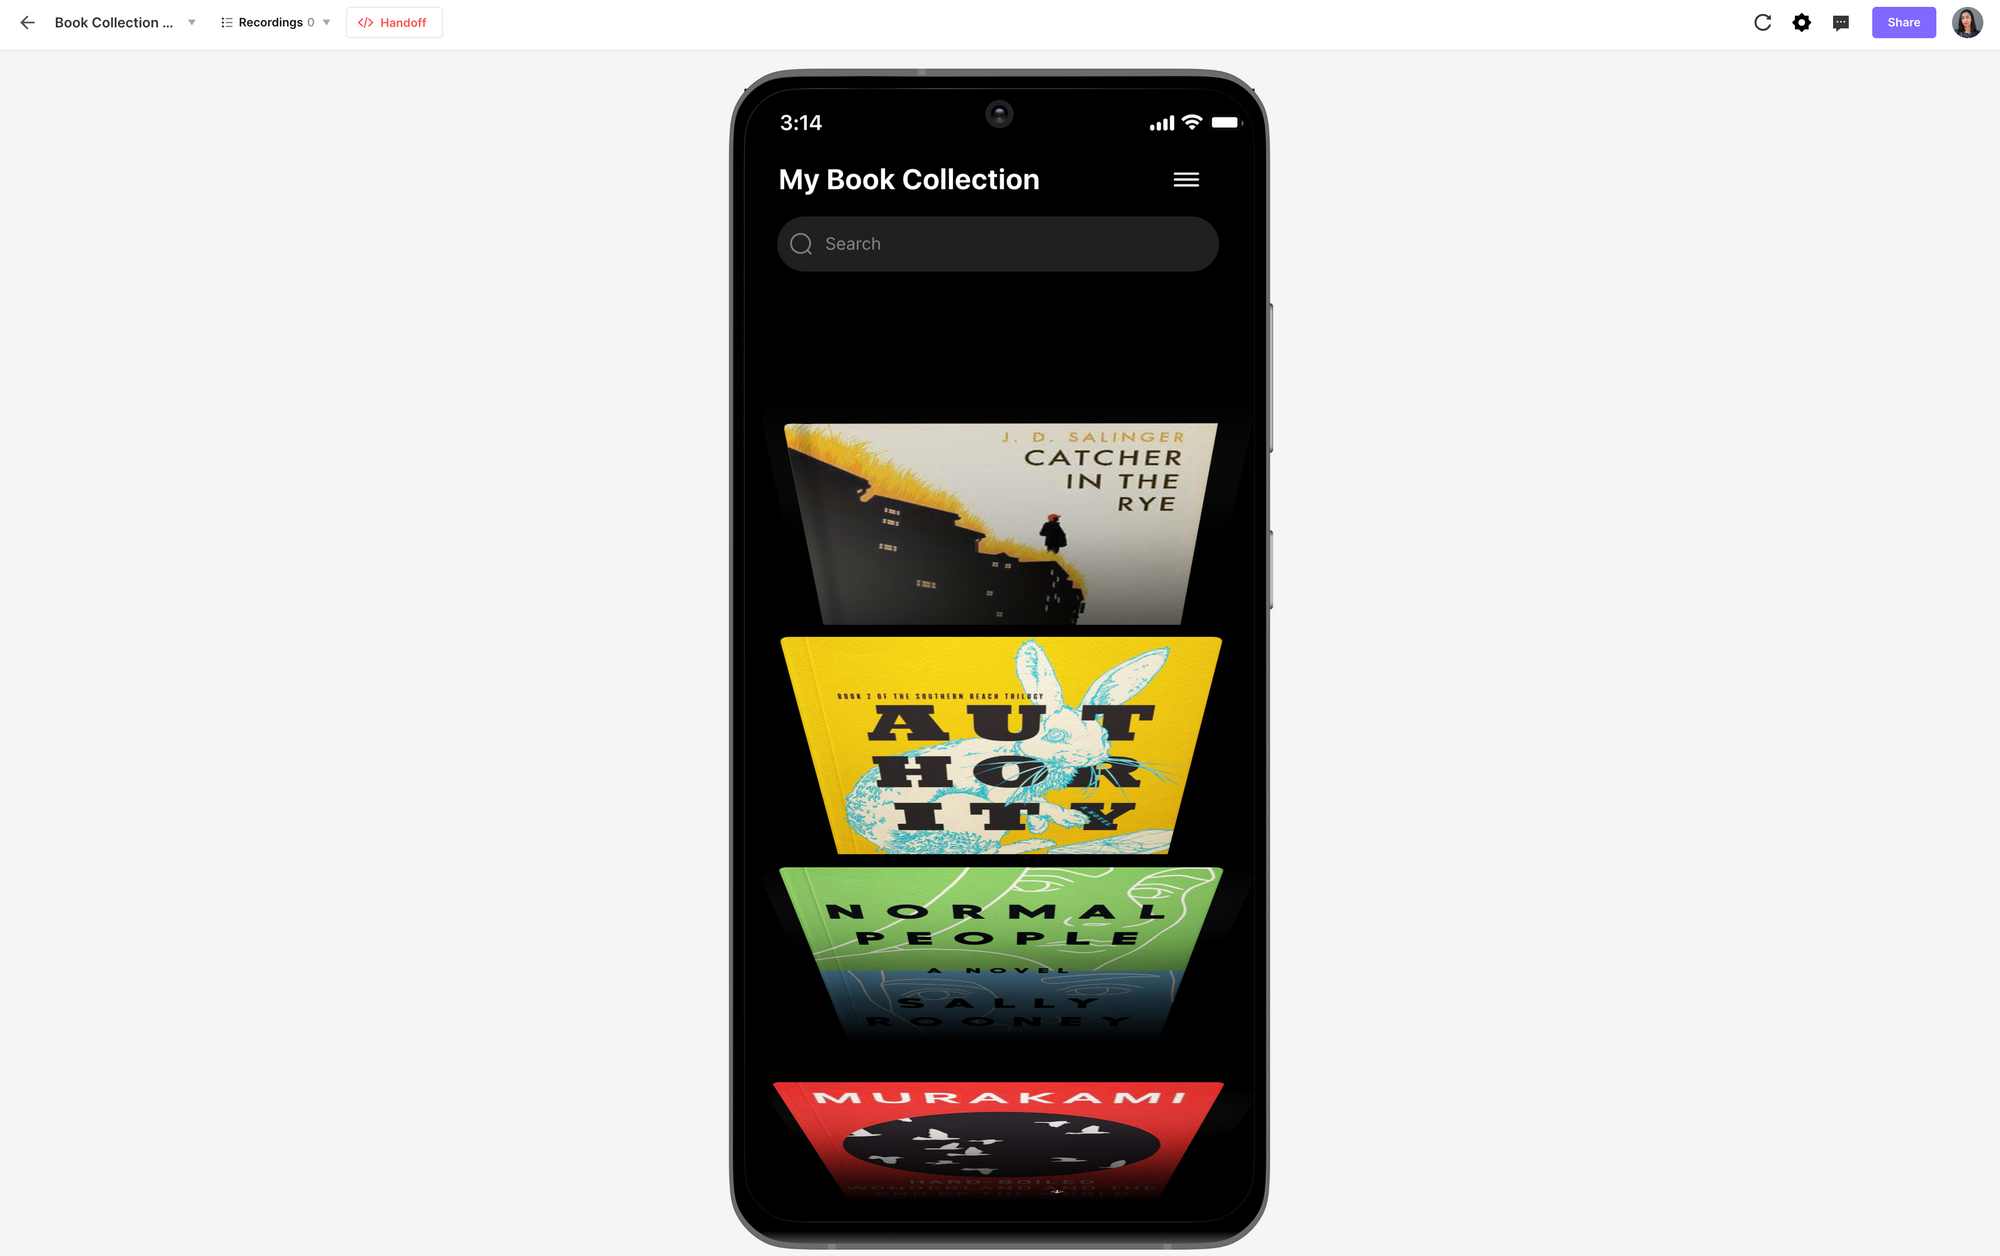
I made a reading app that you can scroll through with these amazing animations and micro-interactions.
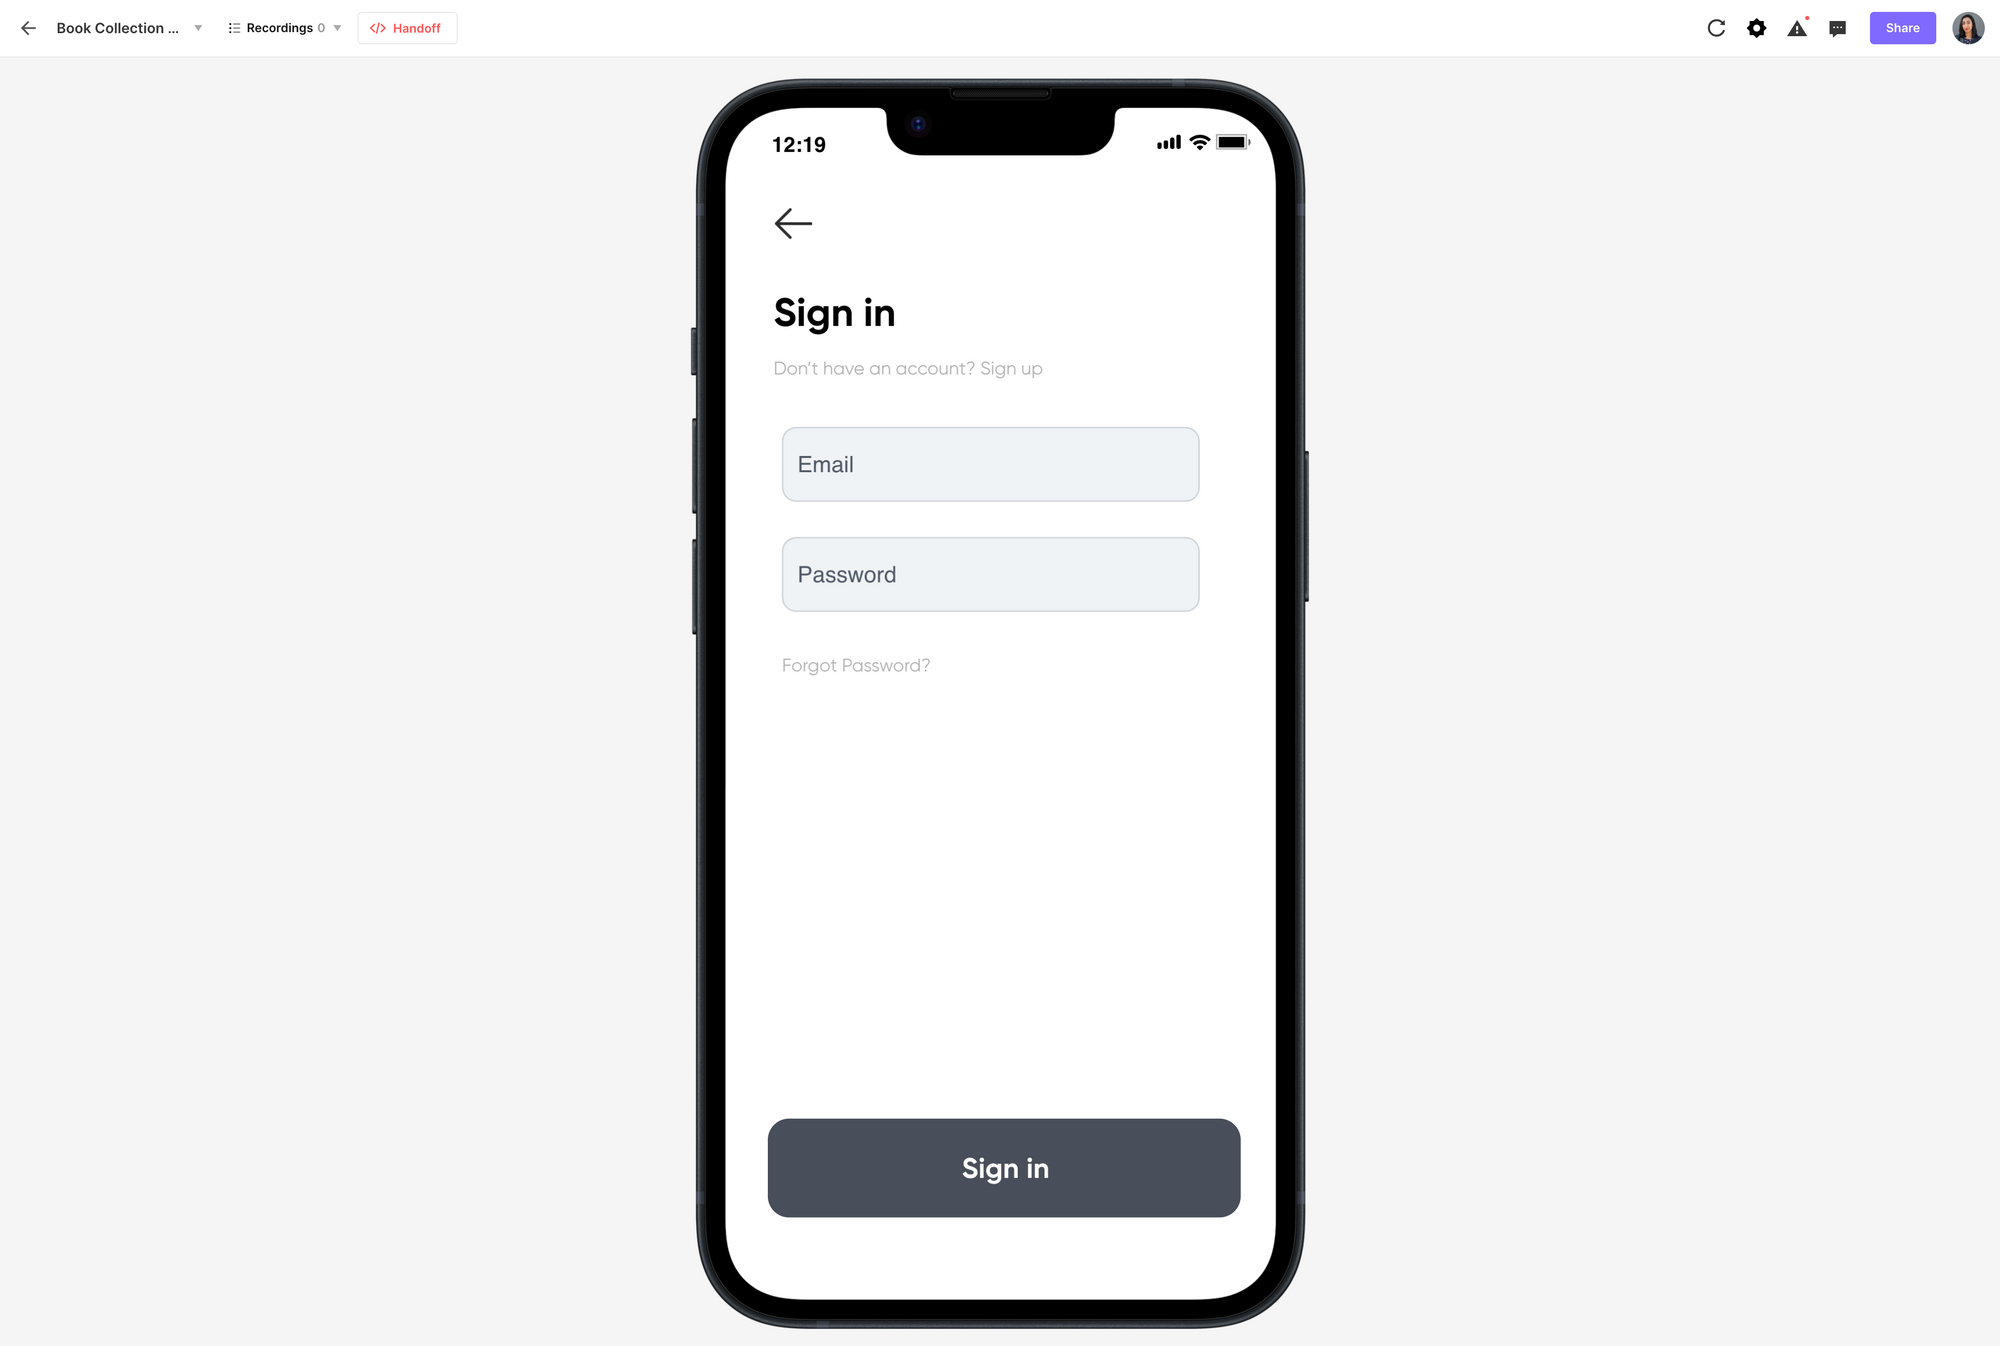
Then I made an email sign-in form that you can actually validate.

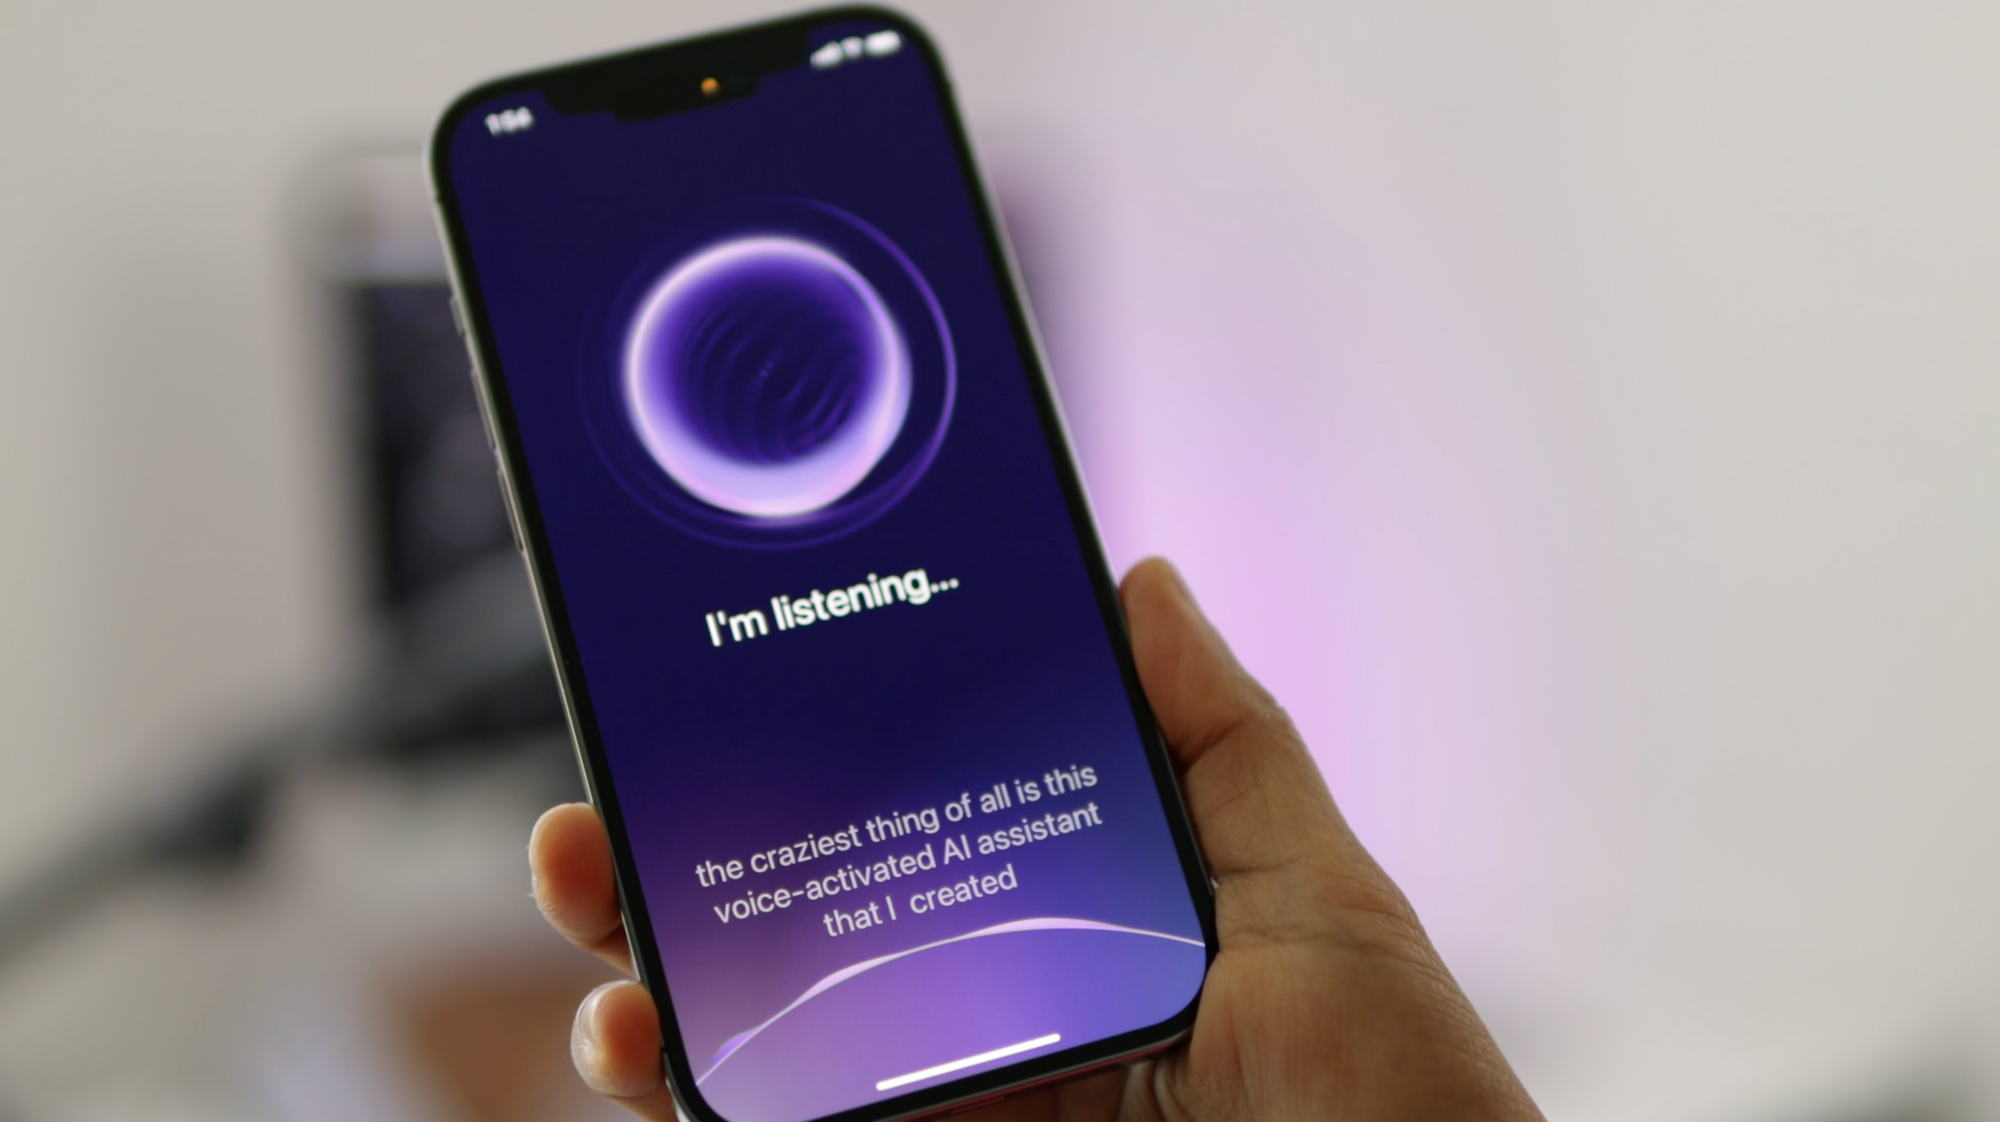
And the craziest thing is this voice-activated AI assistant you can speak to and it answer back in real-time!
This is some next-level prototyping and interaction design, and it's surprisingly easy to do and I'm going to walk you through how you can make all of this stuff yourself. Also be sure to download my ProtoPie files below each example if you want to follow along.
Exporting Designs from Figma
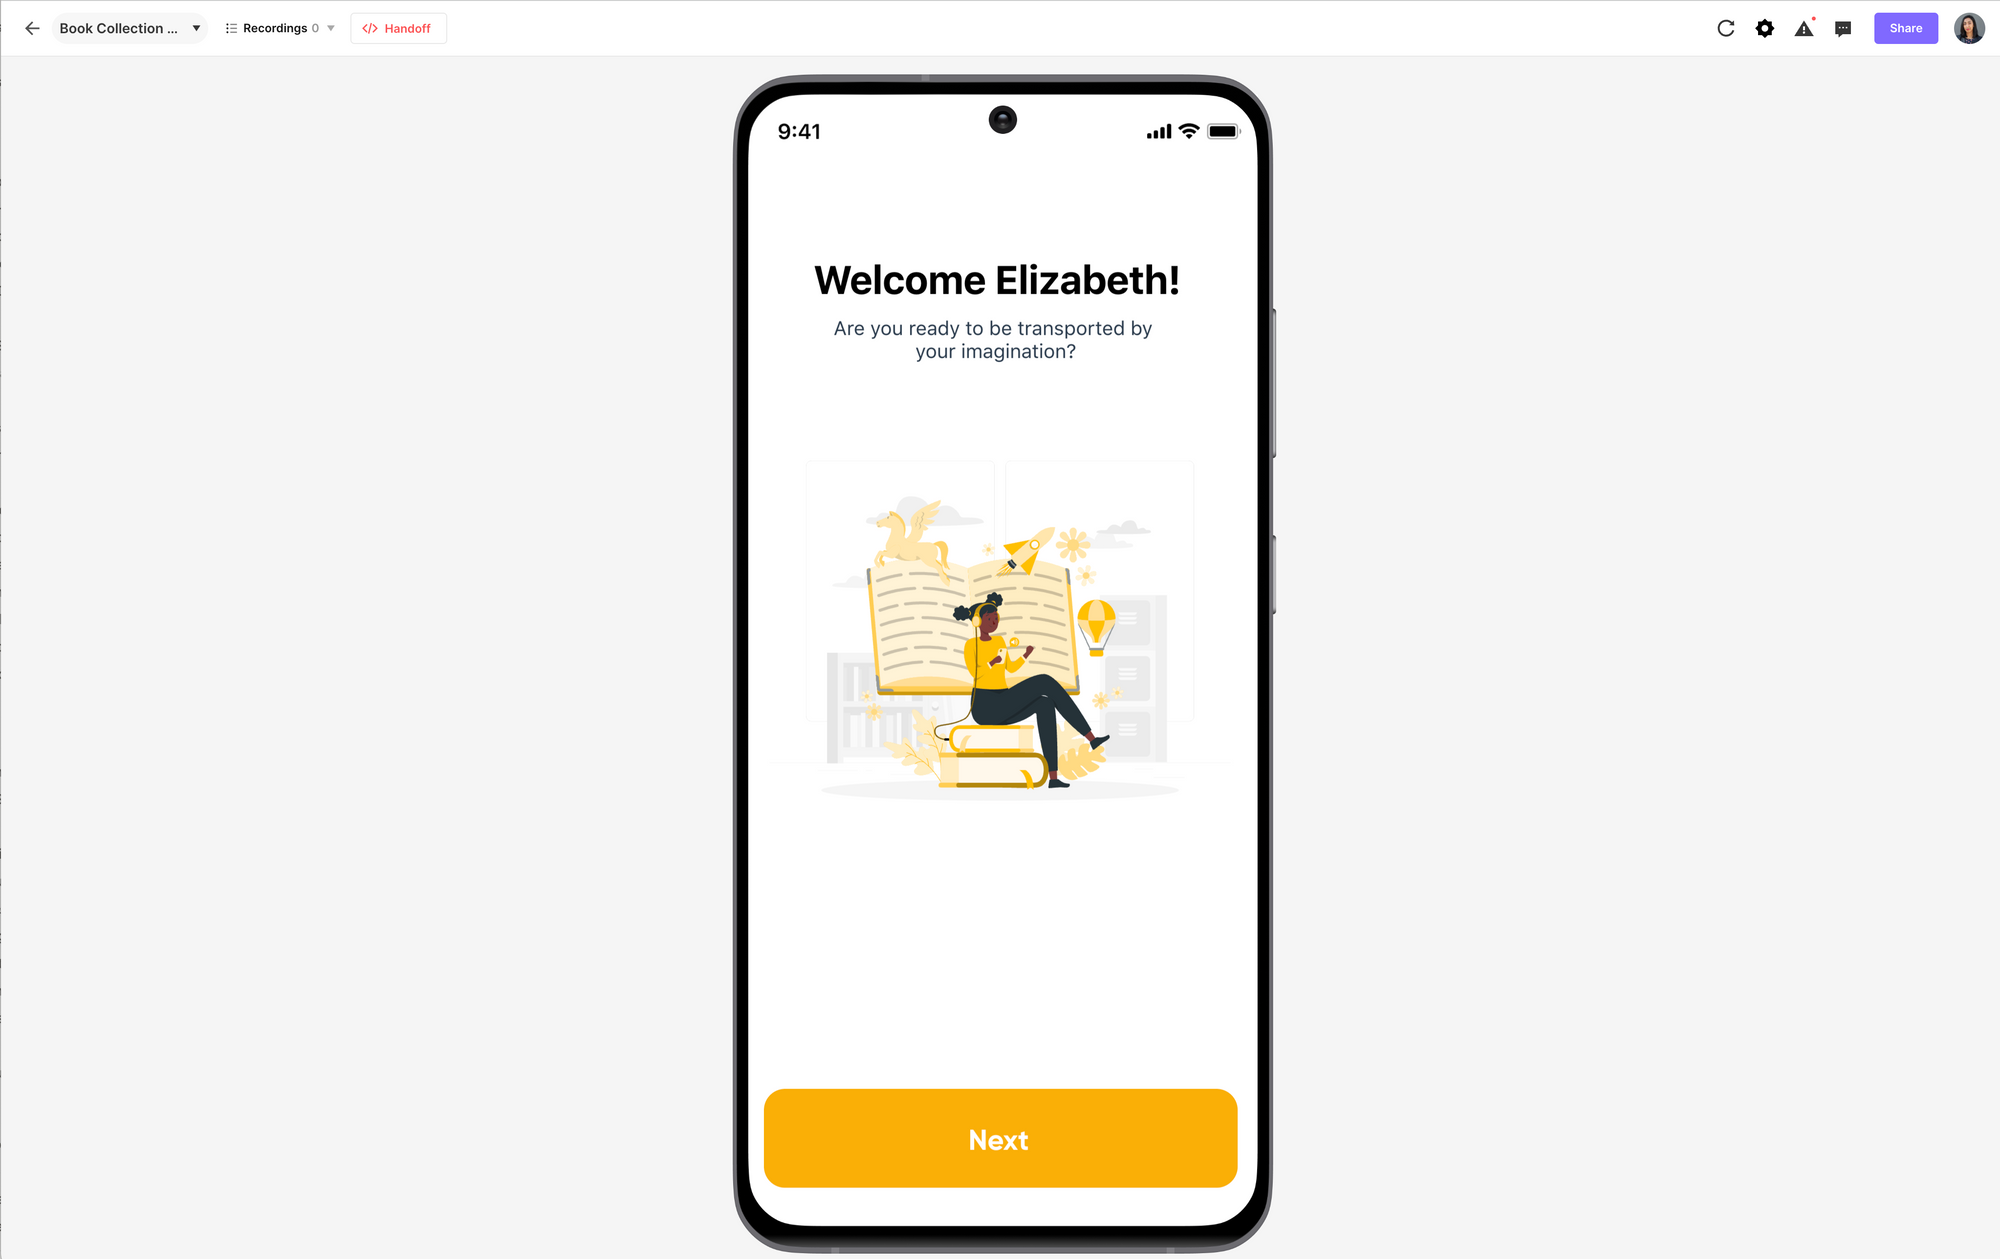
Here we are in Figma, and I have my first design which is just the first screen of an onboarding flow. We're going to install the ProtoPie plugin. You can search for ProtoPie inside of Figma > Plugins > Find More Plugins and click on it to install. Next, select your frame and then run that ProtoPie plugin.
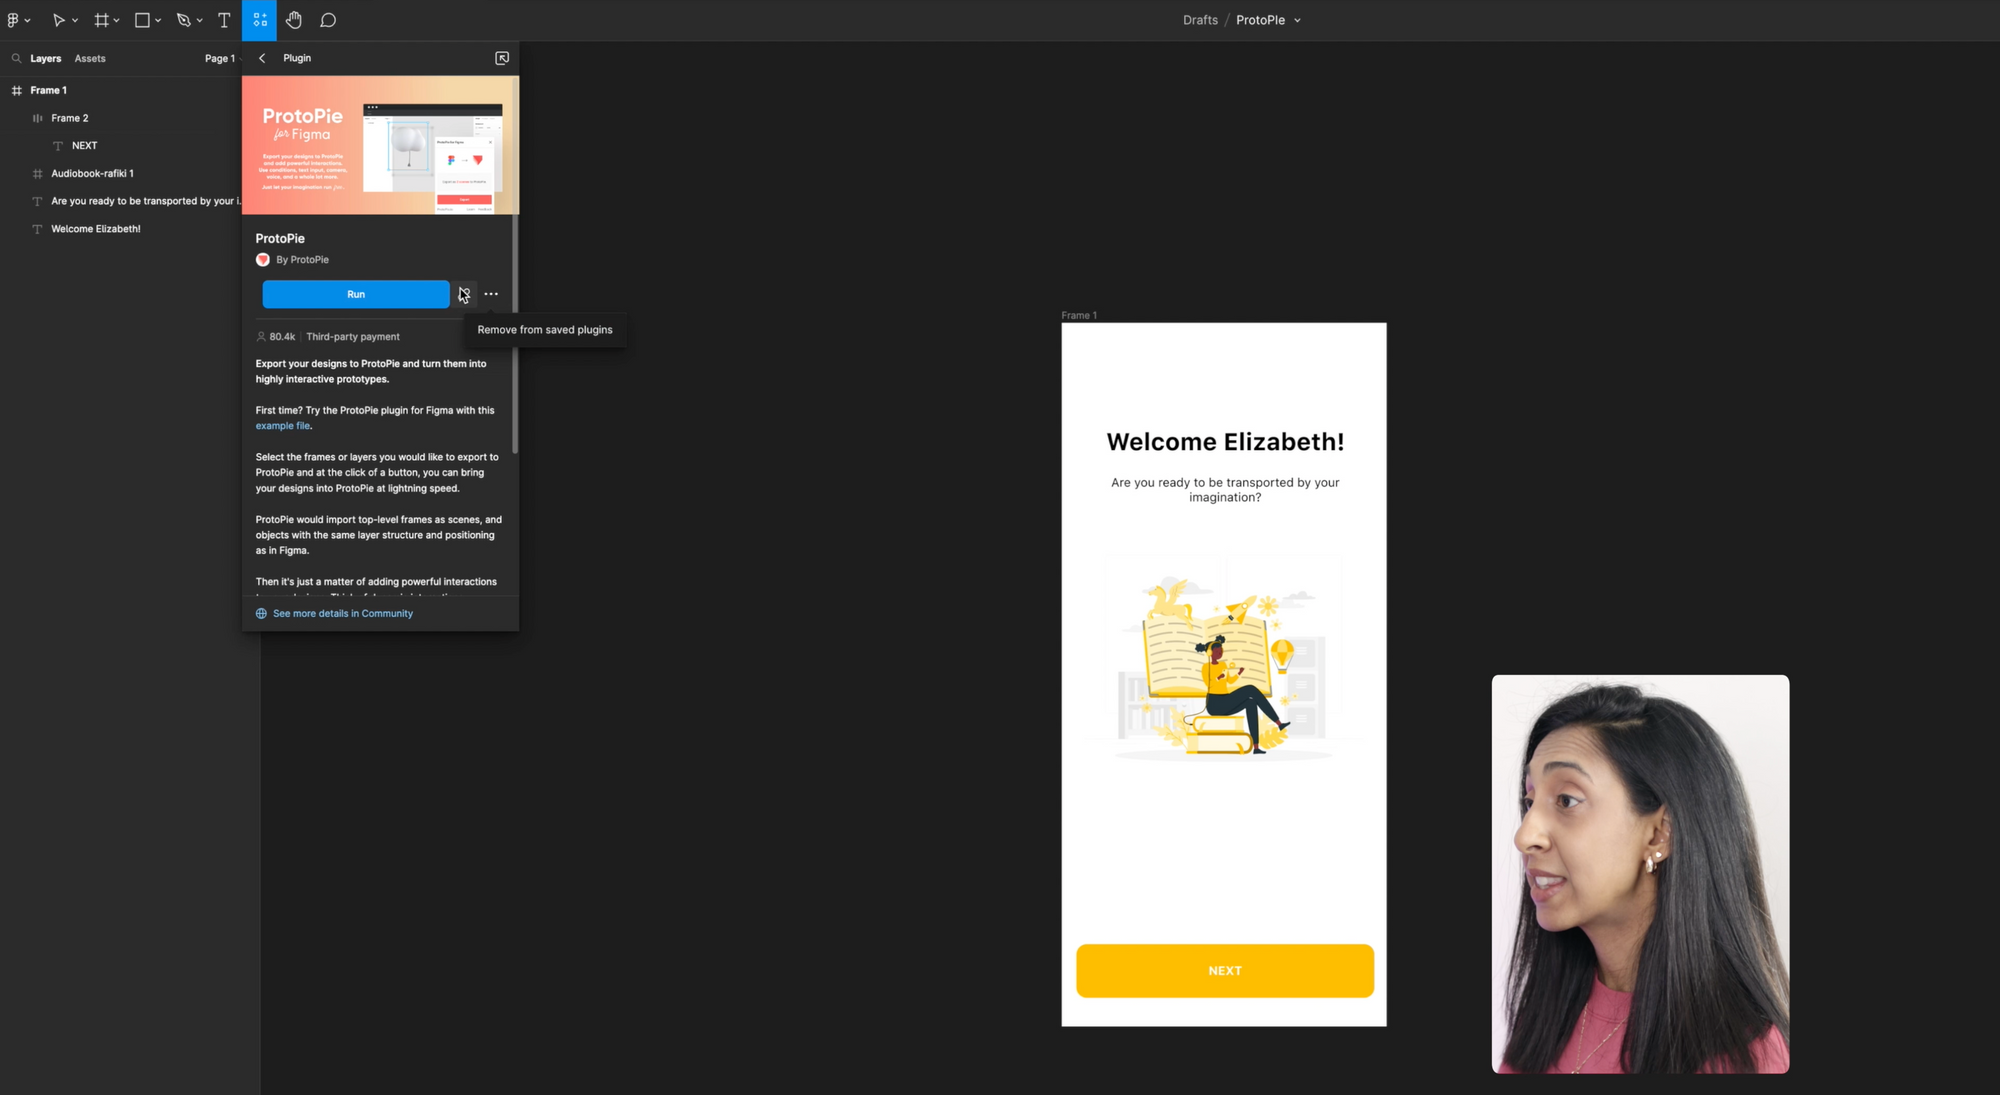
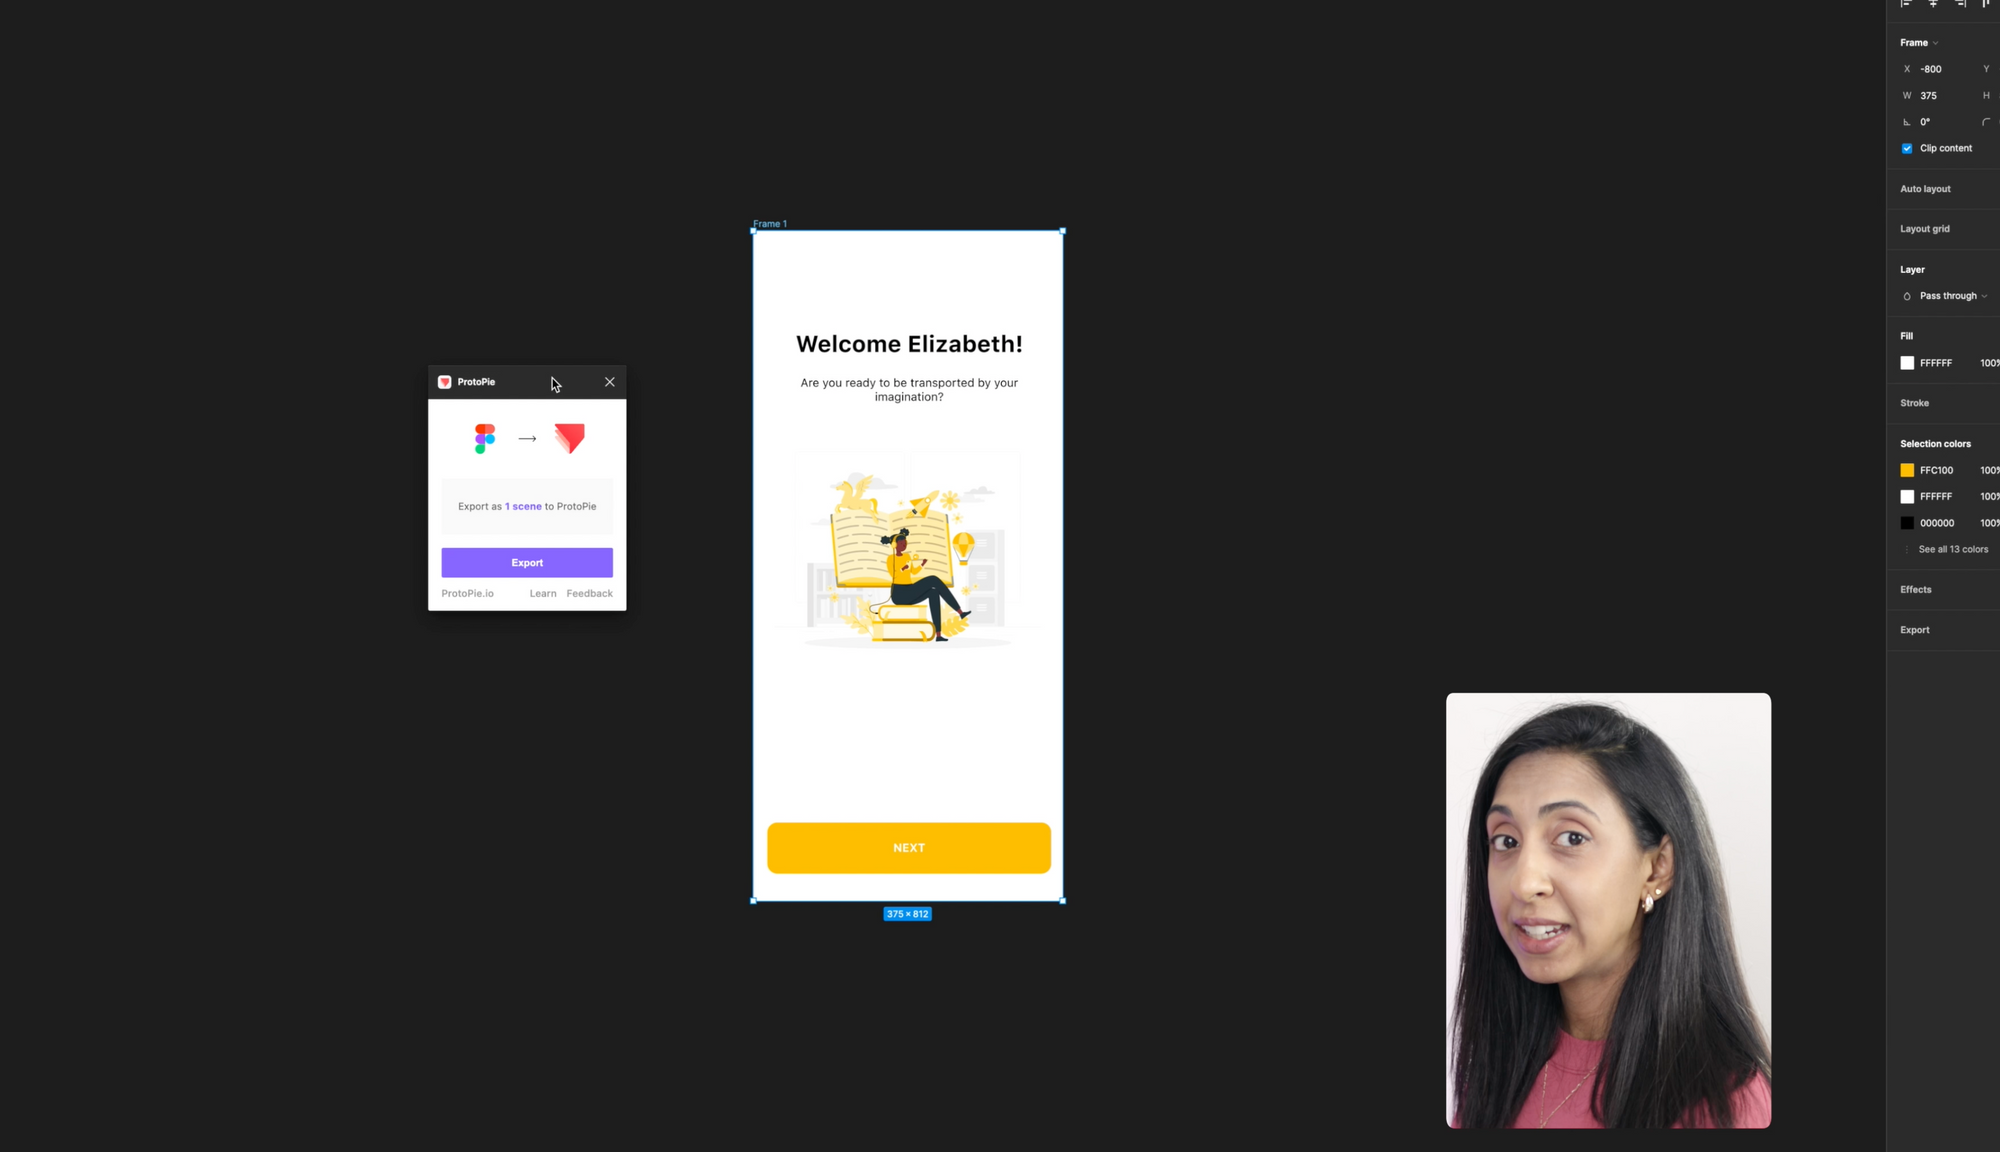
What's going to happen when you click export is that it's going to take this Frame you’ve selected and convert it to a scene inside of ProtoPie. A Scene is synonymous with a Frame or a screen design in Figma.
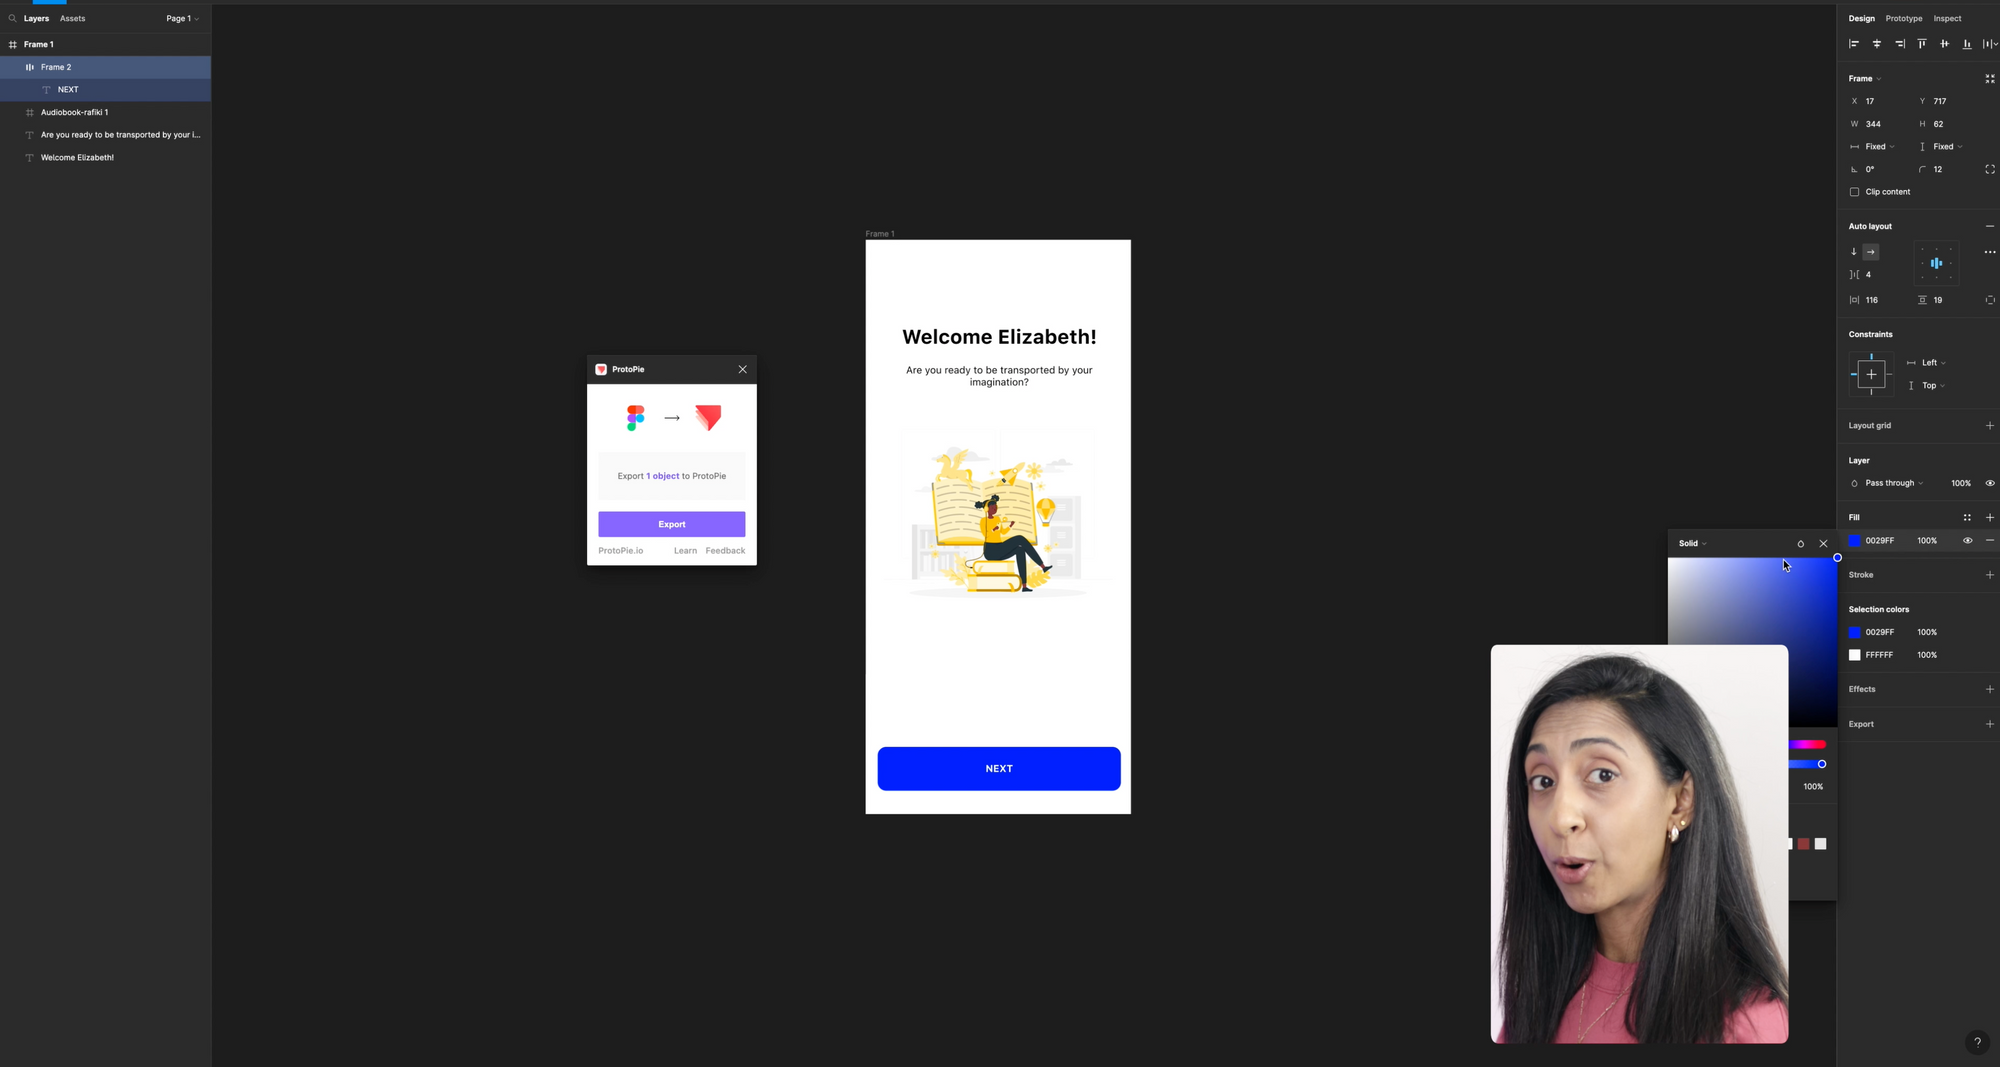
Figma and ProtoPie are also reciprocal, so if you make changes to the Figma designs, they will be reflected in ProtoPie through that plugin. If I wanted to change a button color, for example, I can do that, and you'll see that the plugin prompt changes to export object and it will match that exported object to the correct scene in ProtoPie.
Introduction to ProtoPie’s Interface Panels
Once we're in ProtoPie, it’s going to load up the designs we've exported from Figma. The interface of ProtoPie is very similar to other design apps like Figma and Sketch, but you’ll notice a few extra panels.
Scenes panel - shows you all of the frames/scenes that you’ve imported or created
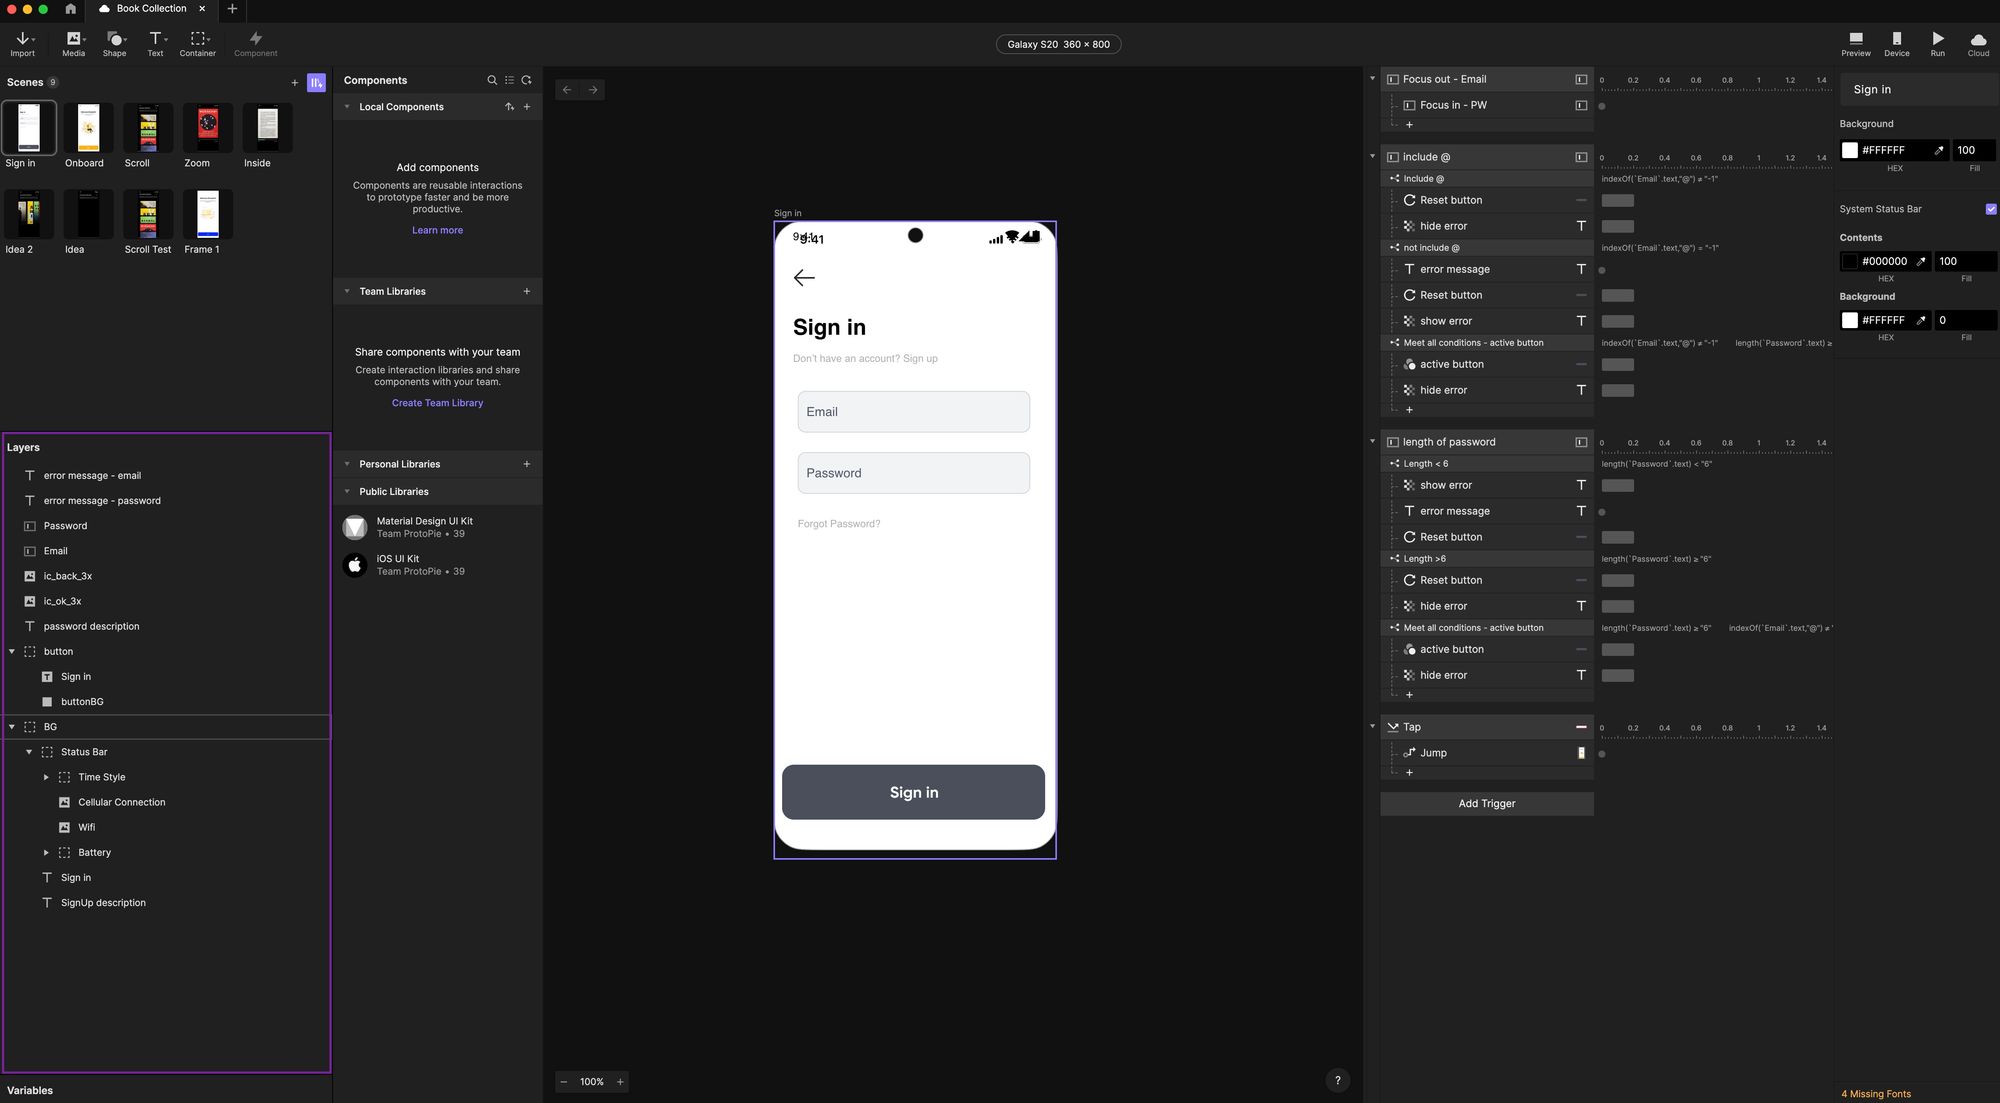
Layers panel - This shows you all of the layers and objects in each of your selected scenes.
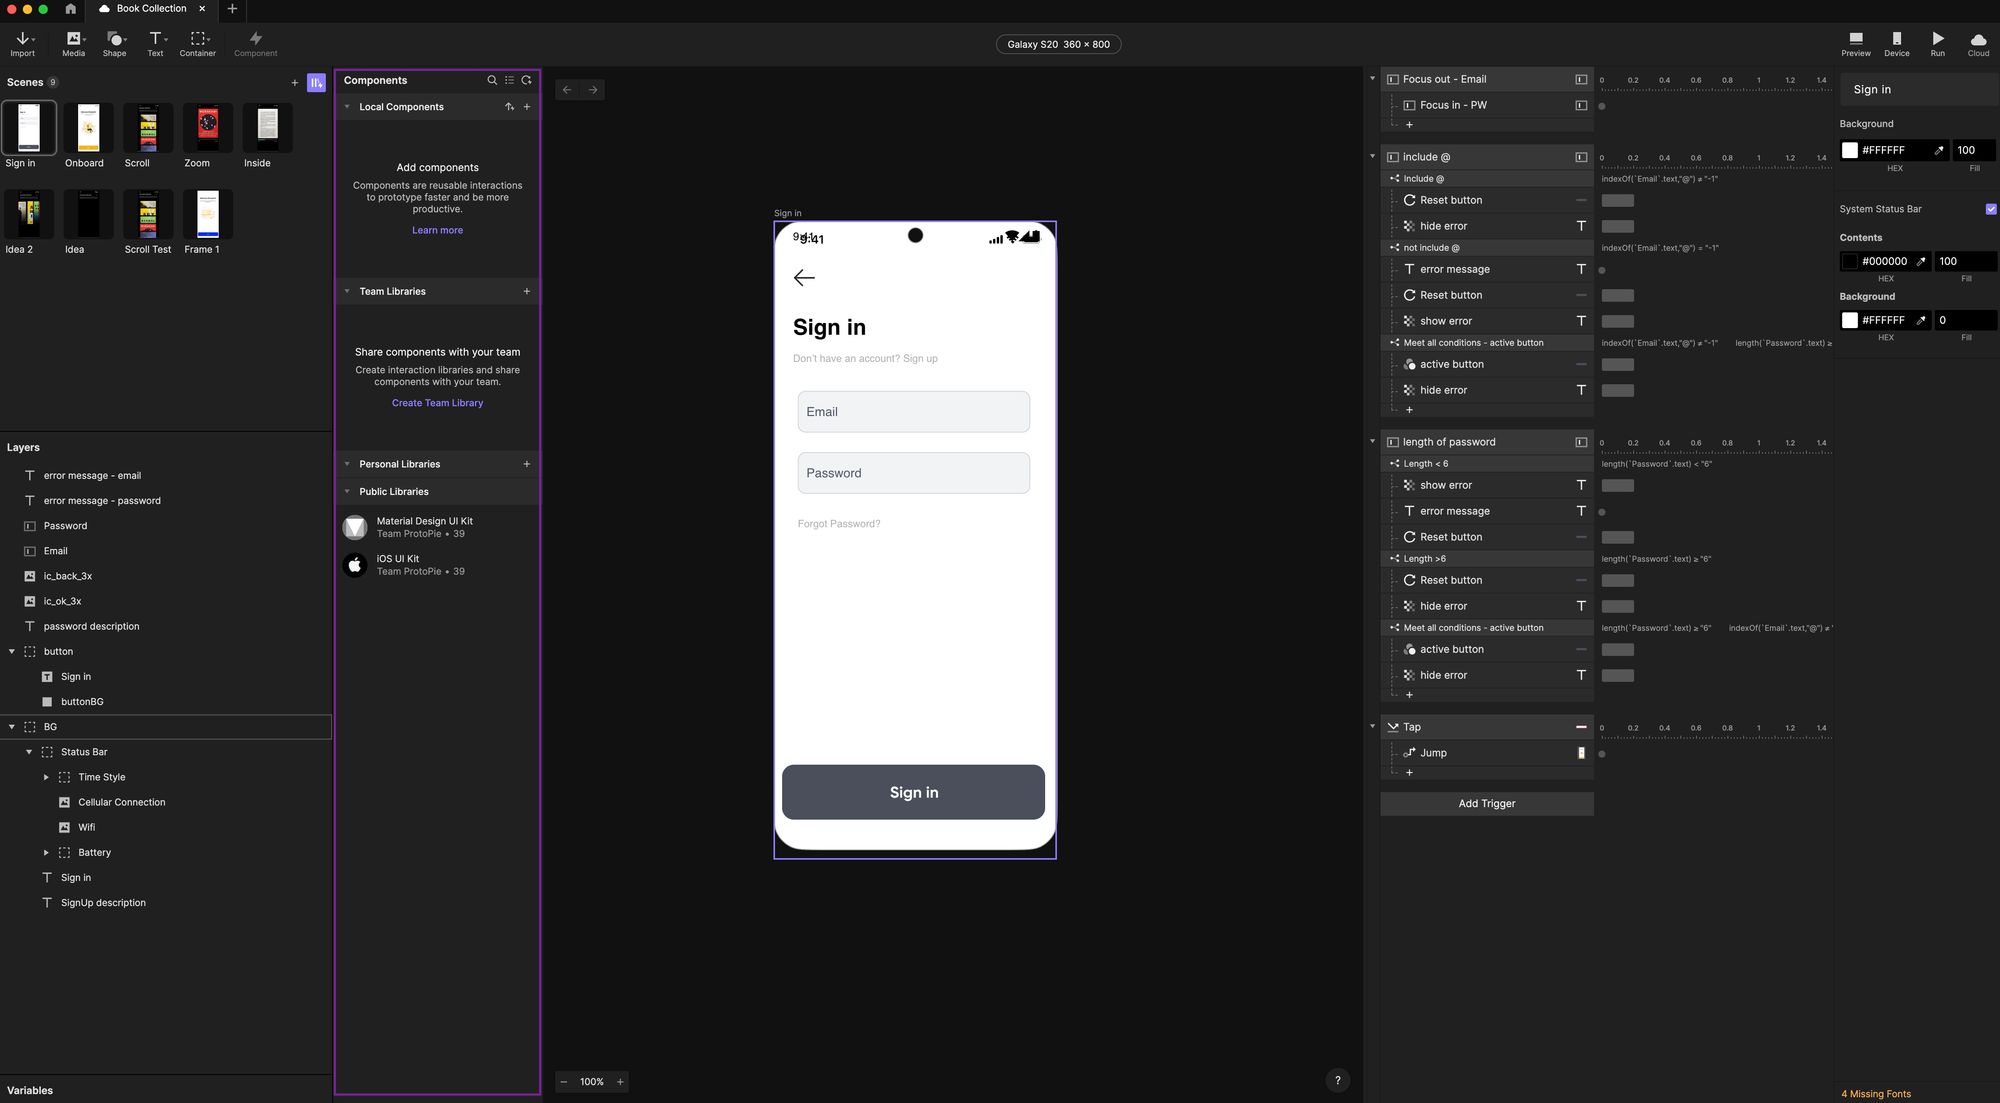
Components panel - This is where you’ll find components local components, team libraries, and Design Systems
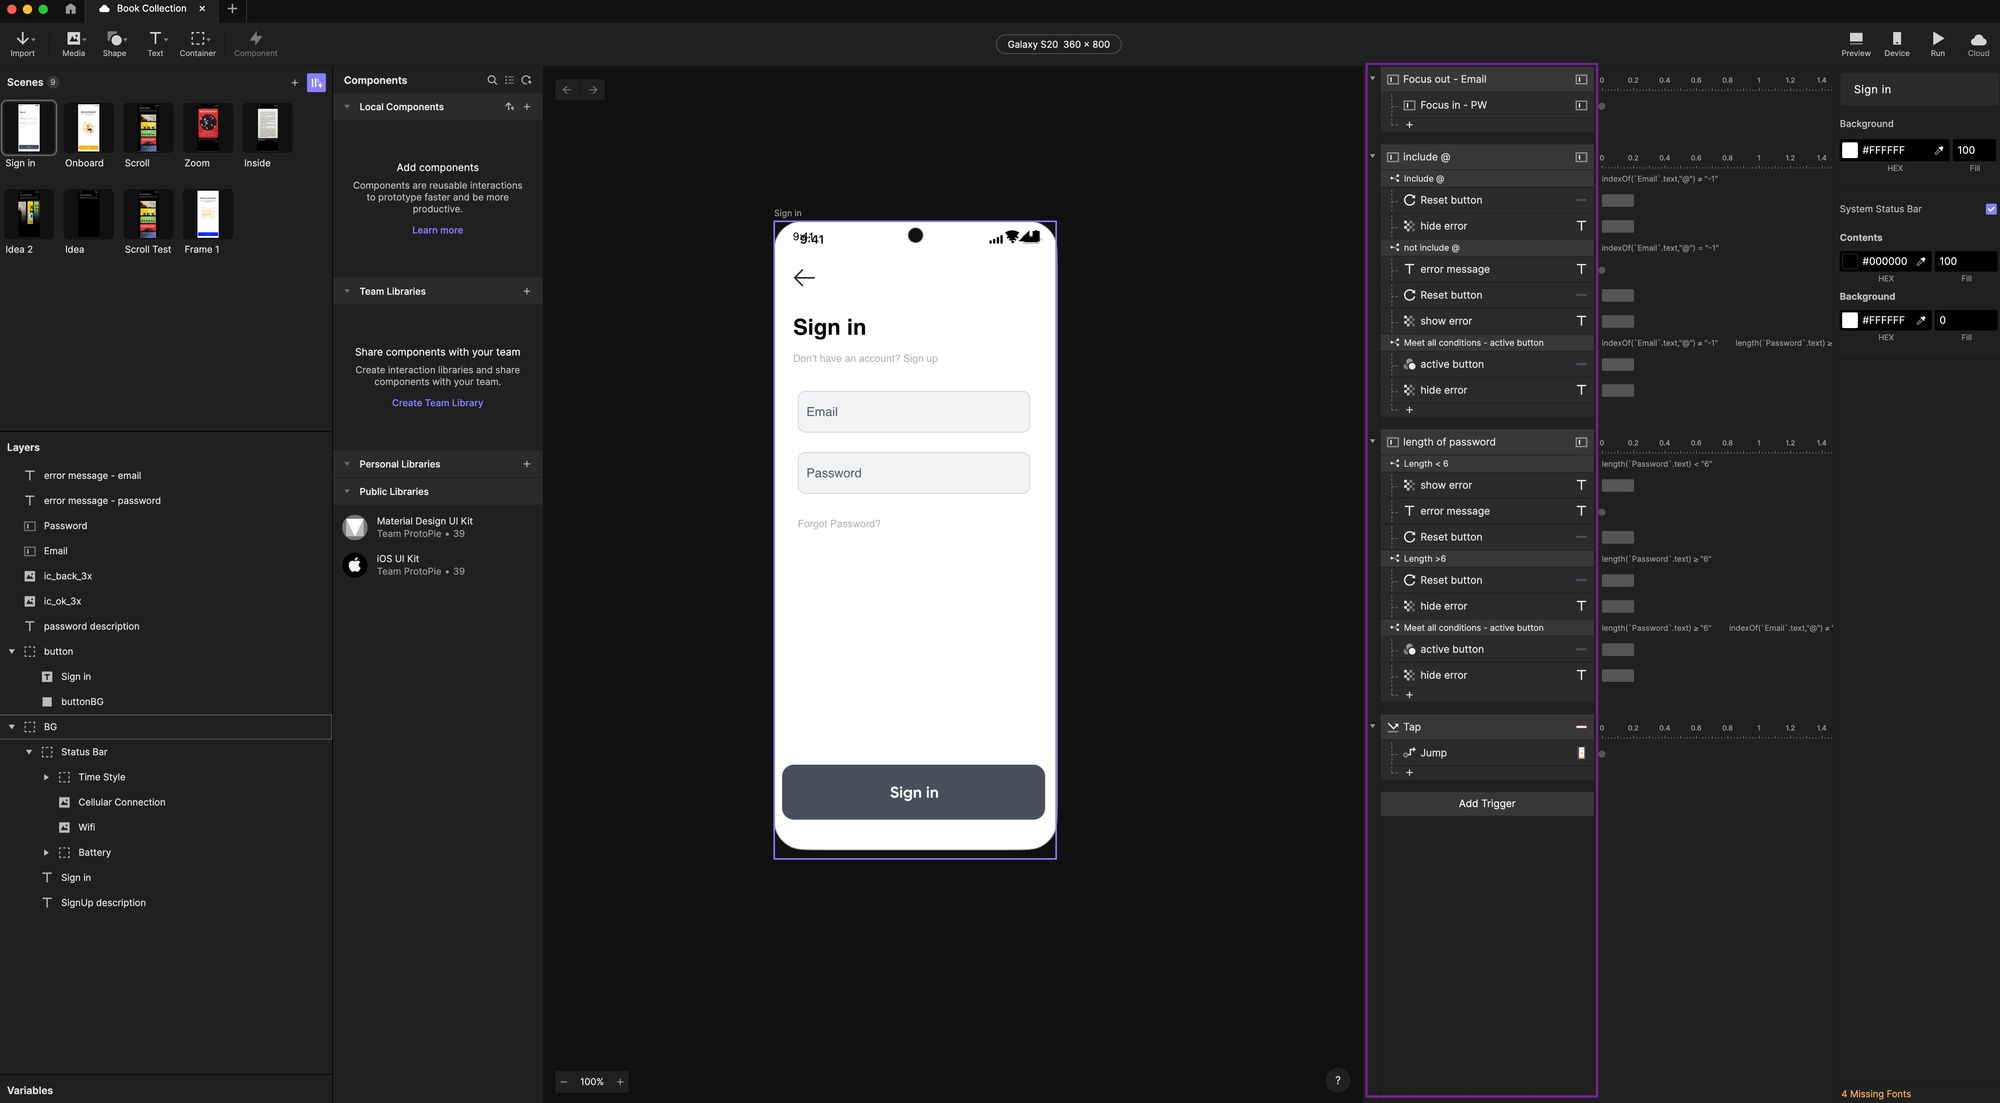
Tiggers/Responses panel - This panel contains all of the available trigger interactions as well as the responses
Animations Timeline panel - And then this little panel that is hardly noticeable when you click on one of these range indicators, you can change the length of the animation, the duration of it, and you can move it to start at different times, this is kind of your timeline for each of these responses, the length, the delay, all of that stuff. And then you'll see that you can apply all of these other transitions, similar to Figma, you have these different styles of transitions that you can apply.
Design panel - probably the most familiar panel this give you the options to change the visual look or your select objects.
ProtoPie’s Interaction Model
The thing about ProtoPie that's really going to help you wrap your head around it is understanding the interaction model. Where Figma is a screen-to-screen connection for prototypes, ProtoPie uses an Object, Trigger and Response model. Everything you do will have an object selected, then you'll have a trigger, and you'll apply an action to that that will result in a response. This is amazing because it makes it very easy to target very specific elements and objects and make them do specific things.

Triggers and Responses
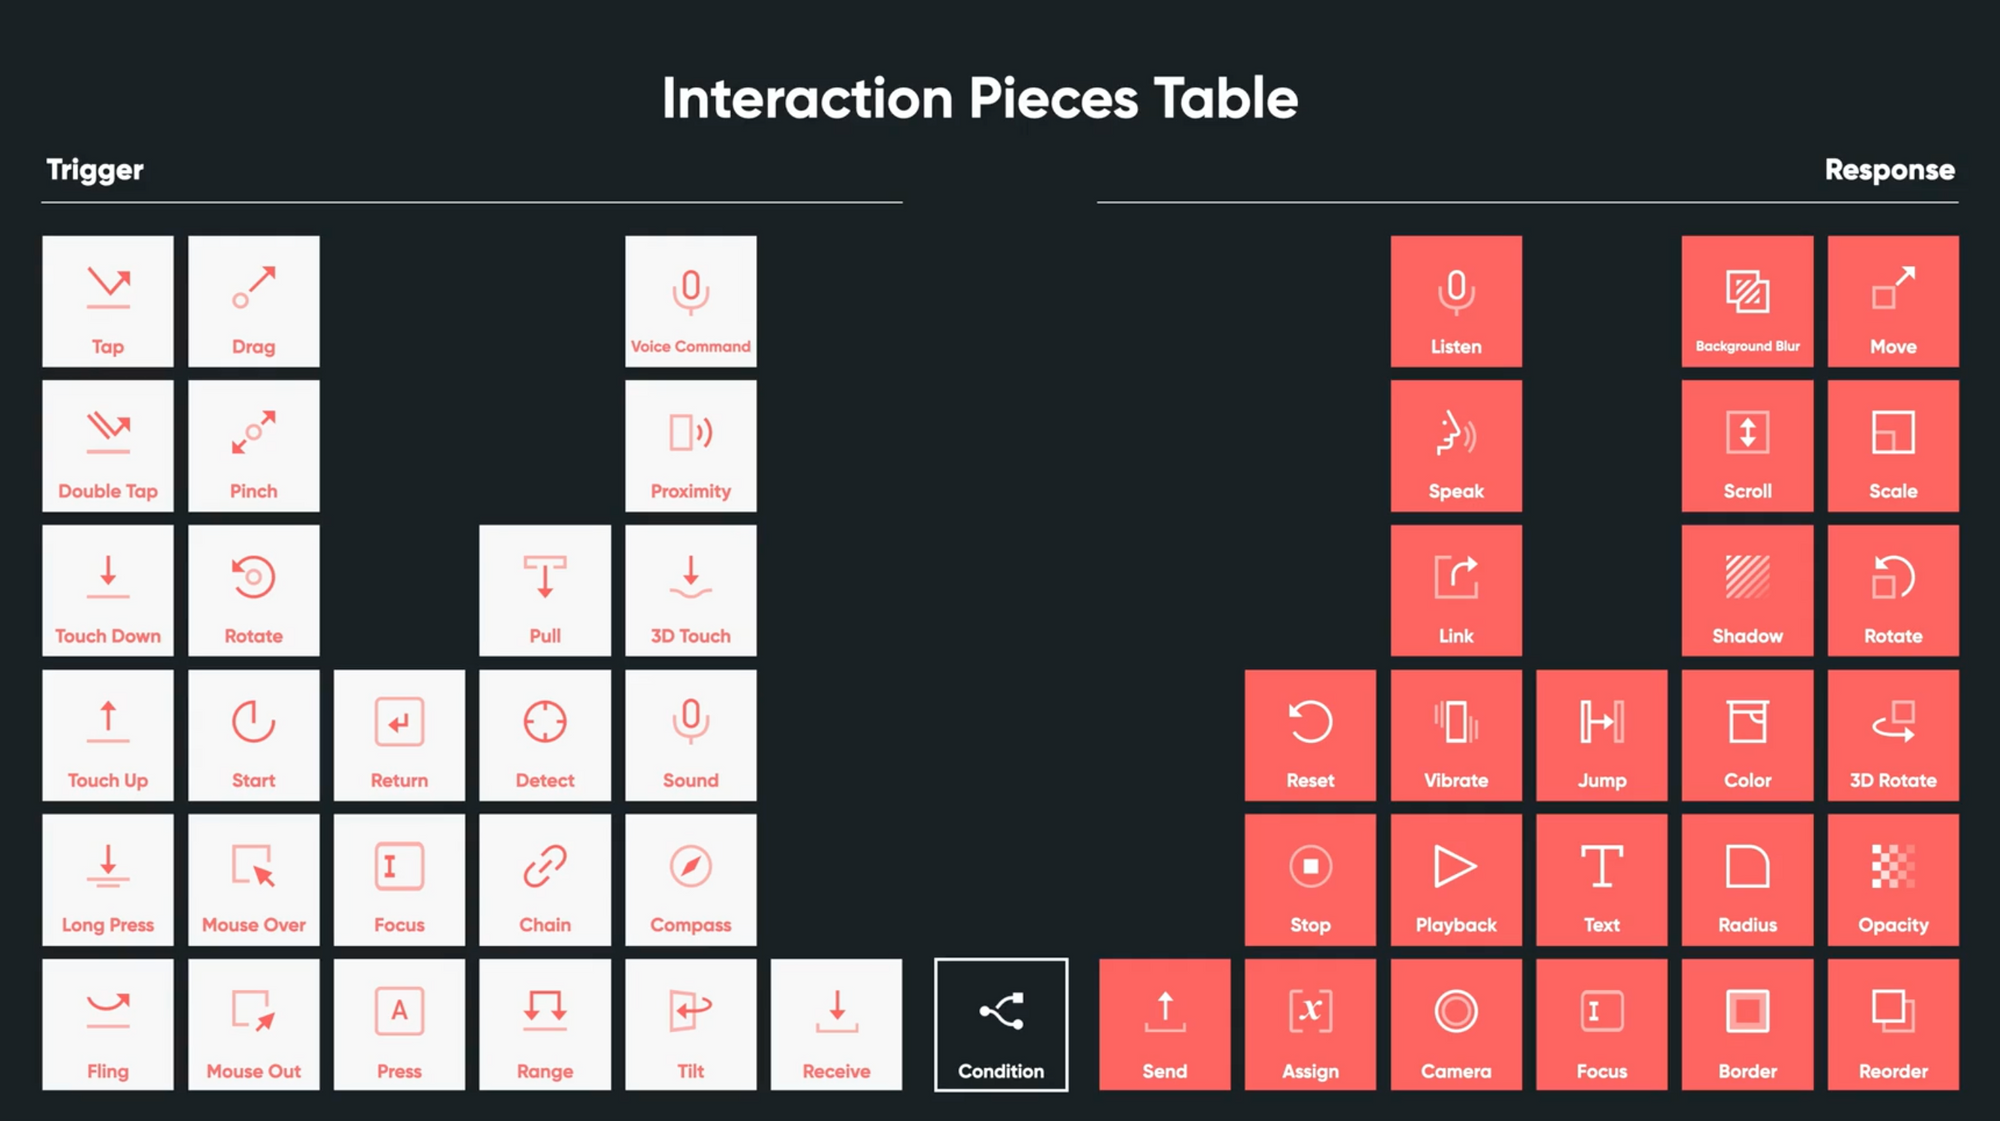
There is a large list of interaction pieces that you can choose from. This table is helpful to see a high-level overview of what they are and the responses you can apply to them. For a deeper dive into how to use all of these and how to form conditional and use formulas I highly recommend checking out ProtoPie School where you can take their ProtoPie 101 Crash Course and even gain a certificated upon completion.
ProtoPie's strength lies in selecting existing design elements, objects, components, and then adding triggers to them. I prefer to do all of my really polished UI design in Figma and then import them into ProtoPie rather than creating something in ProtoPie from scratch. But you can use ProtoPie to create things from scratch. You can import media, there are your basic shapes, text, all of that stuff.
Example 1: Scene-to-Scene Interaction (Beginner Level)
Let's start out with a simple example, which is just jumping to another screen or scene.
Here I can select a button, which is my object, and then I'm going to add a trigger. You'll see all of these trigger options come down.
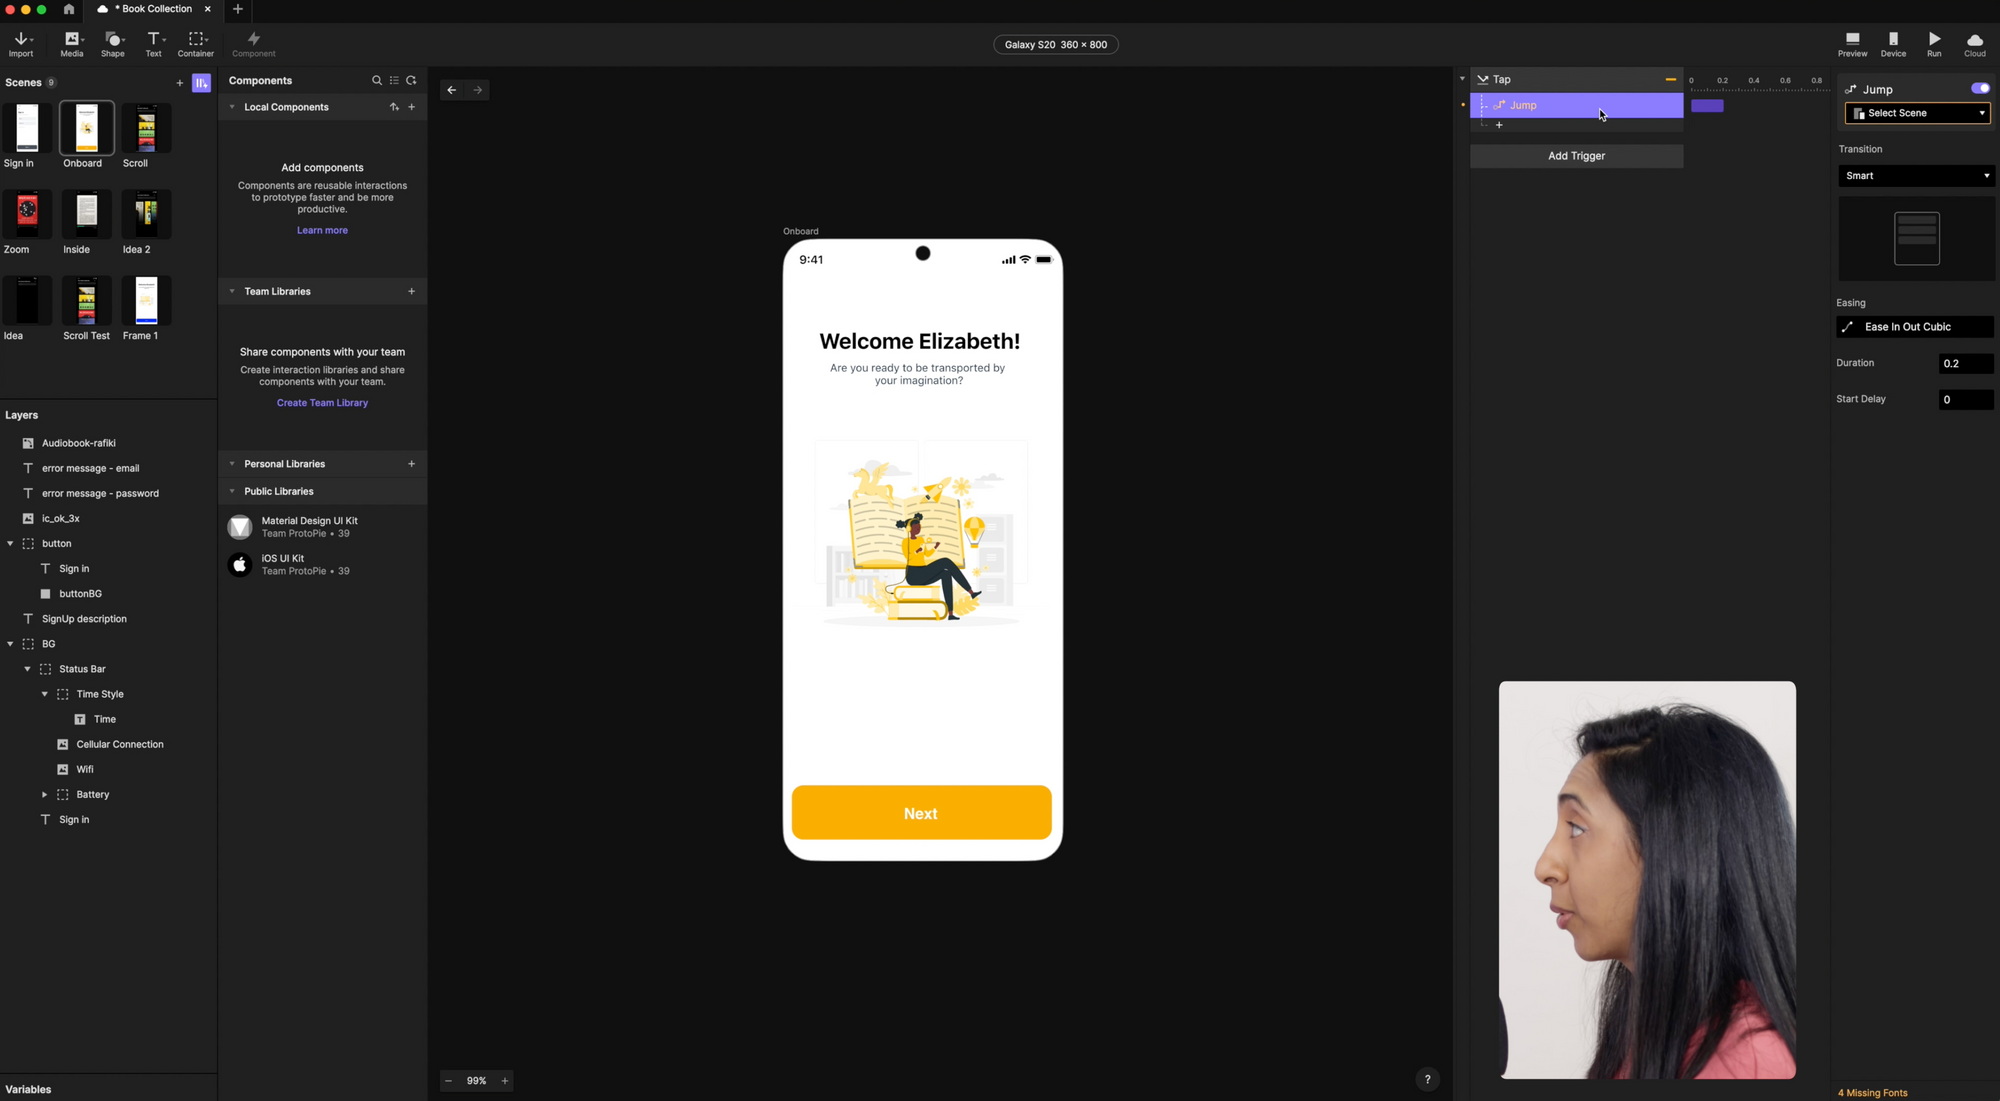
There are familiar interactions like tap, double tap, touch, fling, pull, drag, and pinch. Then, there are some interactions that you might not have seen before, like chain, range, start, and detect. There are also mouse interactions and inputs.
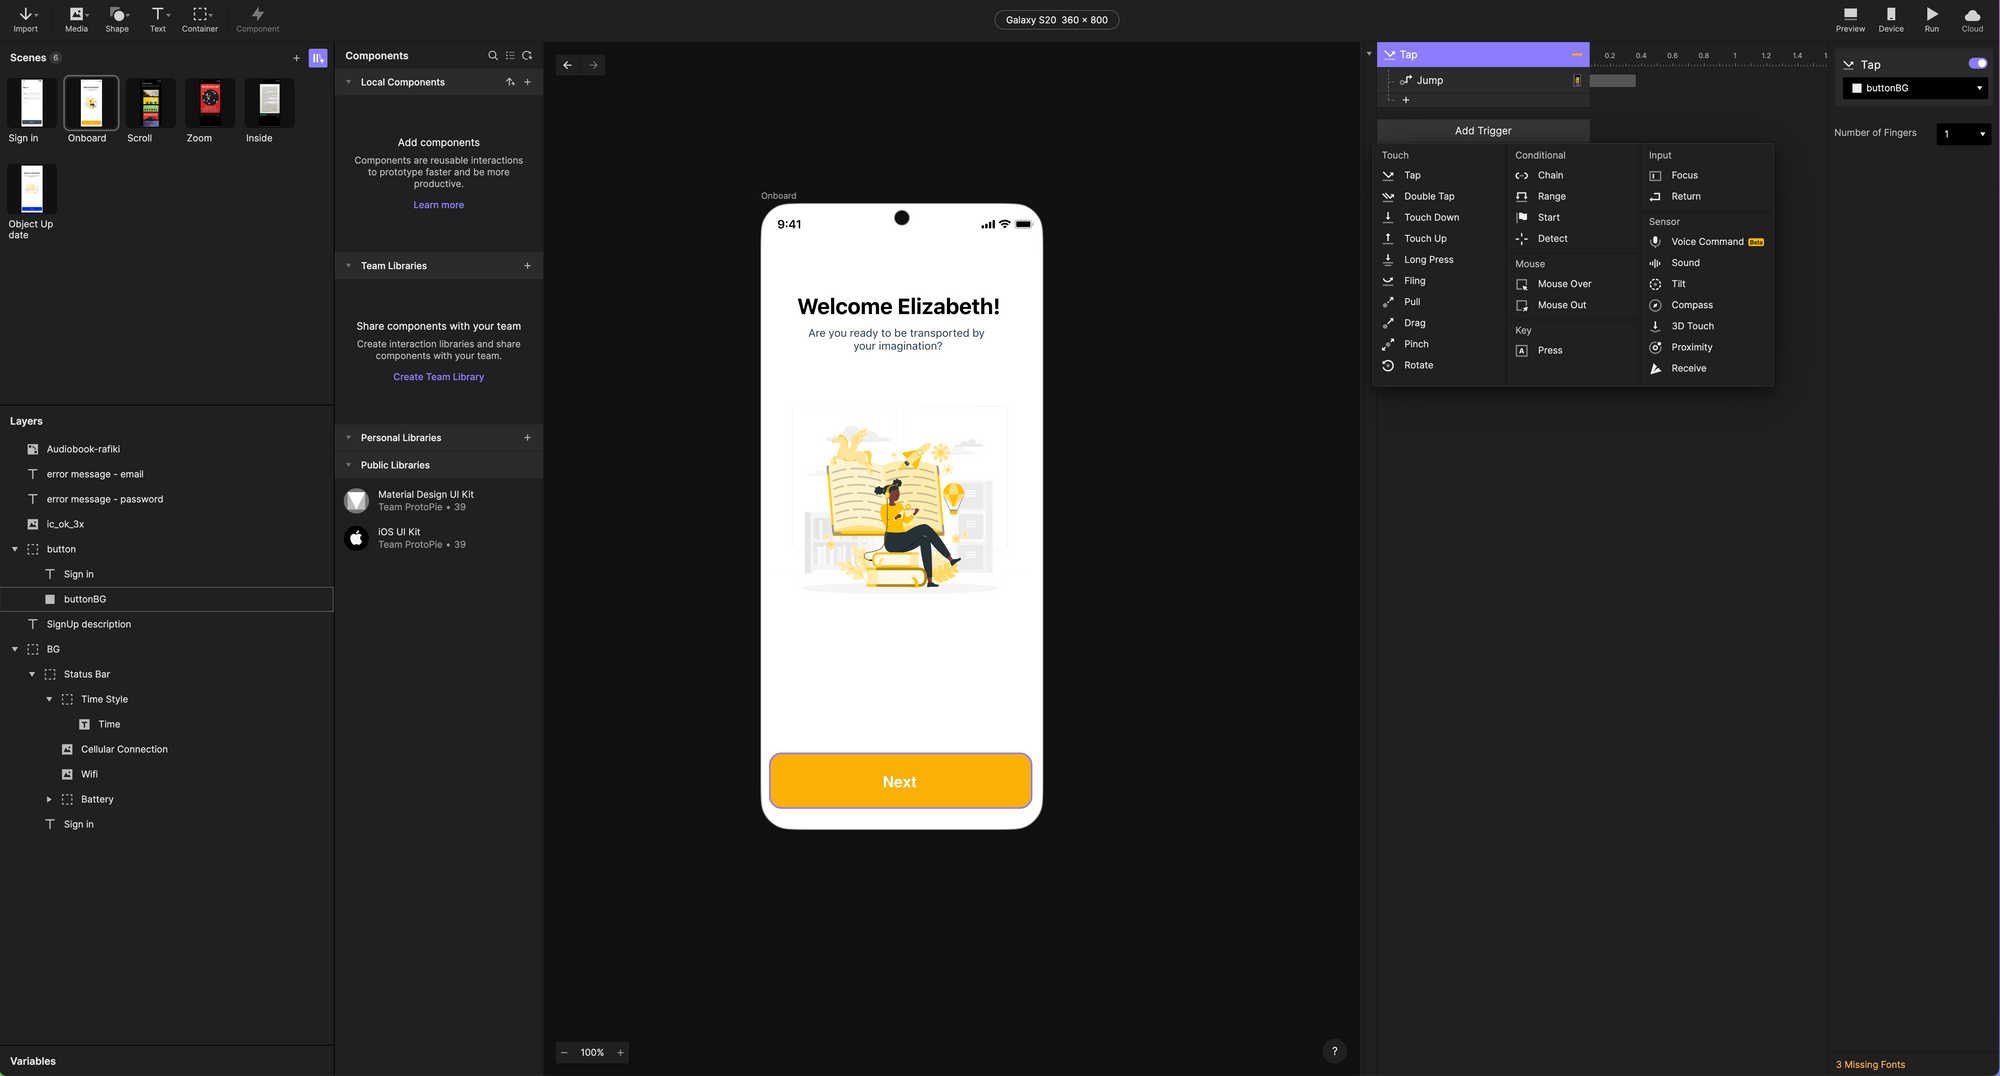
The coolest part is the sensor interactions. This allows you to tap into your device's native sensors and other Internet of Things objects. If you click on an object and add a trigger, something will happen when you tap it. That's the trigger, and then you'll see a tiny little plus button. When tapped, there are lots of little responses that can happen. It can move, scale, rotate in 3D, change the opacity, the color, the radius, and more.

If you want to move to another screen, "jump" is the interaction you're going to want to use, you'll add a jump response, and then you need to go to the dropdown and select the correct screen that you want to jump to.
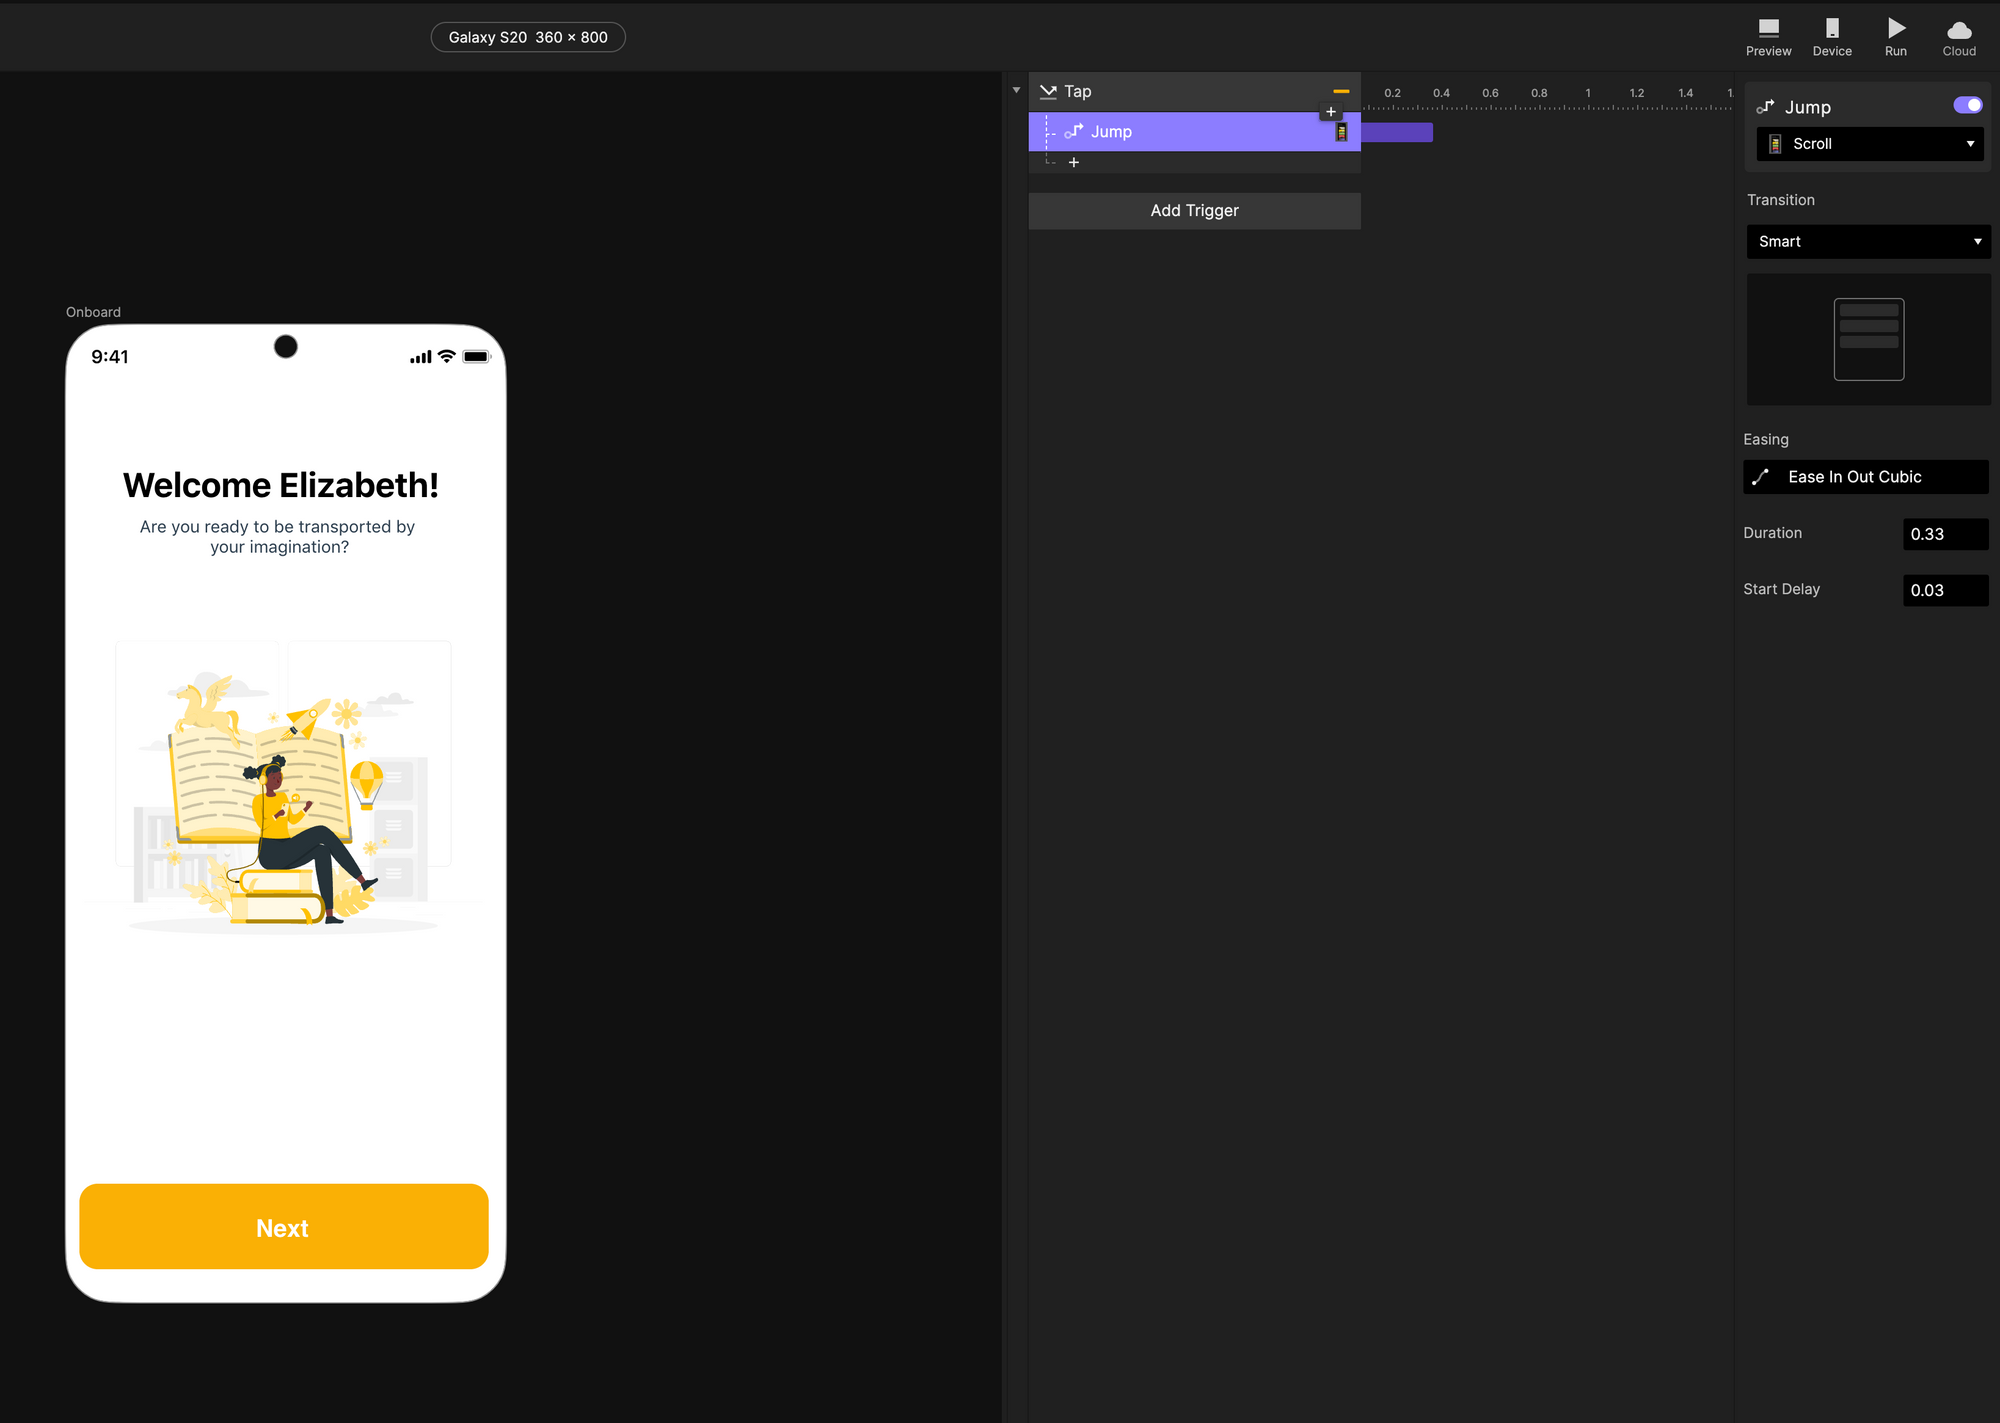
Now, when you go to preview at the top and open the preview window, click on next and it will transition to the next screen.
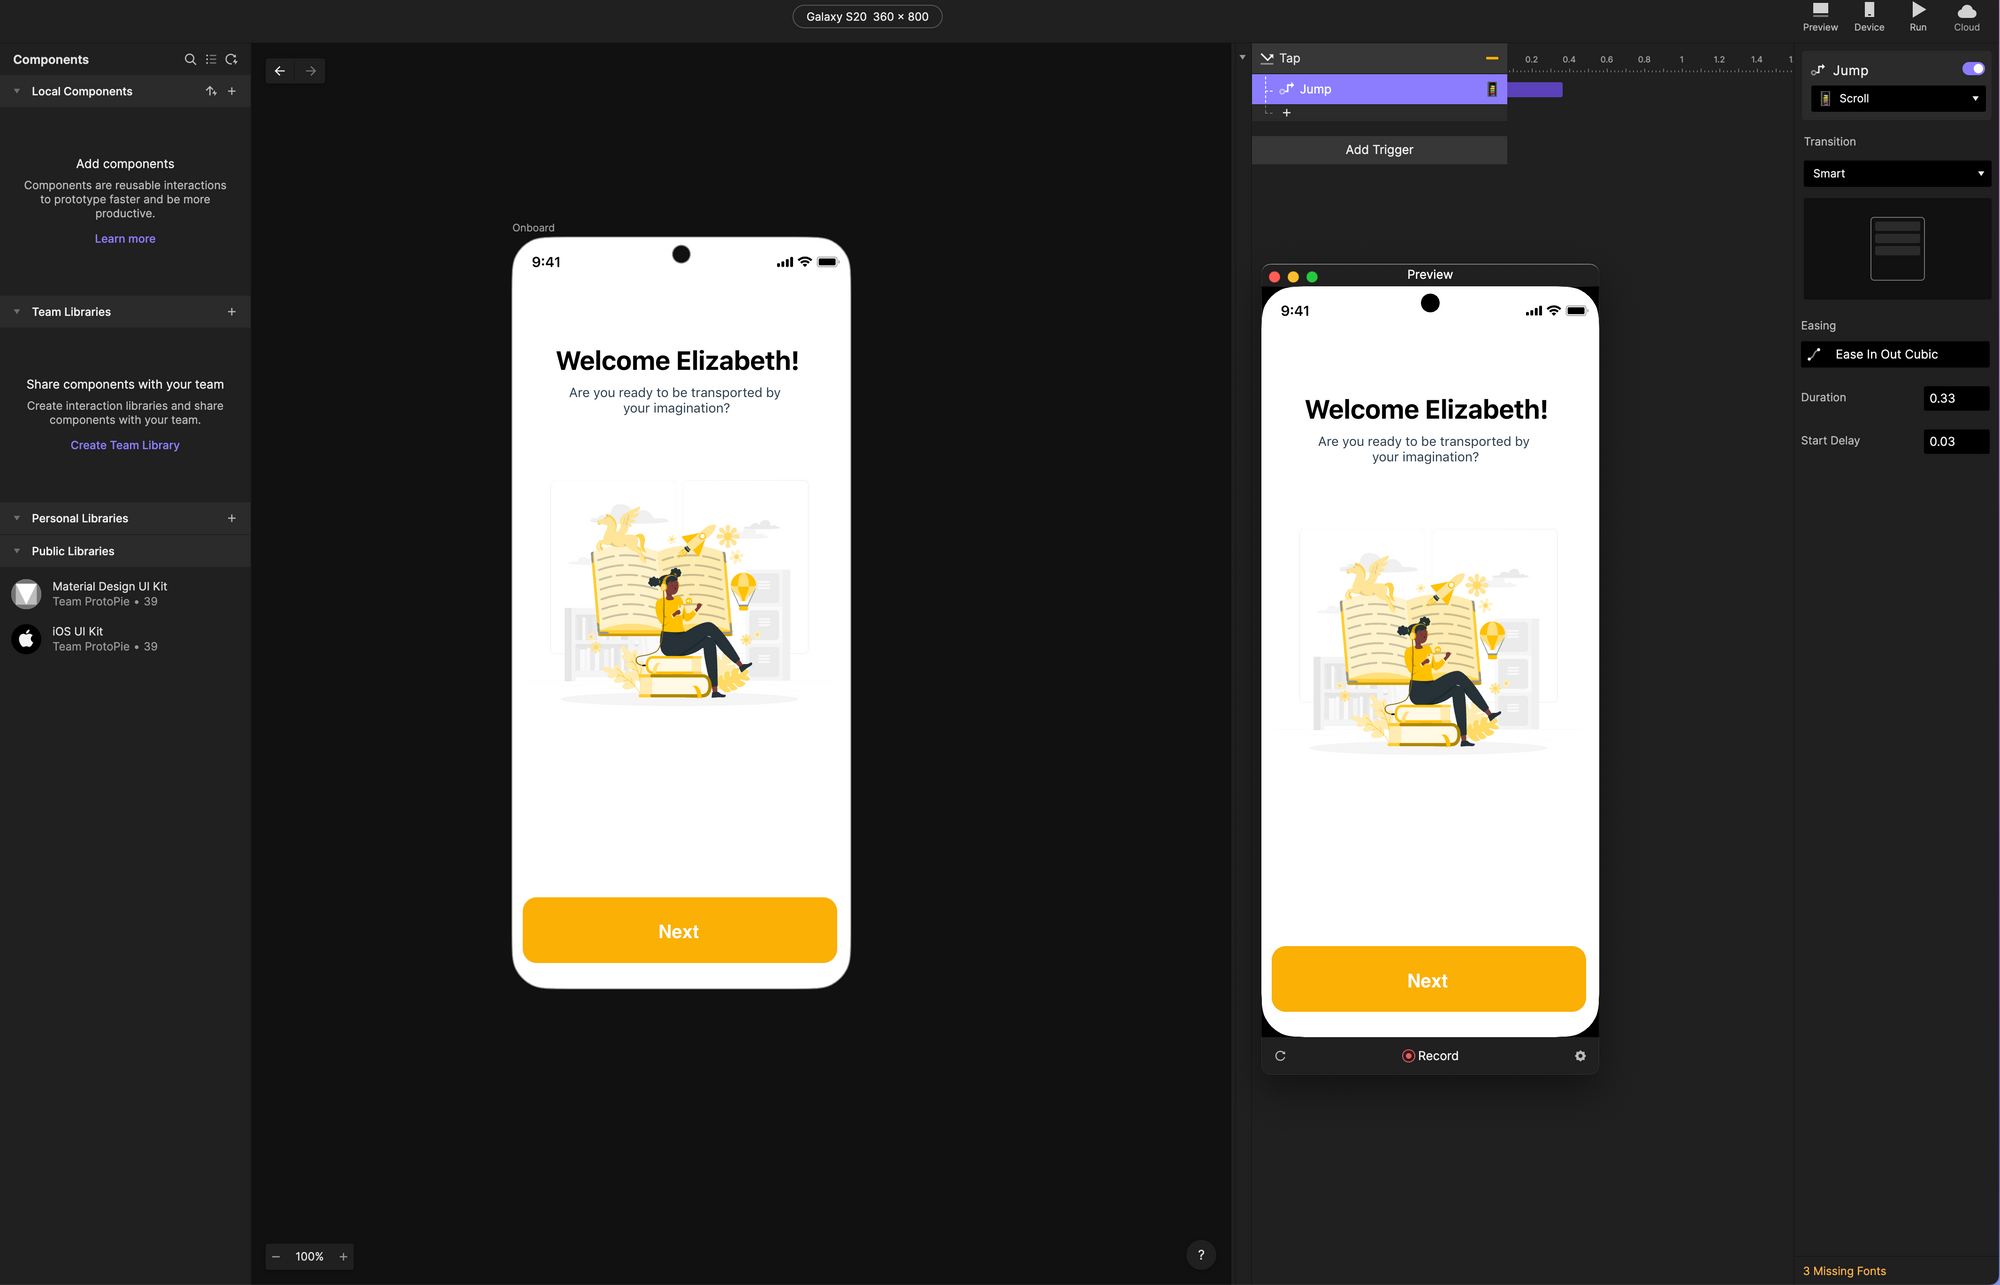
These icons at the top are important. Preview is how you open the preview window to interact with the prototype. Then, you have your Device, which brings up a QR code that you can scan onto your iPhone or iPad to run one of these prototypes on your device.
Lastly, you've got the cloud. You might want to save some of your projects to the cloud you can access them from anywhere, rather than just locally onto your computer.
So that is just one simple trigger interaction that you can create to jump from one scene to the next. Let's move on to a more advanced example.
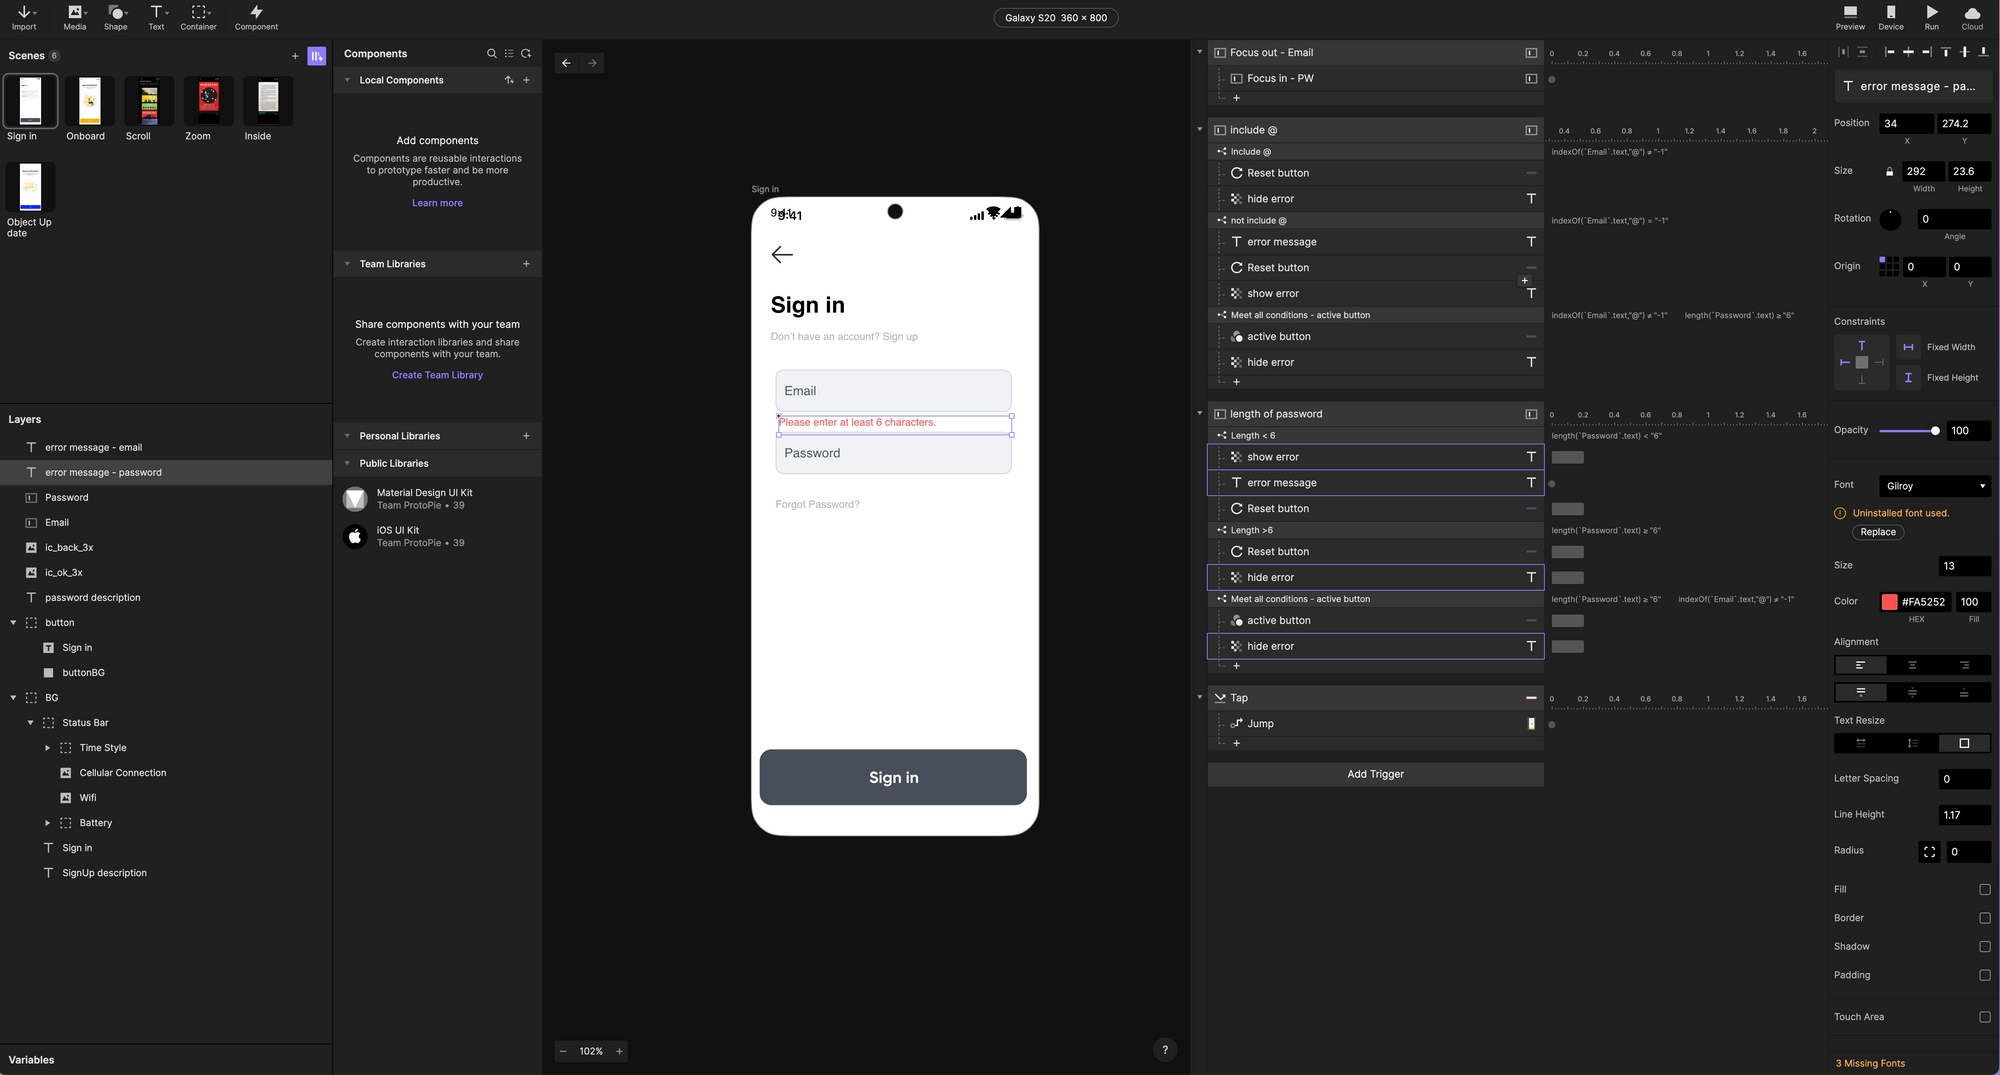
Example 2: Email / Sign in Form validation (Advanced Level)
In order to get to this onboarding screen, you have to sign in. Sign in is probably the most ubiquitous design pattern that every app and software application uses, the thing that's amazing about ProtoPie is that you can actually test and validate these form inputs, and that's something you can't really do in Figma.
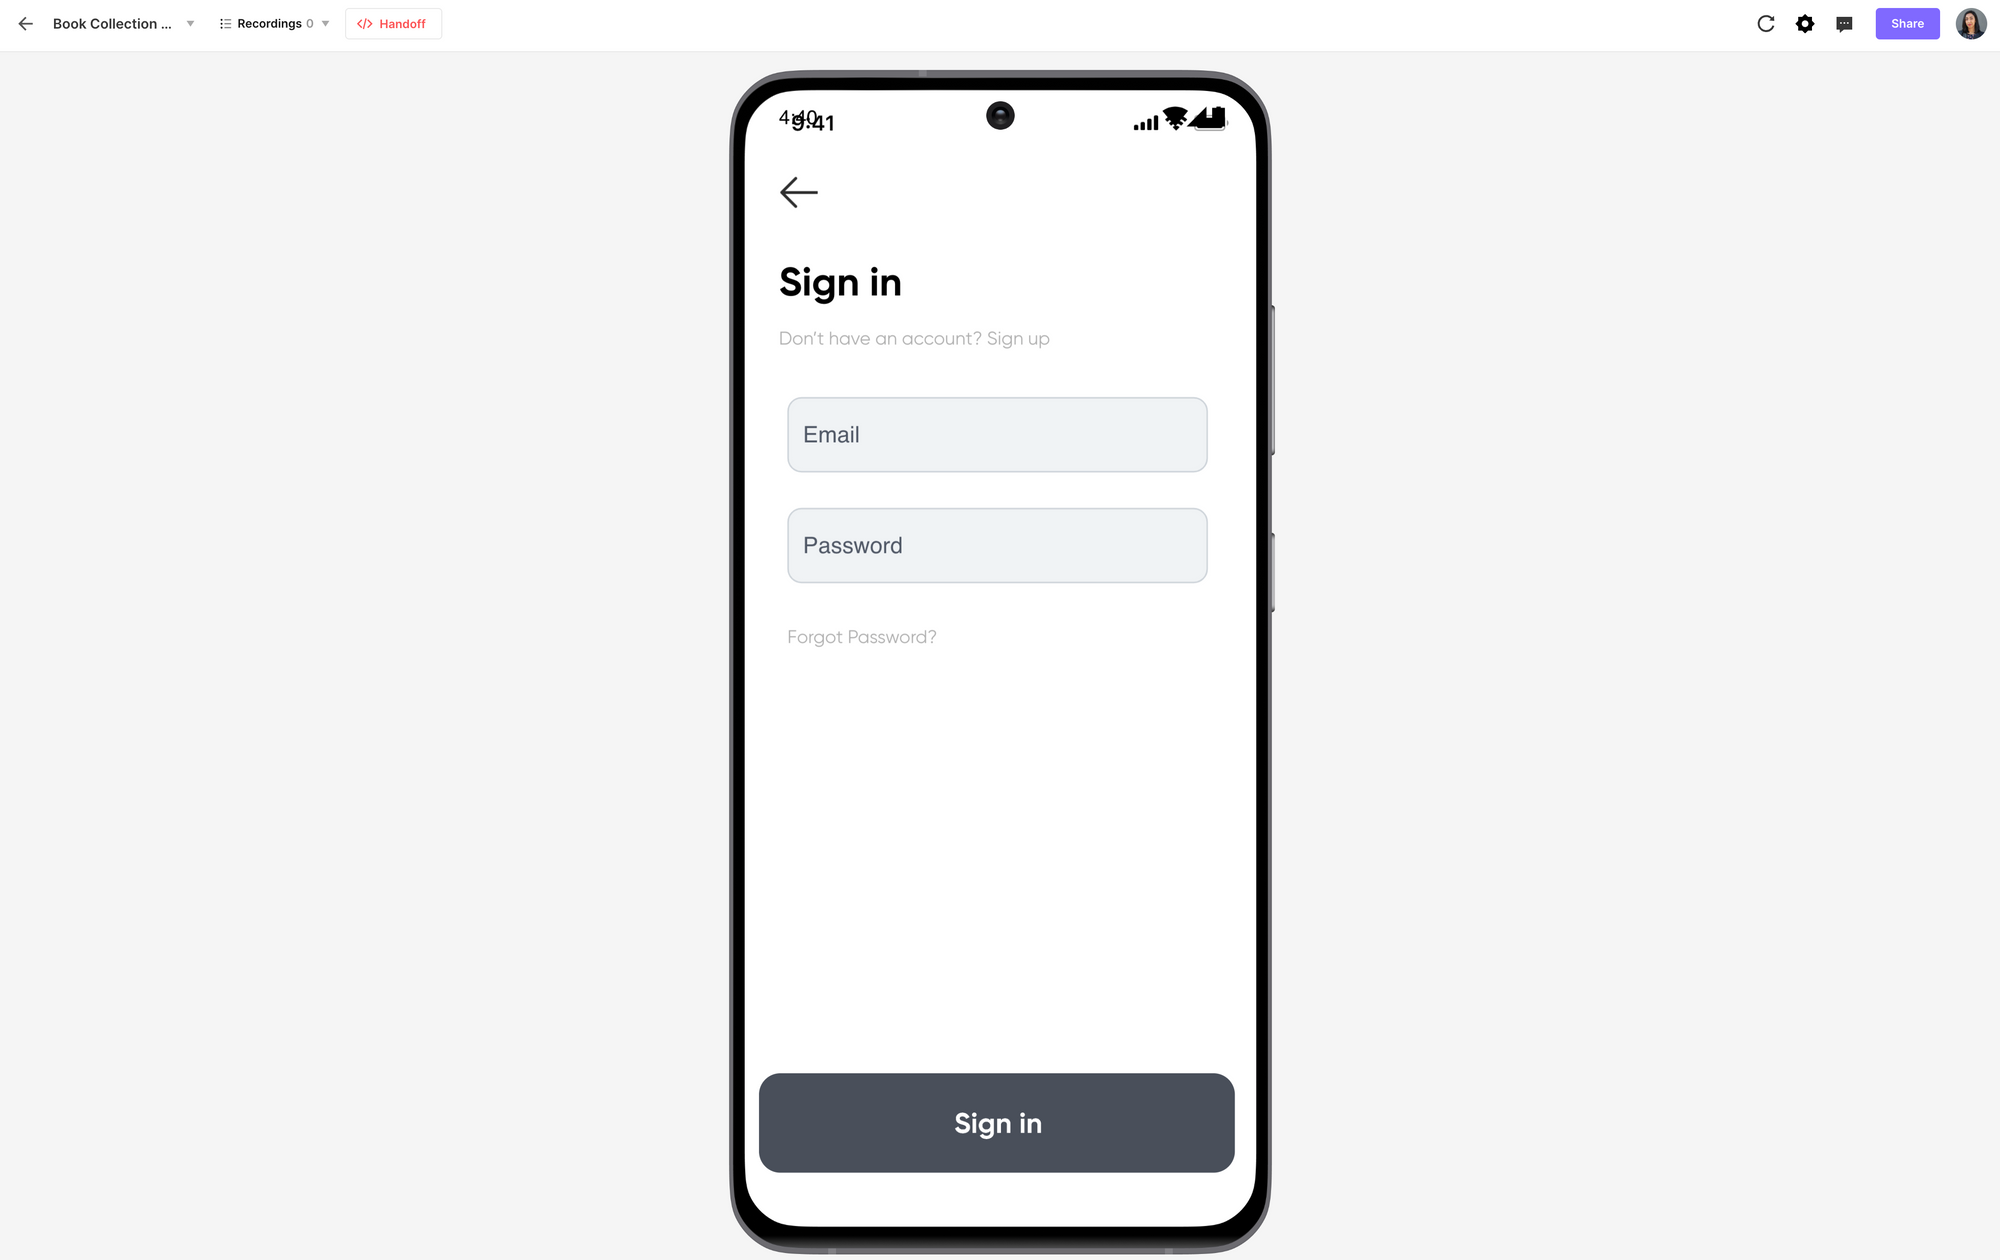
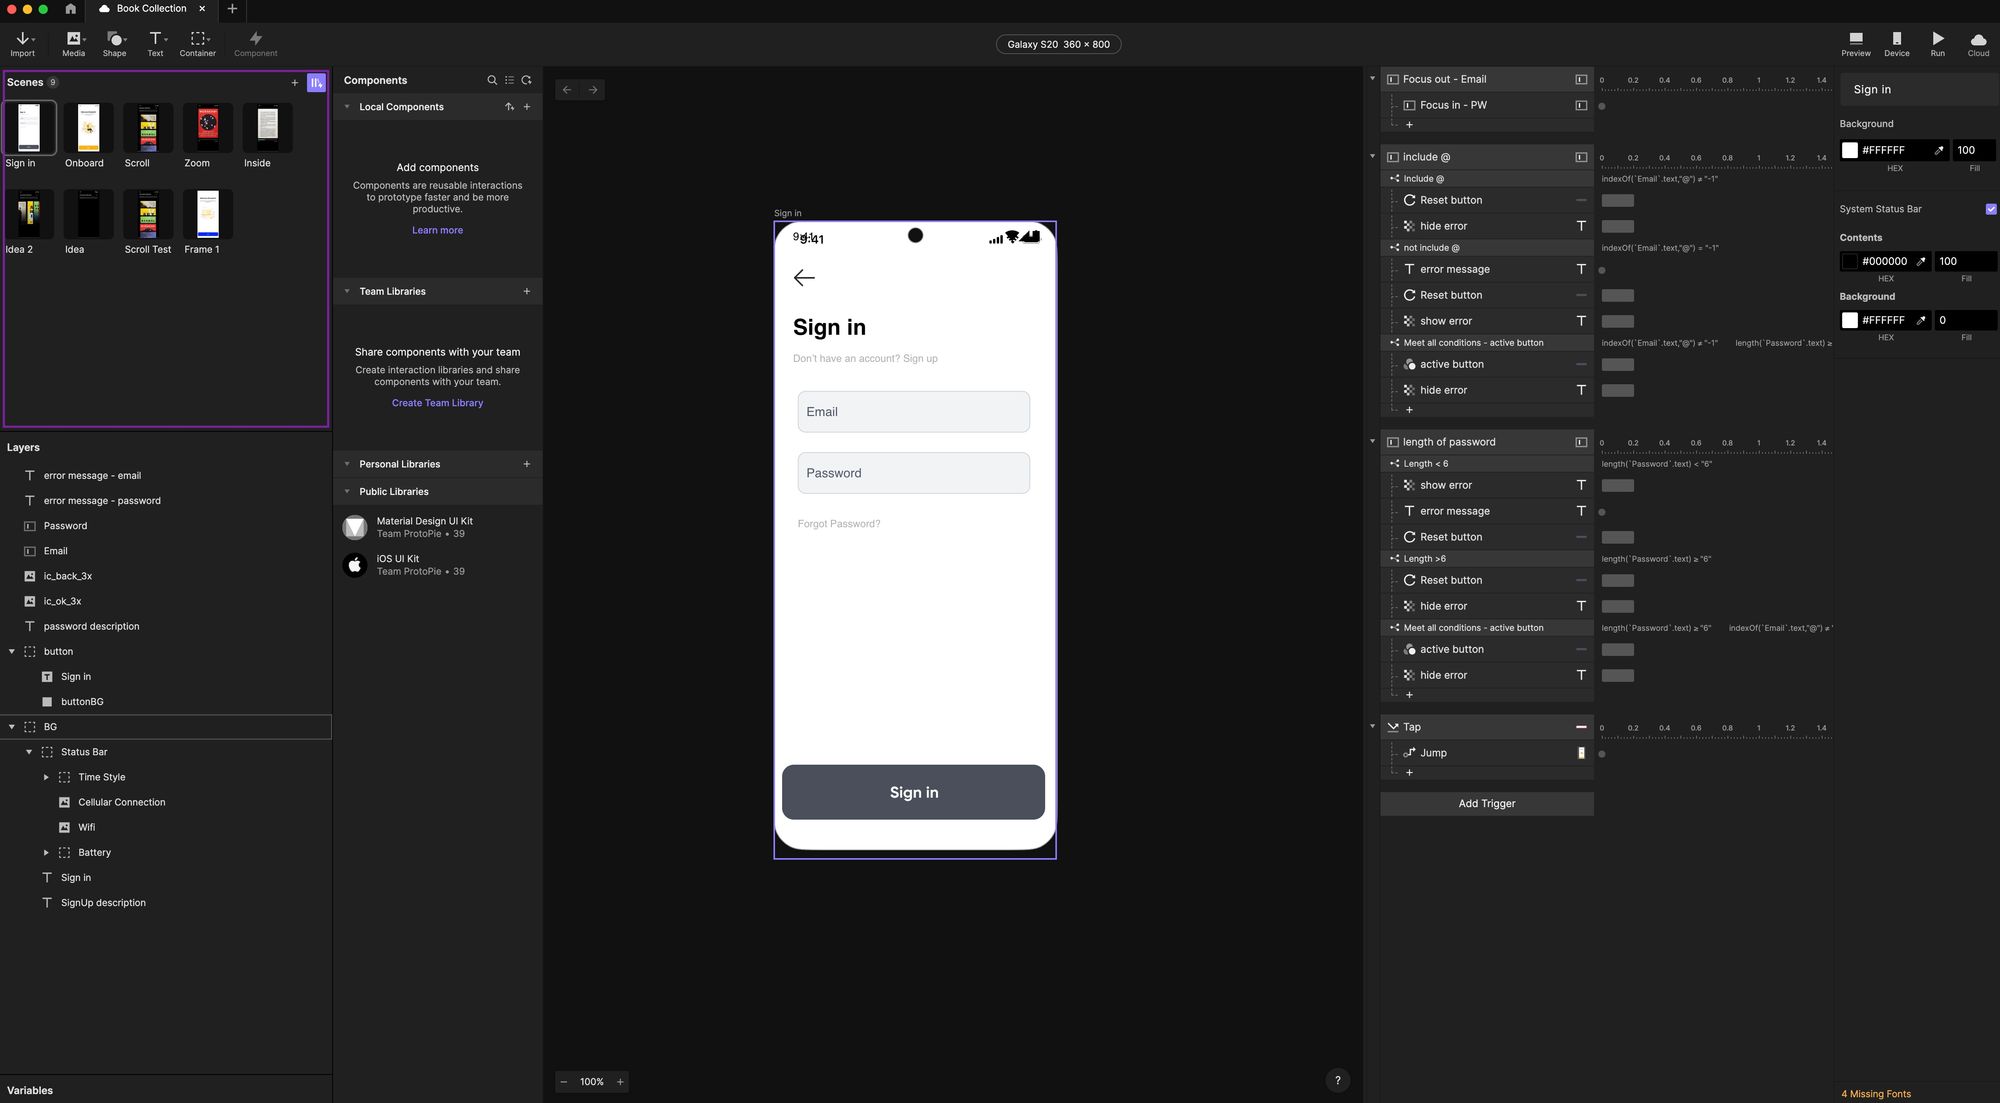
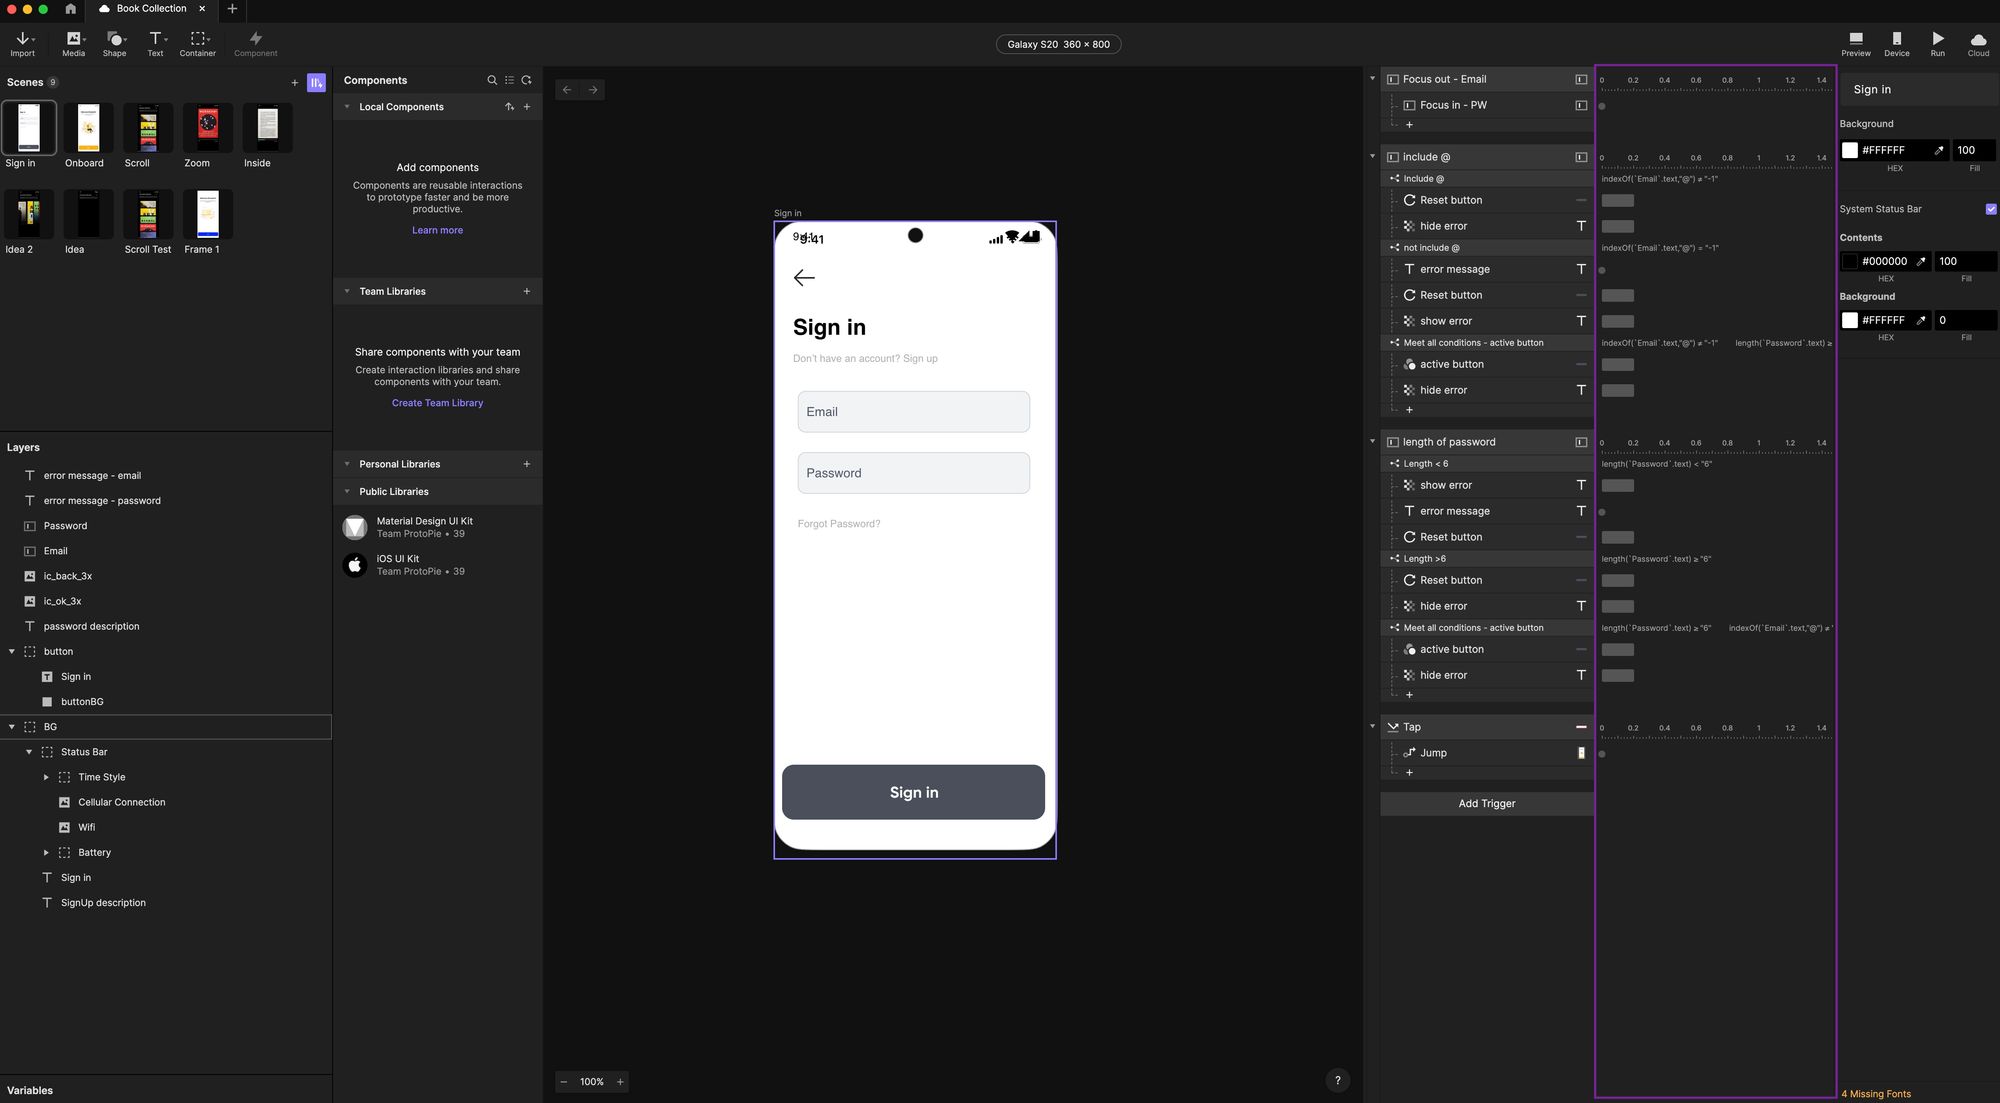
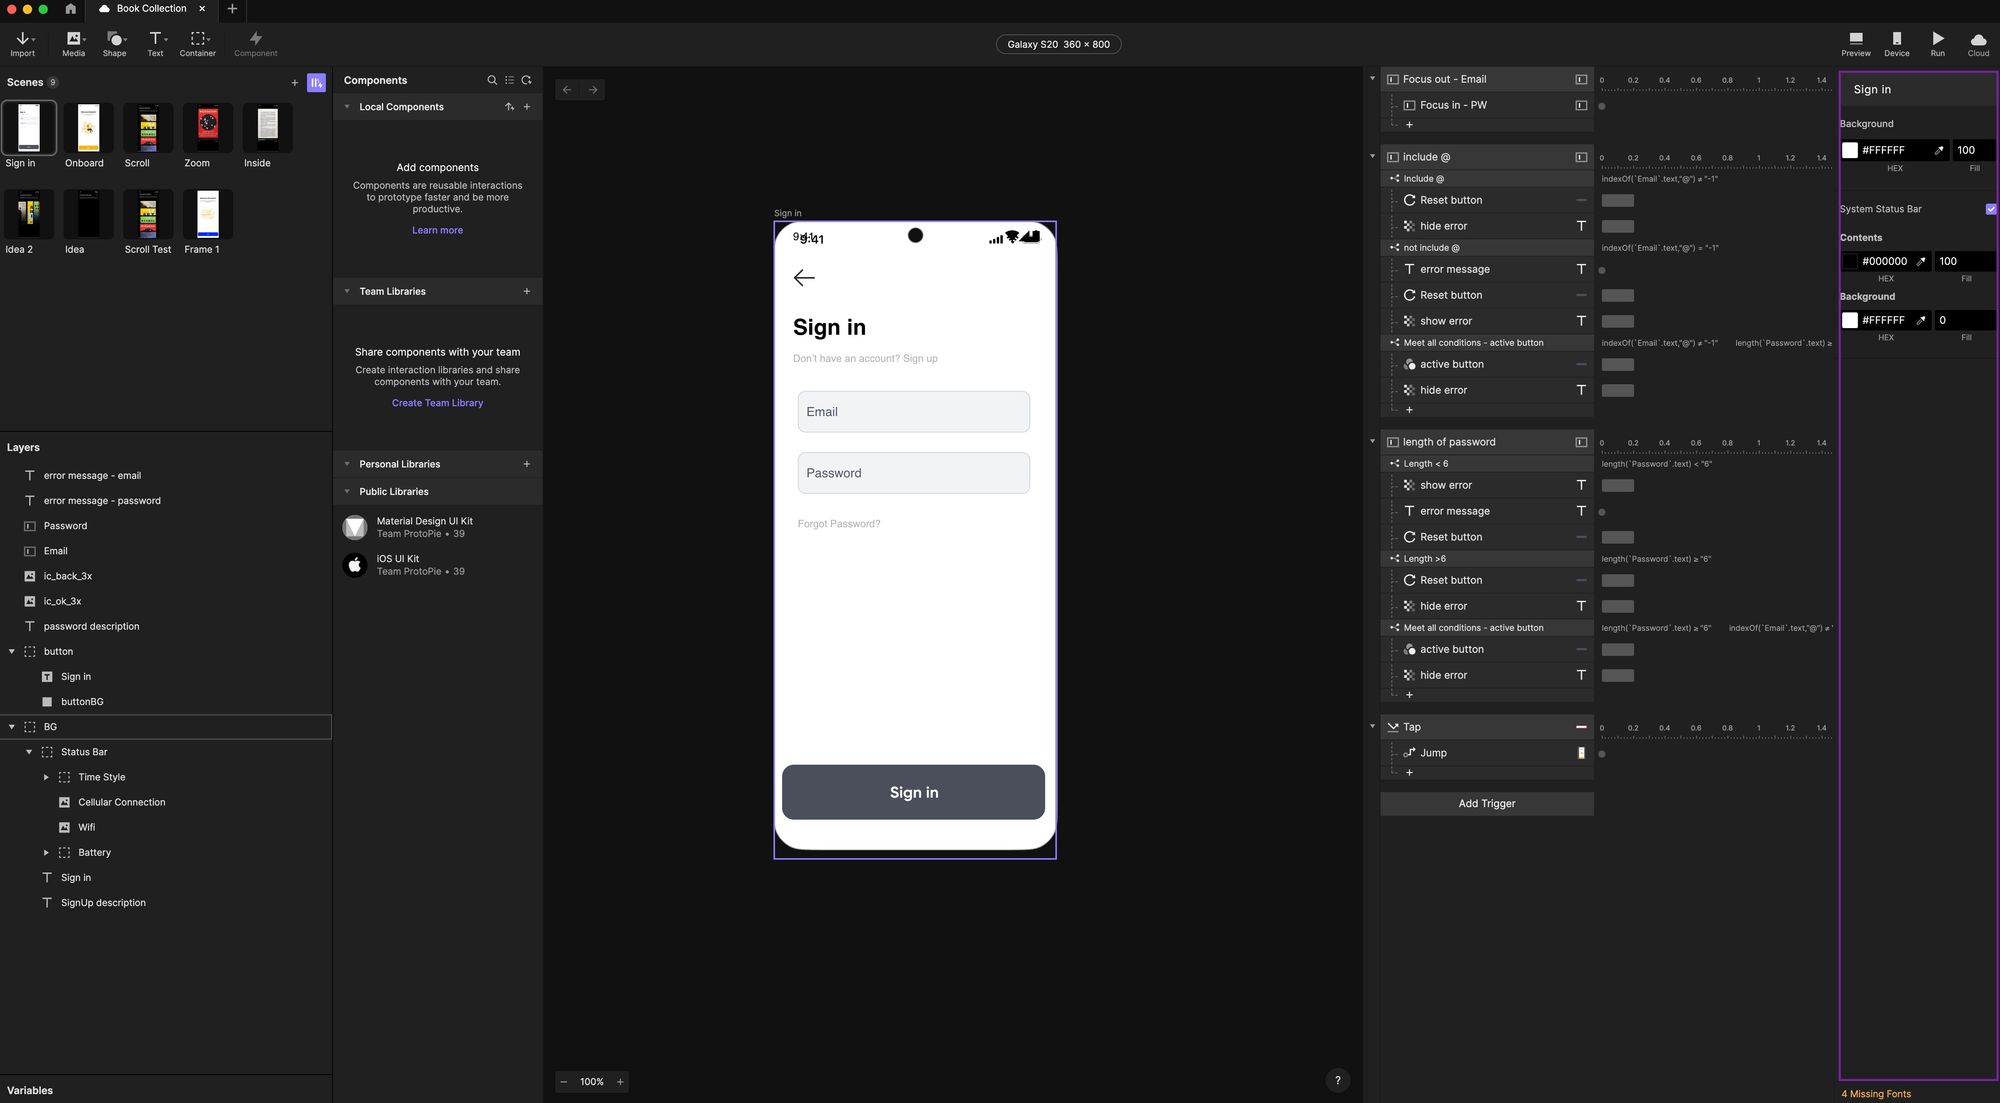
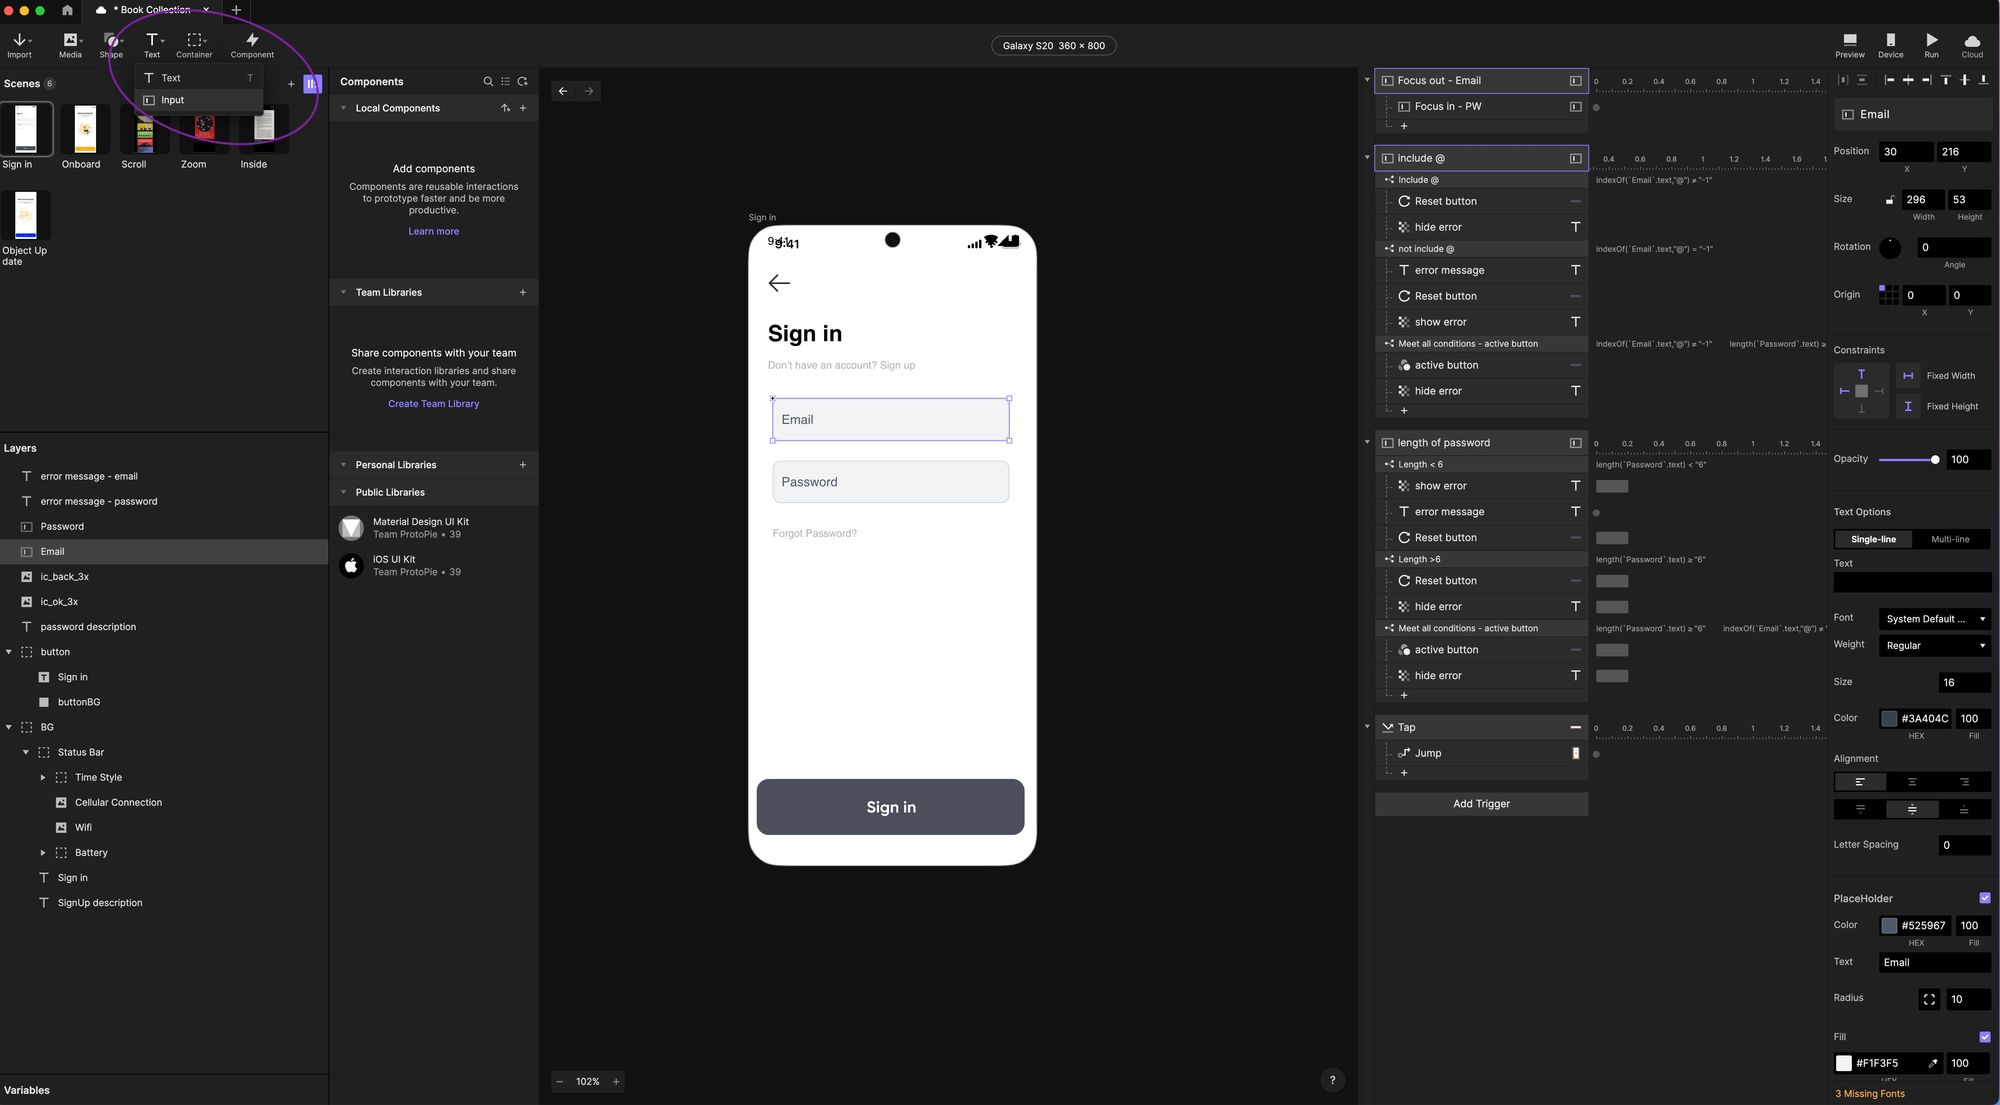
In order to understand that, we have to look at how this screen is constructed. I have a simple email form and a password form field input. And, in Figma, we would just draw these out as static design objects. But inside of ProtoPie, we need to make sure that these are actual input fields, we want to go over here to text, and then we want to select input. And then from there, we can draw out an input field. And now we can change the color of it, of the placeholder text, we can change the stroke, the field input color, the fill, all of that.
If I click on one of these input fields, you'll see that I already have a bunch conditionals and formulas setup here. Whenever we want to add a response to a form field, we want to use the focus out and focus in. For the focus out on the email, we want to select that and for the focus in we're going to select password.
The focus out is used to trigger an error message when the text doesn't meet the requirements. Then we're going to use detect to check and validate when the text meets those requirements. This is creating a condition for that trigger that if there's something there or not there that should be, you want to have a condition set for that. This will help validate whether or not that's there to give you the result on the screen that you would want to see or to show to the user.
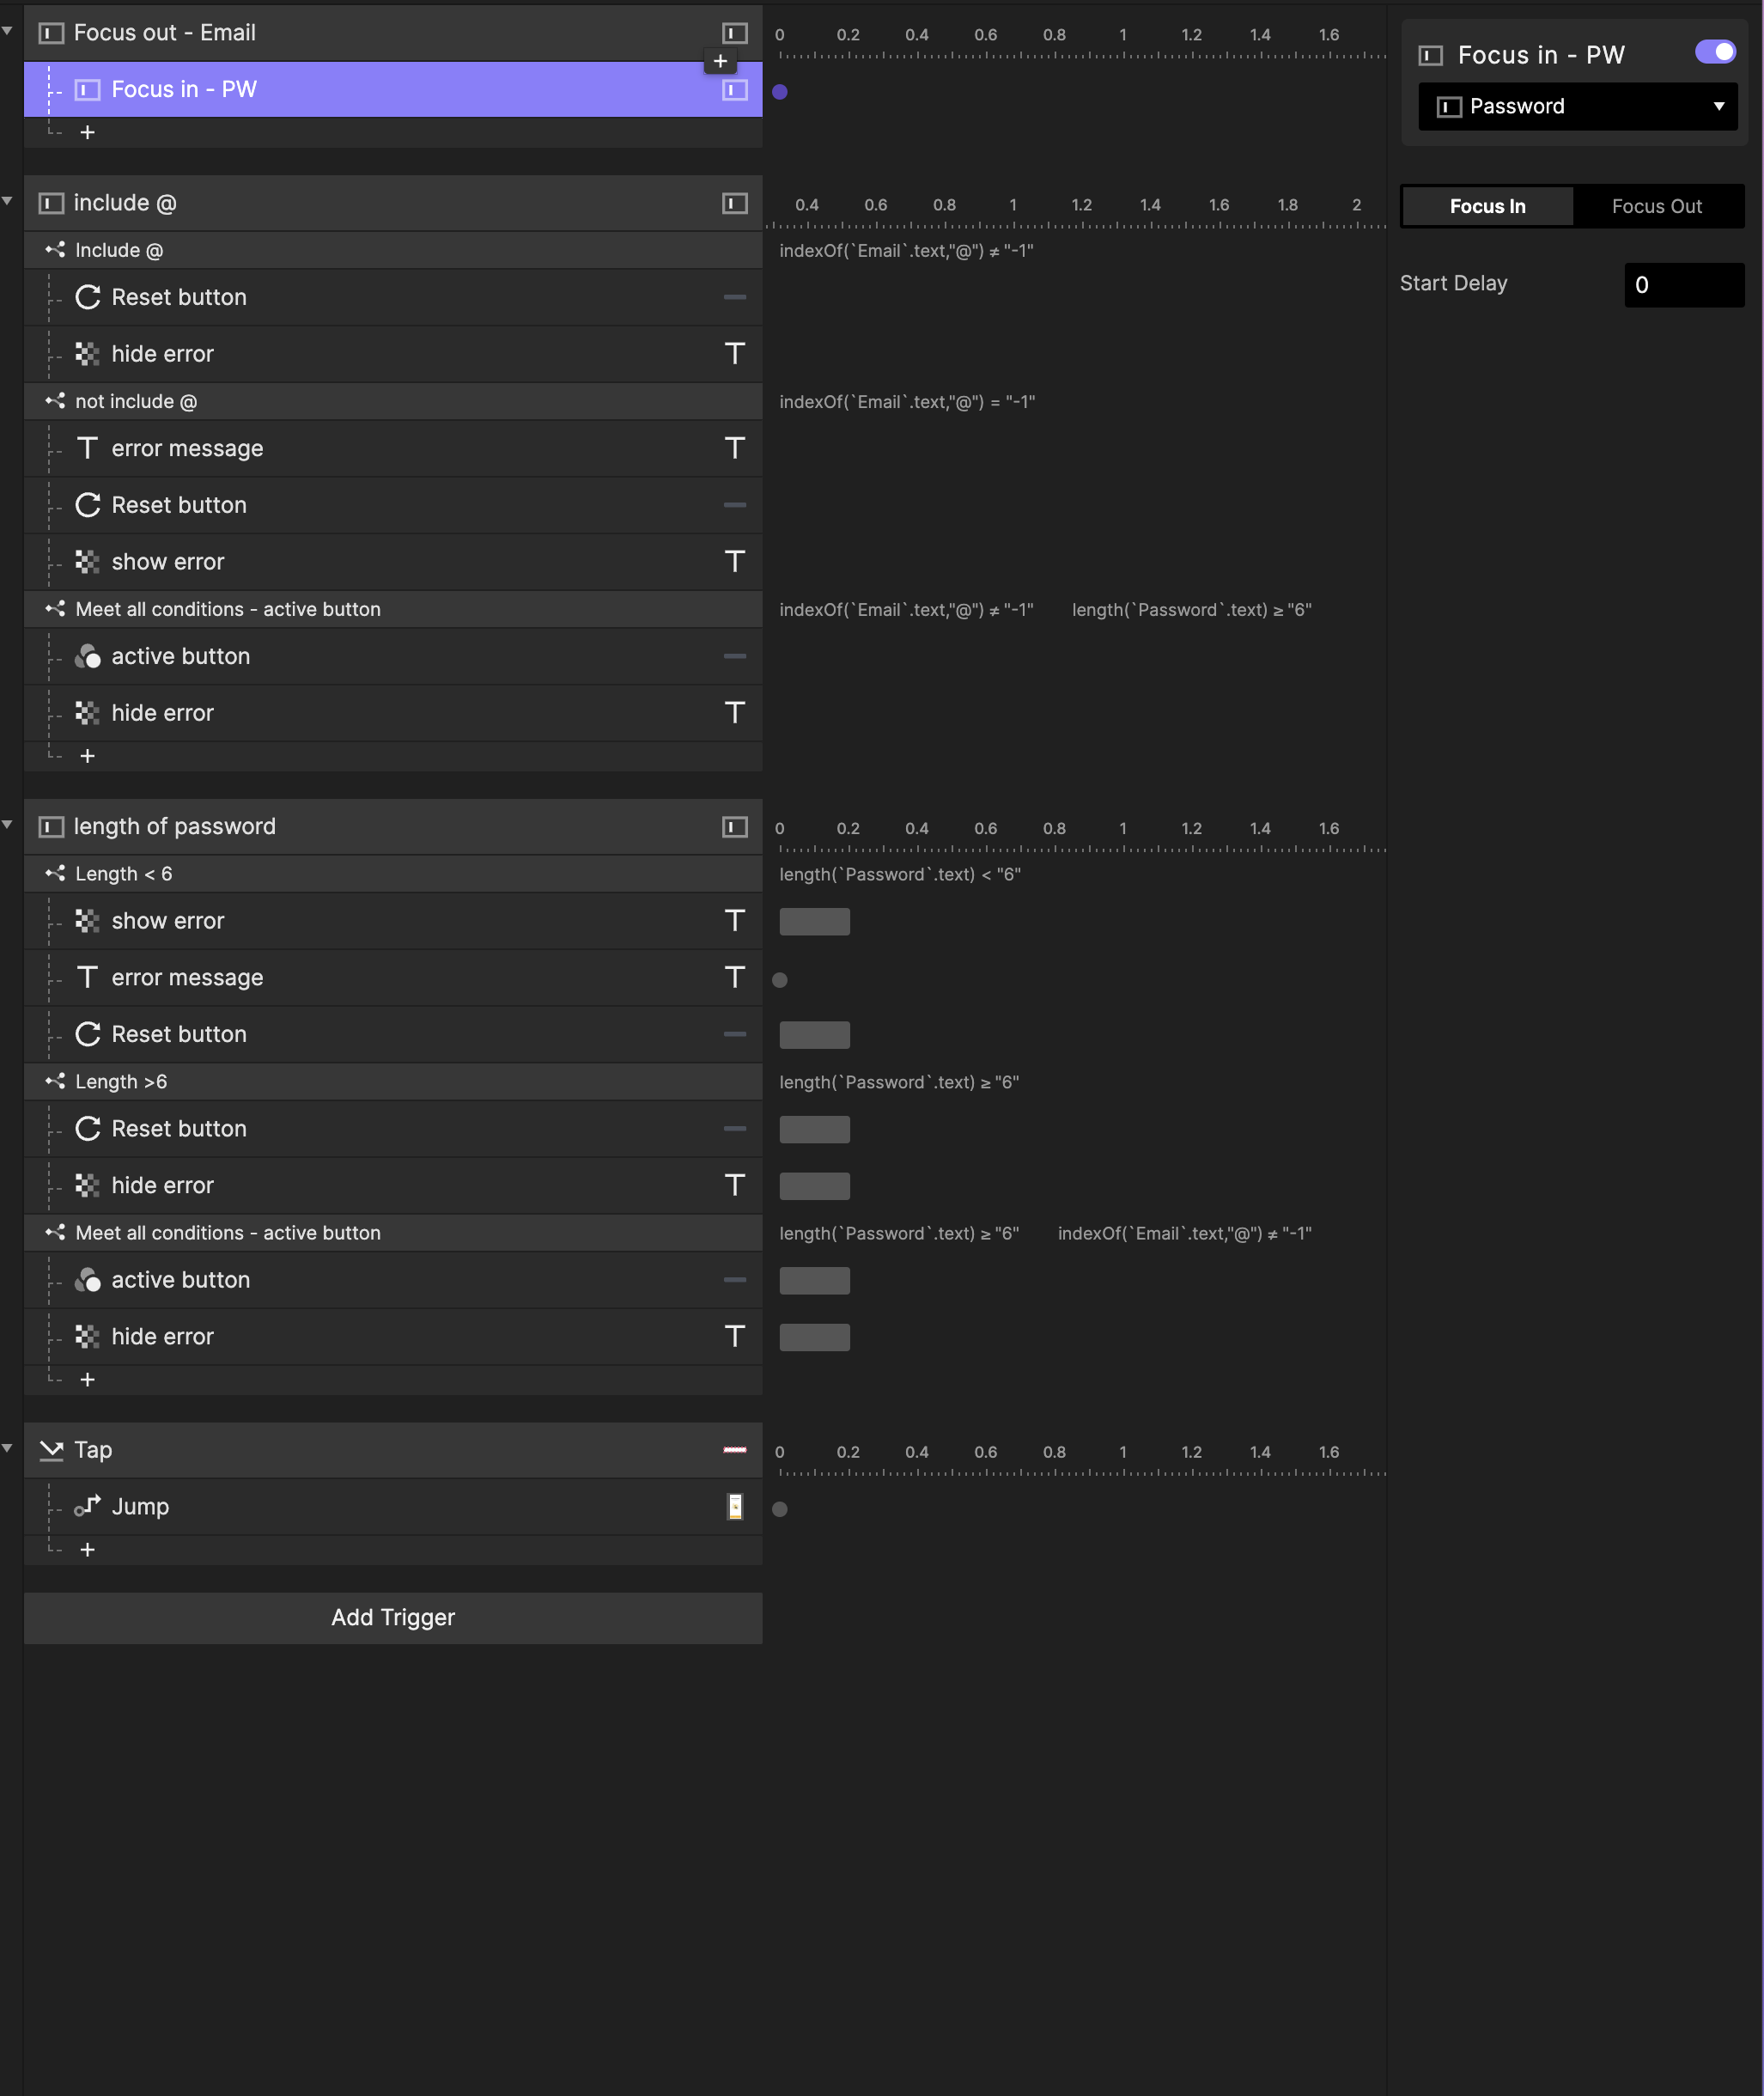
For this, I want to verify that the email address entered includes an [at] symbol, that way people can't put in a bogus name or email. It's going to check to see if there is an [at] symbol there and then if there is, there is a little error message that I have here hidden here that will appear. I've lowered the opacity for this example, but if I turn it up, it's a red arrow message and it says, "That doesn't seem like an email address.”
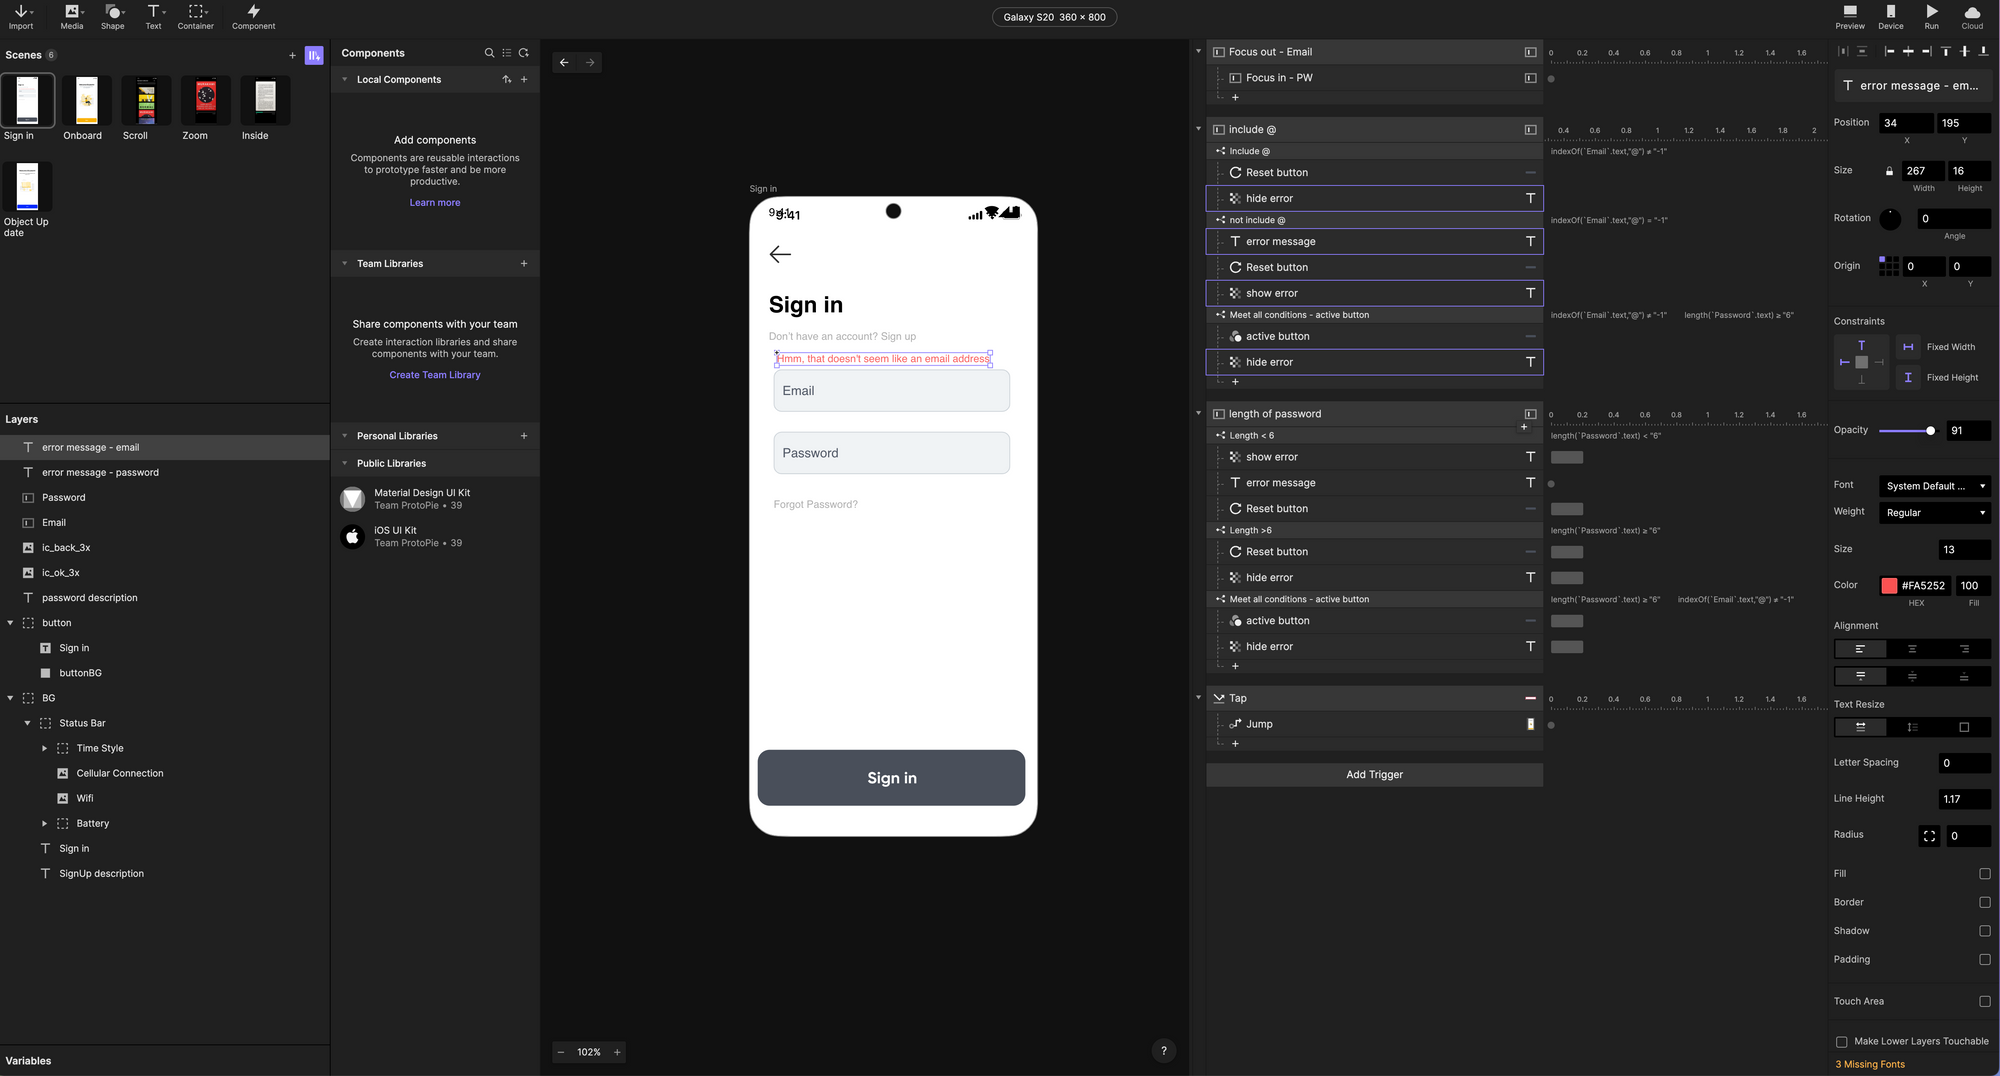
When there is not an [at] symbol included in the response then I want to show that hidden message. I basically want to hide this until there is an error, and then I am going to make sure that all of these conditions are met. The email has to have an at symbol, the password has to be the right length, and for the length of the password over here, I'm selecting that password field, this action applies to that. Then I'm going to add in a formula that says it has to be a minimum of six characters. If it's less than that, then it's not going to validate the form. Let's go to preview and take a look.
As soon as I click preview it’s going to bring up a device window with a native keyboard, and I will use my keyboard in front of my computer to input text into this. If I just type in Liz, for example, and I move to password, it's going to tell me that that's not a valid email address because there's no at symbol. now, if I say "at gmail.com," it recognizes that there's an at symbol. It looks like an actual email address, and it's going to let me move forward.
Now if I enter in four characters, it says, "Please enter at least six," and if I add a few more, then that error message goes away, and this "sign-in" button comes up.
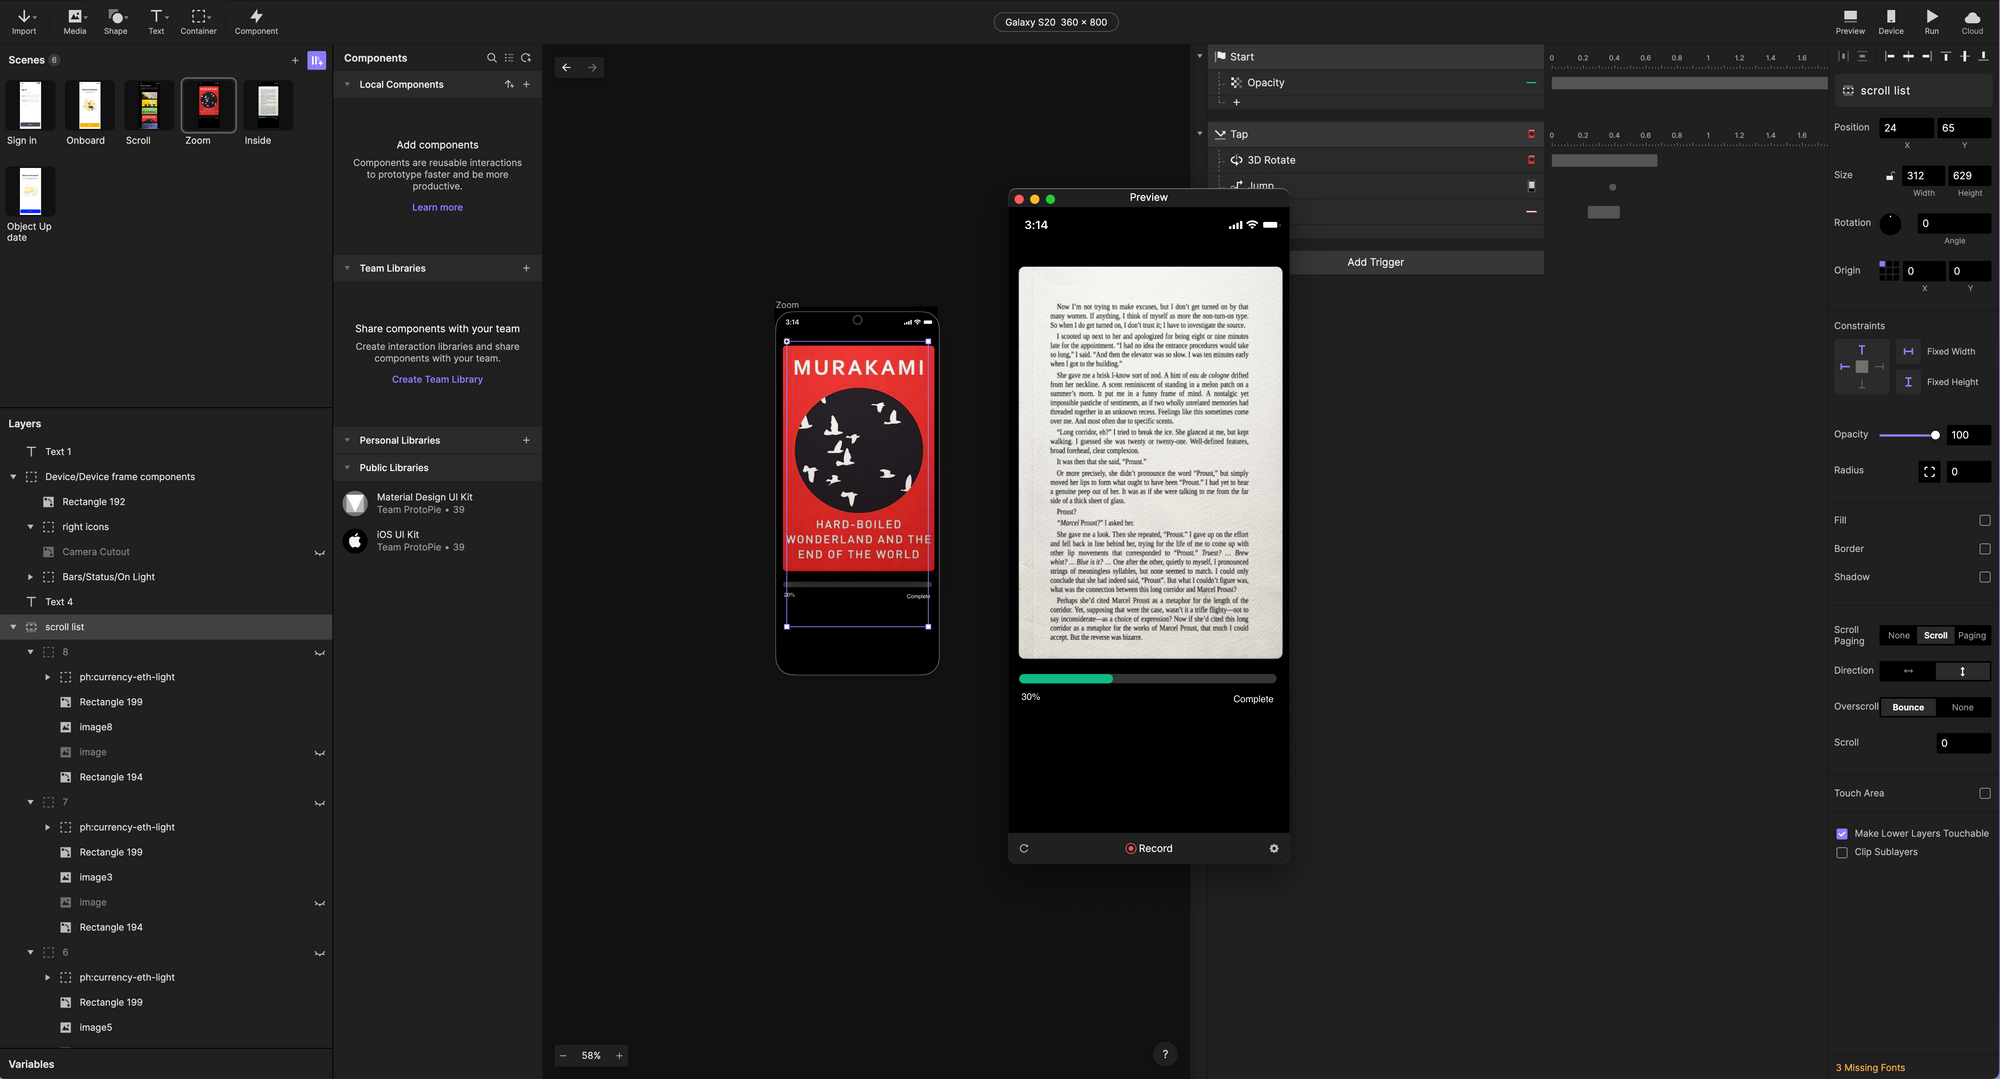
Example 3: 3D Scrolling Animation (Intermediate Level)
The next screen after this is a really cool 3D vertical scrolling animation for a selection of books.
I brought this in from Figma. Again, I've set up these book covers, and I've just put them in order with a simple image for each. Then I've added a little rectangle on top of them to give it some separation, and that's pretty much it. They're all in a straight line and we're going to use the Chain trigger.
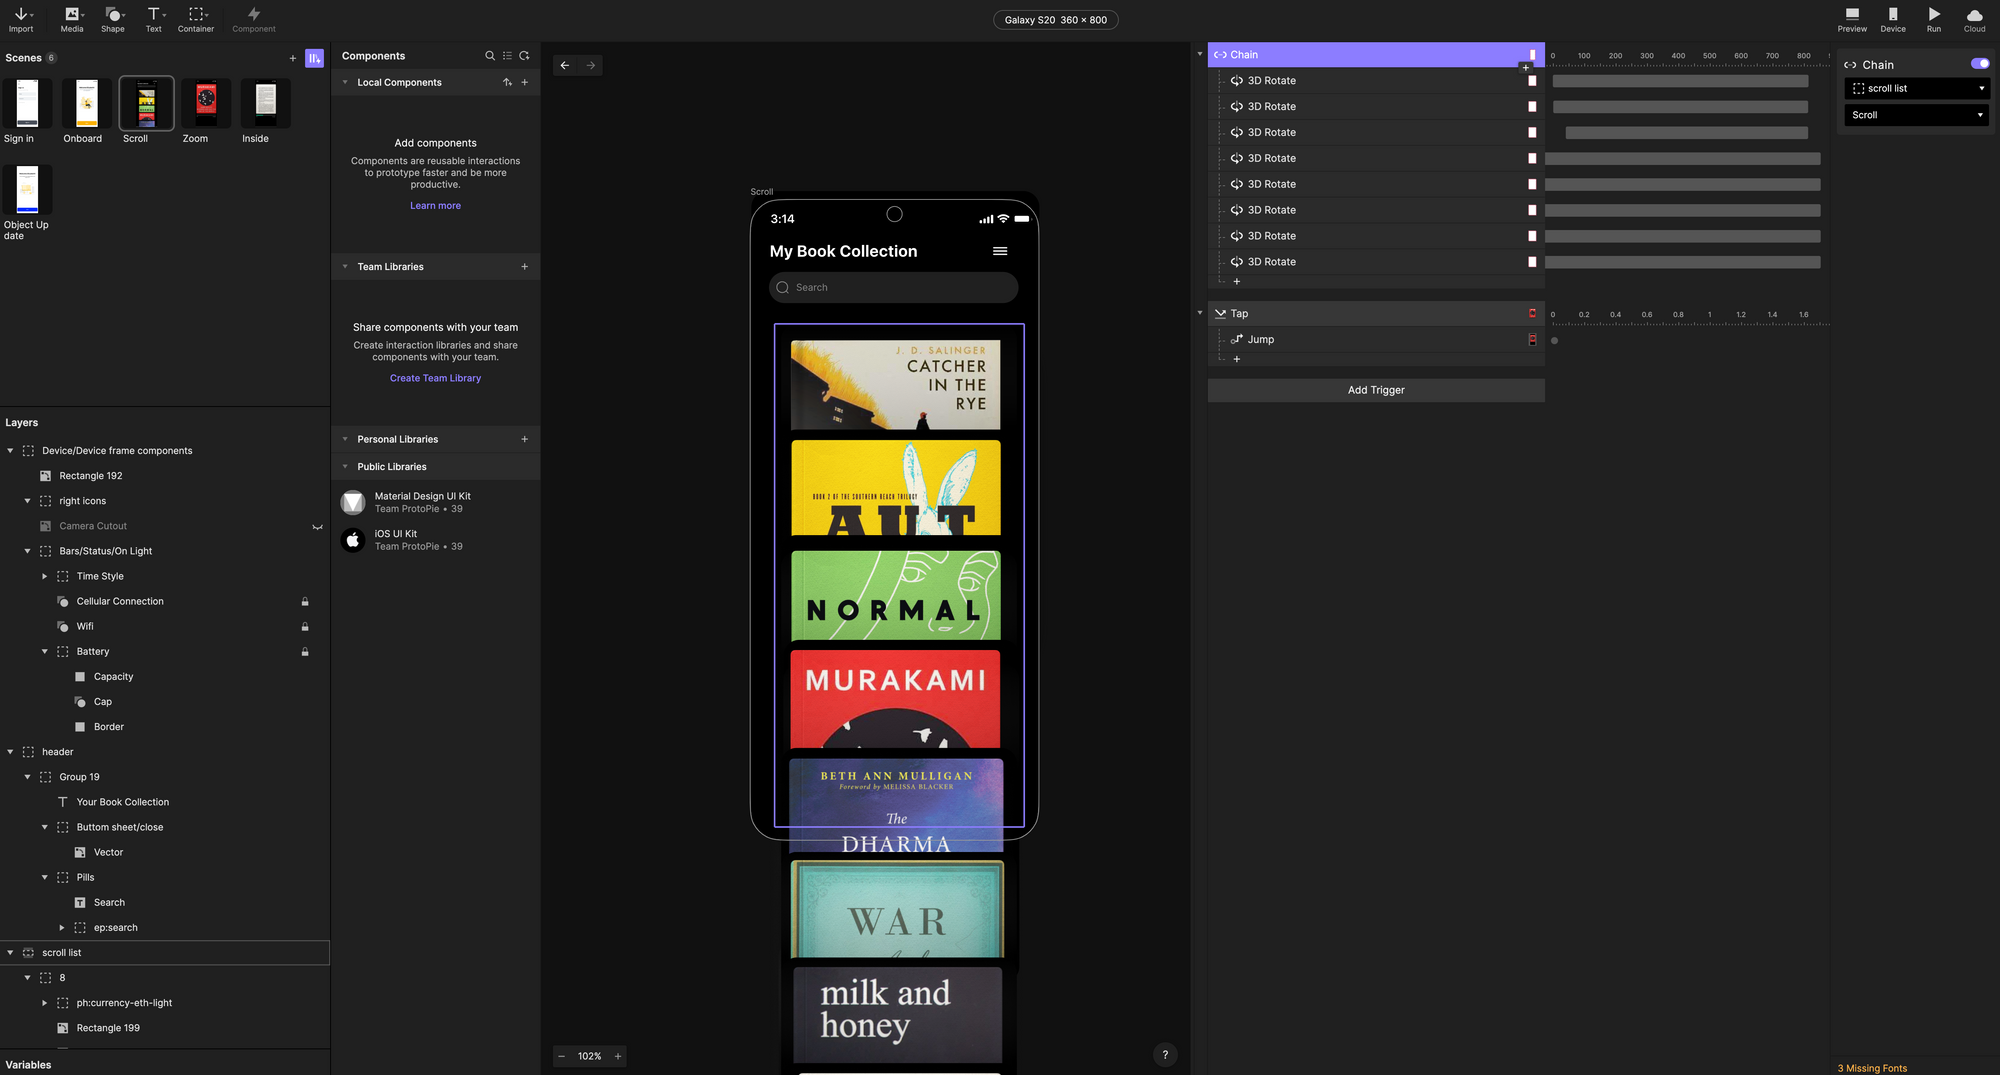
I want to rotate in and have a 3D affect so I'm going to add the 3D rotate response right here. When we click into this, we're going to see a bunch of options, I want to start with the first one. Number one is my first book group cover, and then I want it to Pivot from its origin, right where it is. I'm going to keep the Depth Perspective at 1000, and then I'm going to adjust these scroll and the angle ranges based on how I see fit the . Then I'm going to have it go up, it's going to angle upwards. I'm going to apply that to each one of these in a chain. Right as this one's happening, this is going to happen, and remember over here we've got control of our animations and our timings, I can move these around a little bit. I can adjust these that they're like slightly different timing. I can have them staggered, and I can change the duration of these.
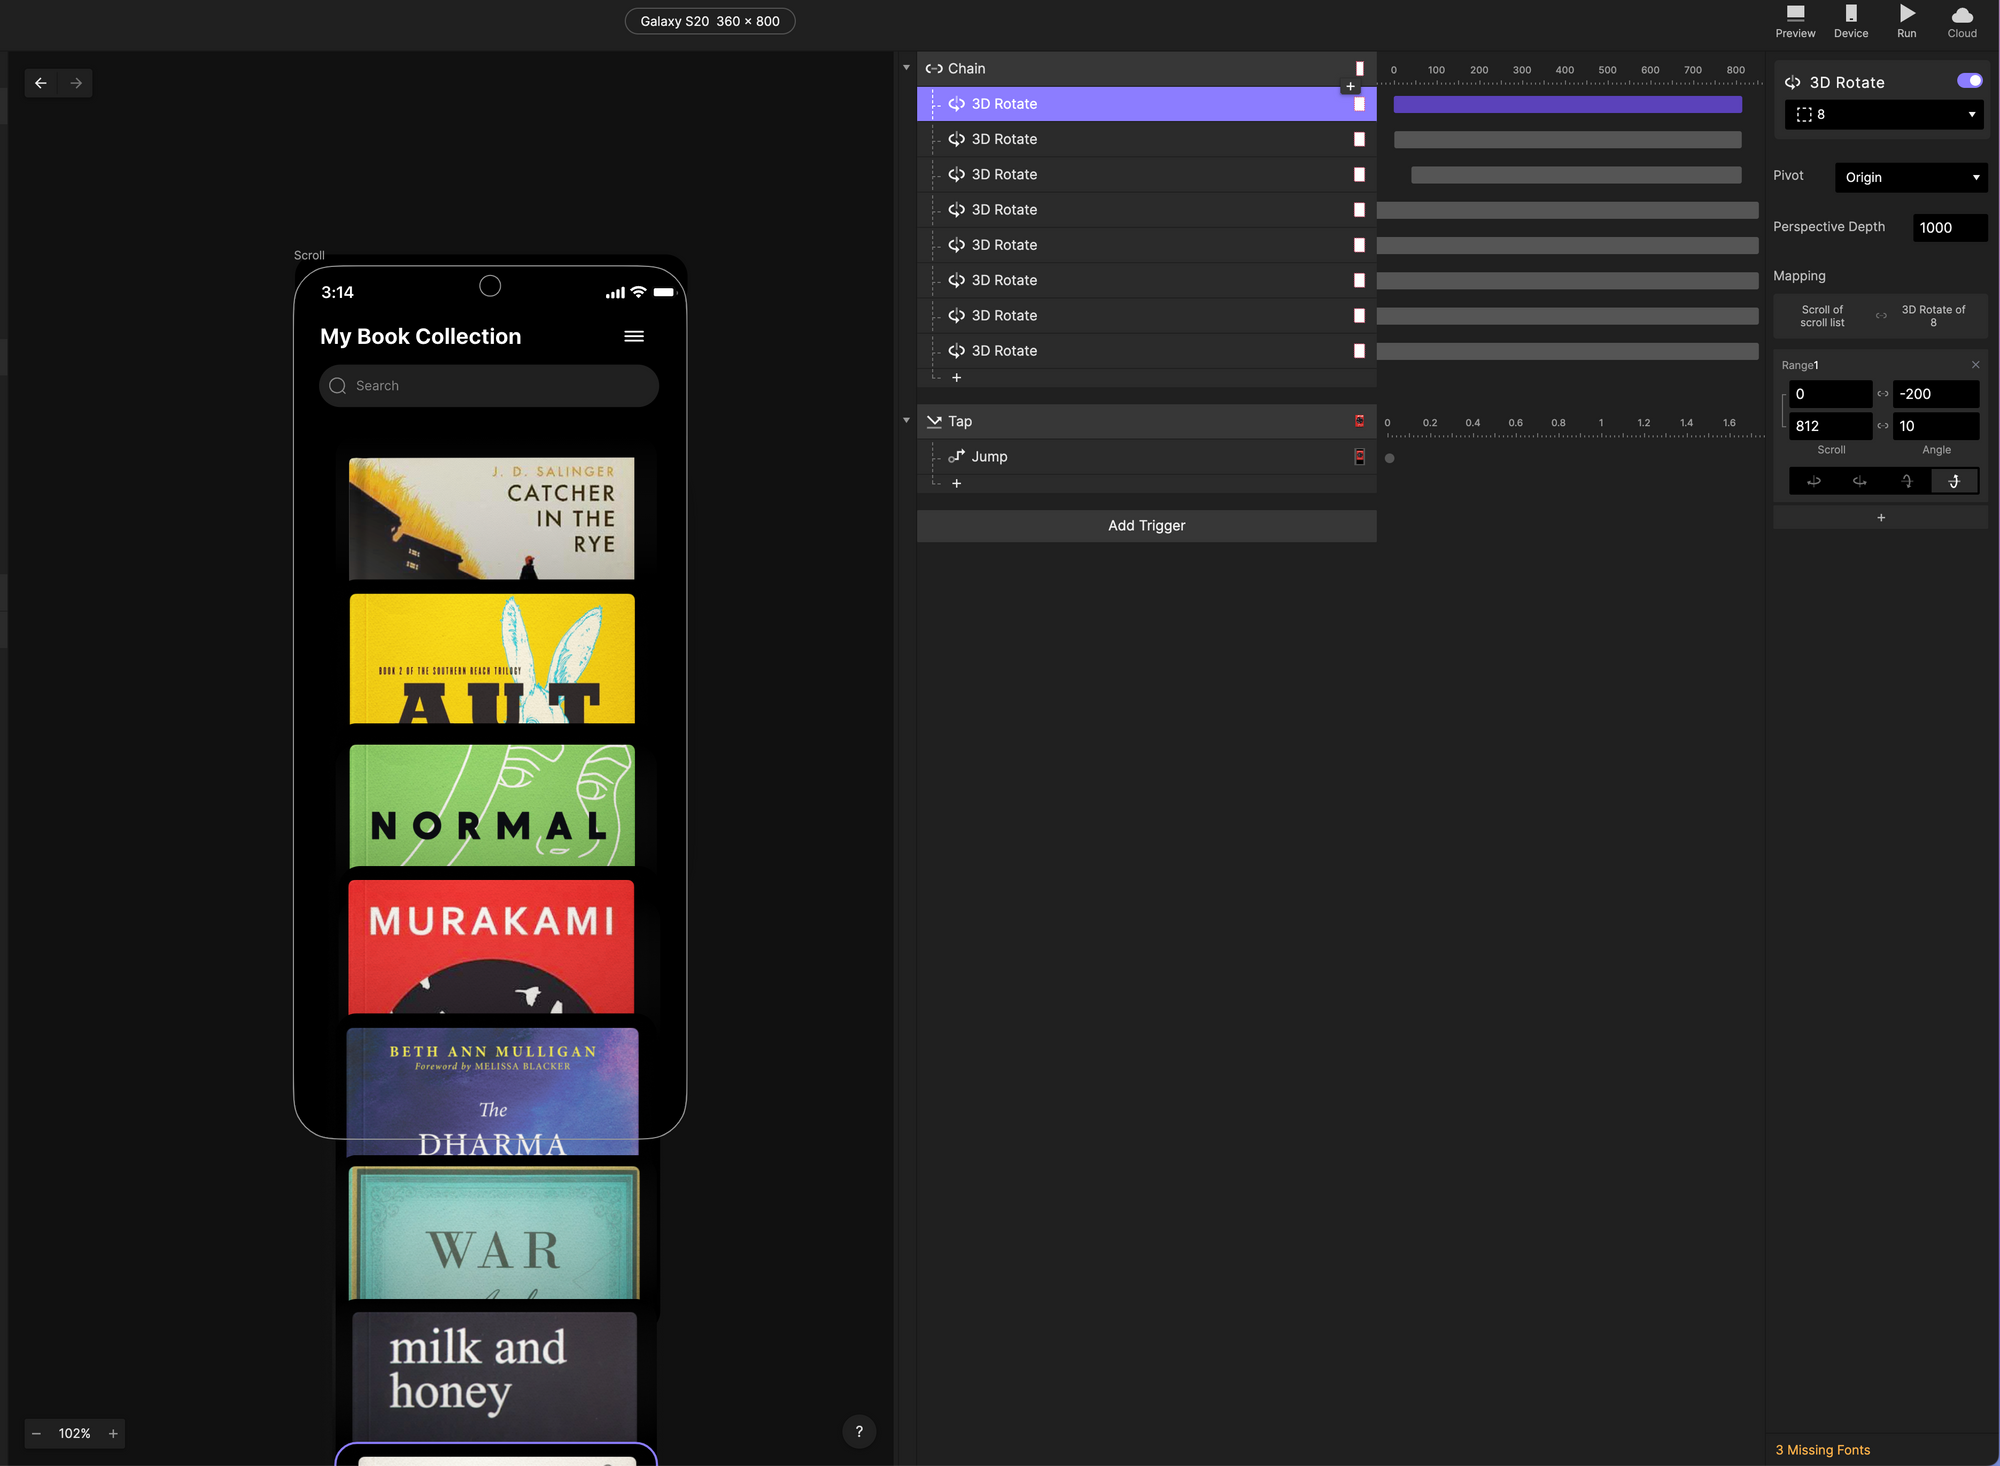
Now we're going to click on preview. That's going to bring up our preview window, and I can scroll through these like that. It's a very cool 3 dimensional effect and it shows the whole length of the object when you scroll, and you can see everything quite nicely.
Book Page Flip
Right after this I want to be able to click on one of these books and have the page flip open. I'm going to kick that off with a start trigger. I just want the opacity to come in, I want it to be no opacity when it starts, and then I want to zoom into full opacity. Really simple. It gives it a nice fading effect, and that's what I wanted to do at the start, right when it transitions from the previous screen.
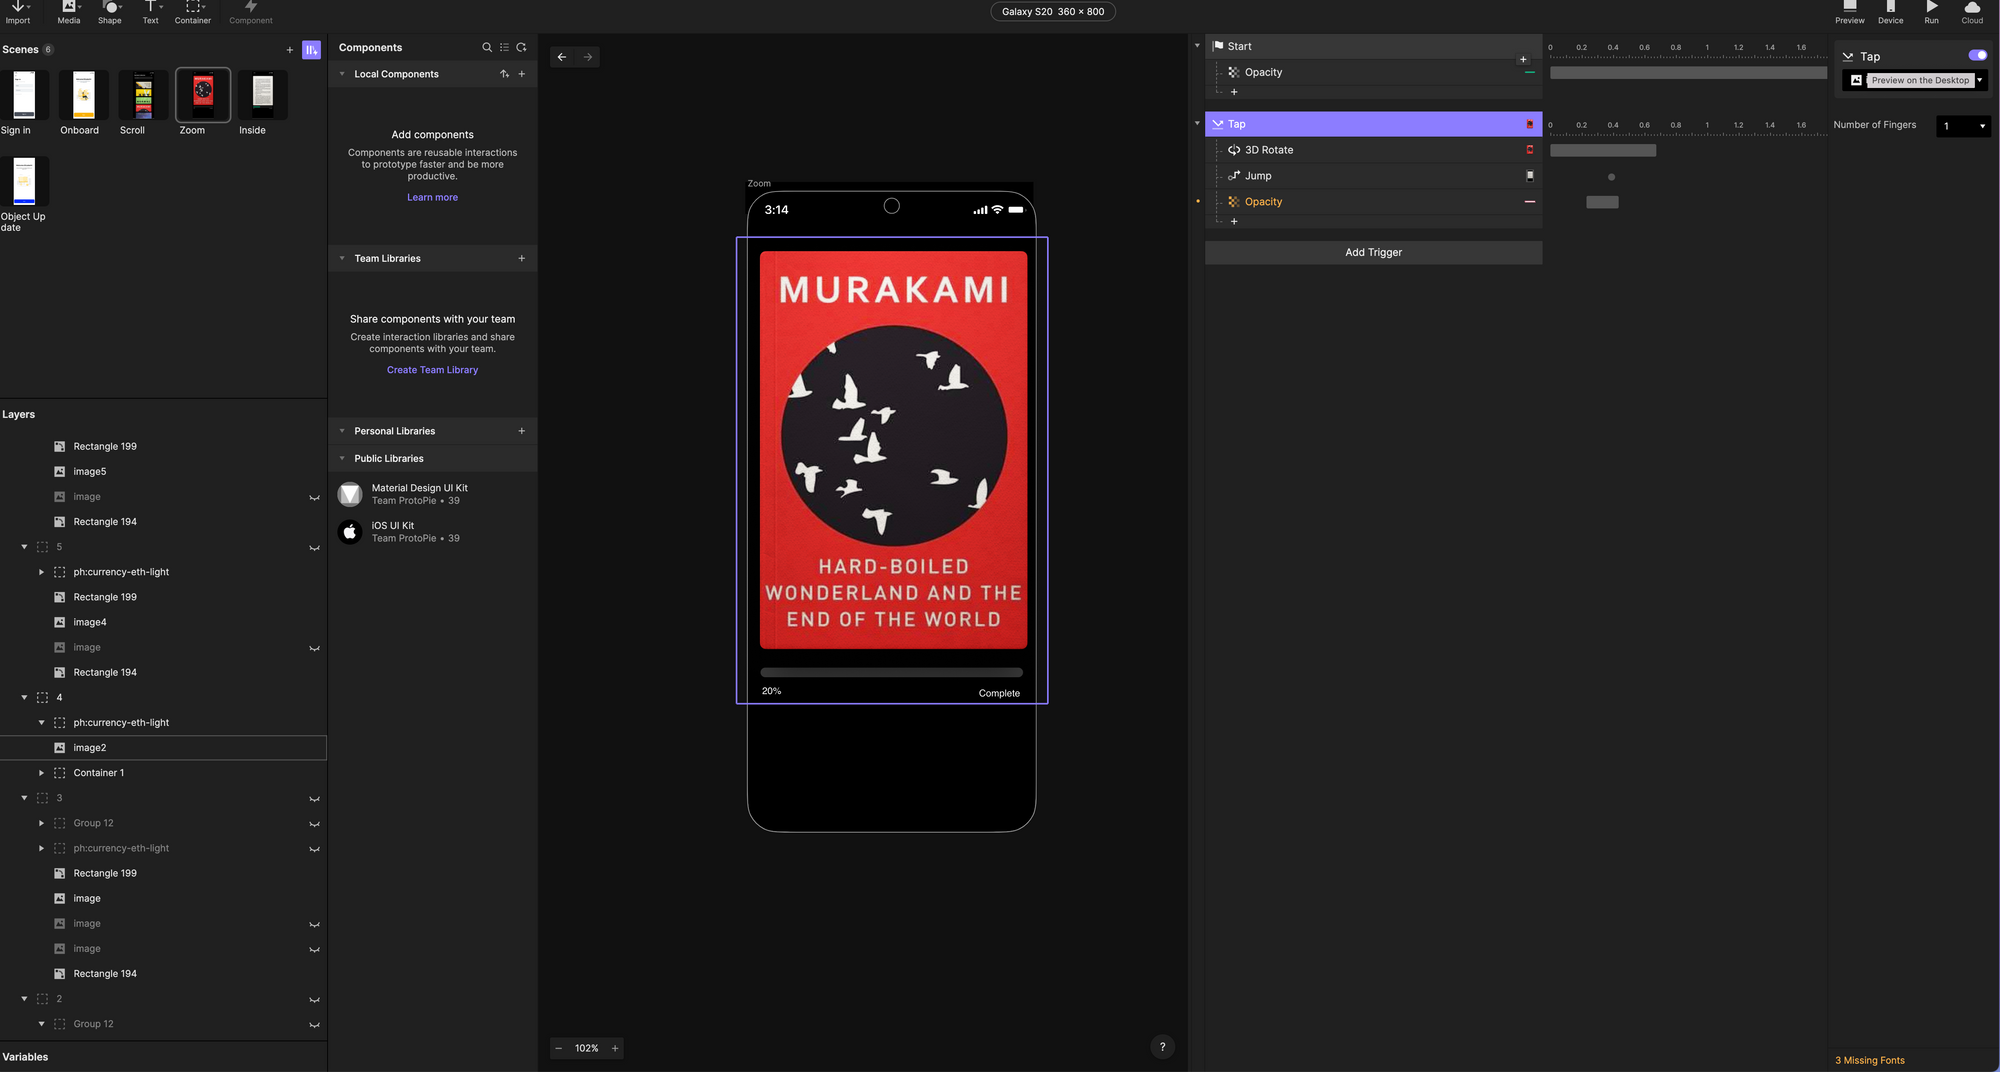
To preview that, I'll go back to the last scene, click on preview and now I can scroll, select a book, click on it and the page flips over. You'll also notice that there is a progress bar that slides in. I'm just going to use a simple interaction here after tapping on that book, I want the opacity to automatically come in after that, and that's exactly what's happening here to this progress bar.
The Page flip gives the effect of a real book, like something you might see in Apple Books. I'm going to use that same 3D rotation effect. when I click here and I tap on the book, it's going to 3D rotate, and it's going to do it. We're going to change the direction, right, because we don't want it to go up like we did in the previous example. We wanted to go left and open out to the left as if we're reading left to right, and everything else is going to stay the same. We make sure we select the correct image from this, and this is really going to be your best friend. You want to make sure you're selecting the correct layer to apply these triggers to. Now for the coolest example
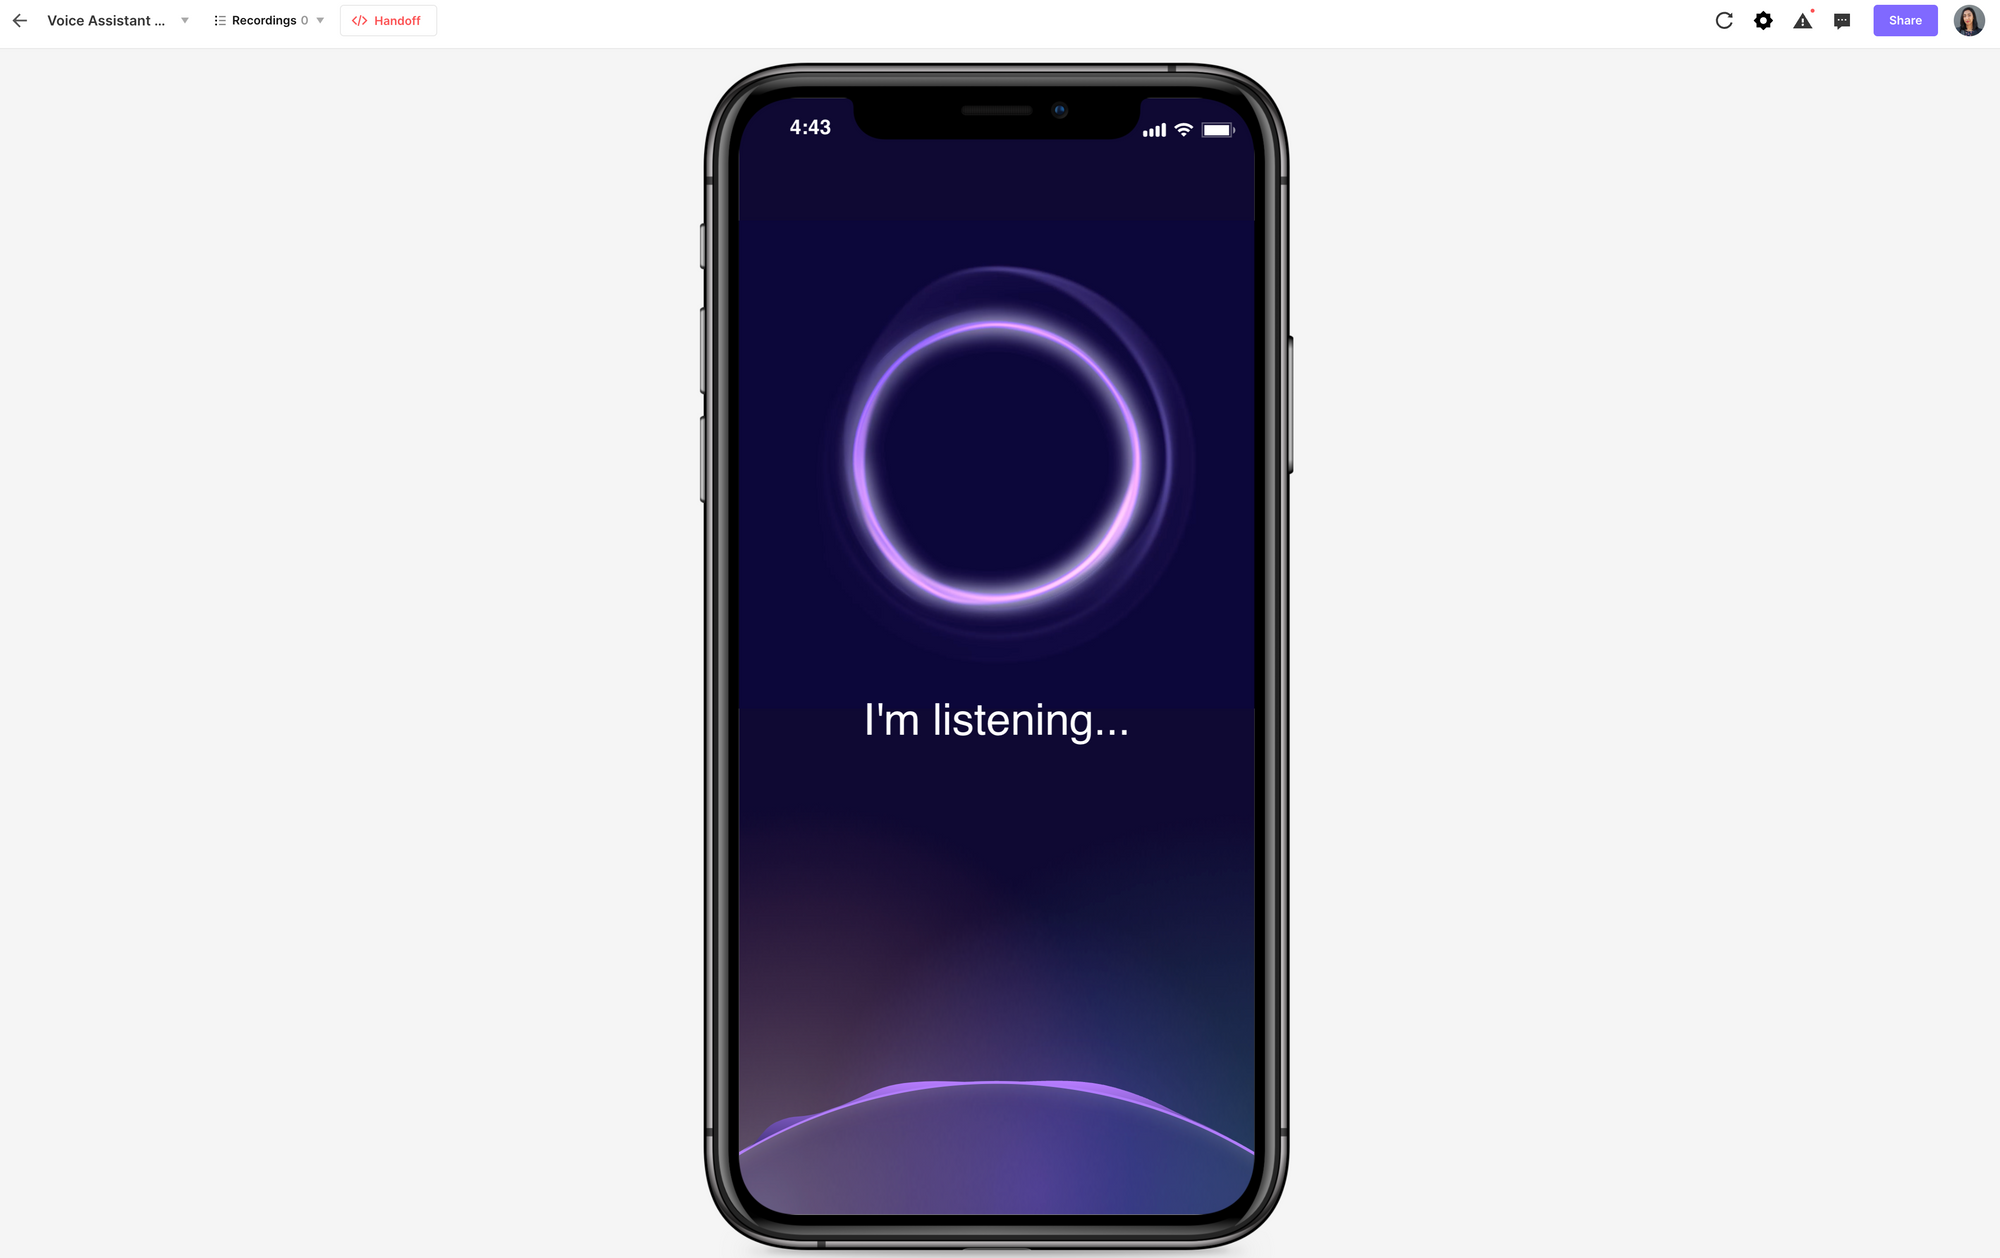
Example 5: Real-Time Voice Assistant Interaction (Beginner Level)
One of my favorite interactions if the ability to tap right into your device's native sensors and use things like this voice command feature. We're going to set up some voice activation on our phone. This one seems really complicated, but surprisingly, I think it's one of the easier ones to do.
I have my starting screen here set up really easy. I just added a text layer and I added a feedback input layer and then a folder here that has a video that it shows this cool graphic voice visualizer. Then I have a vector graphic down here at the bottom. that's it, a couple of layers, and we're all set up there.
Now, we're going to add some triggers. We're going to start with a start trigger, and then that's going to be Listen. Down here, there's a beta feature called Listen, and that's what we want to select.
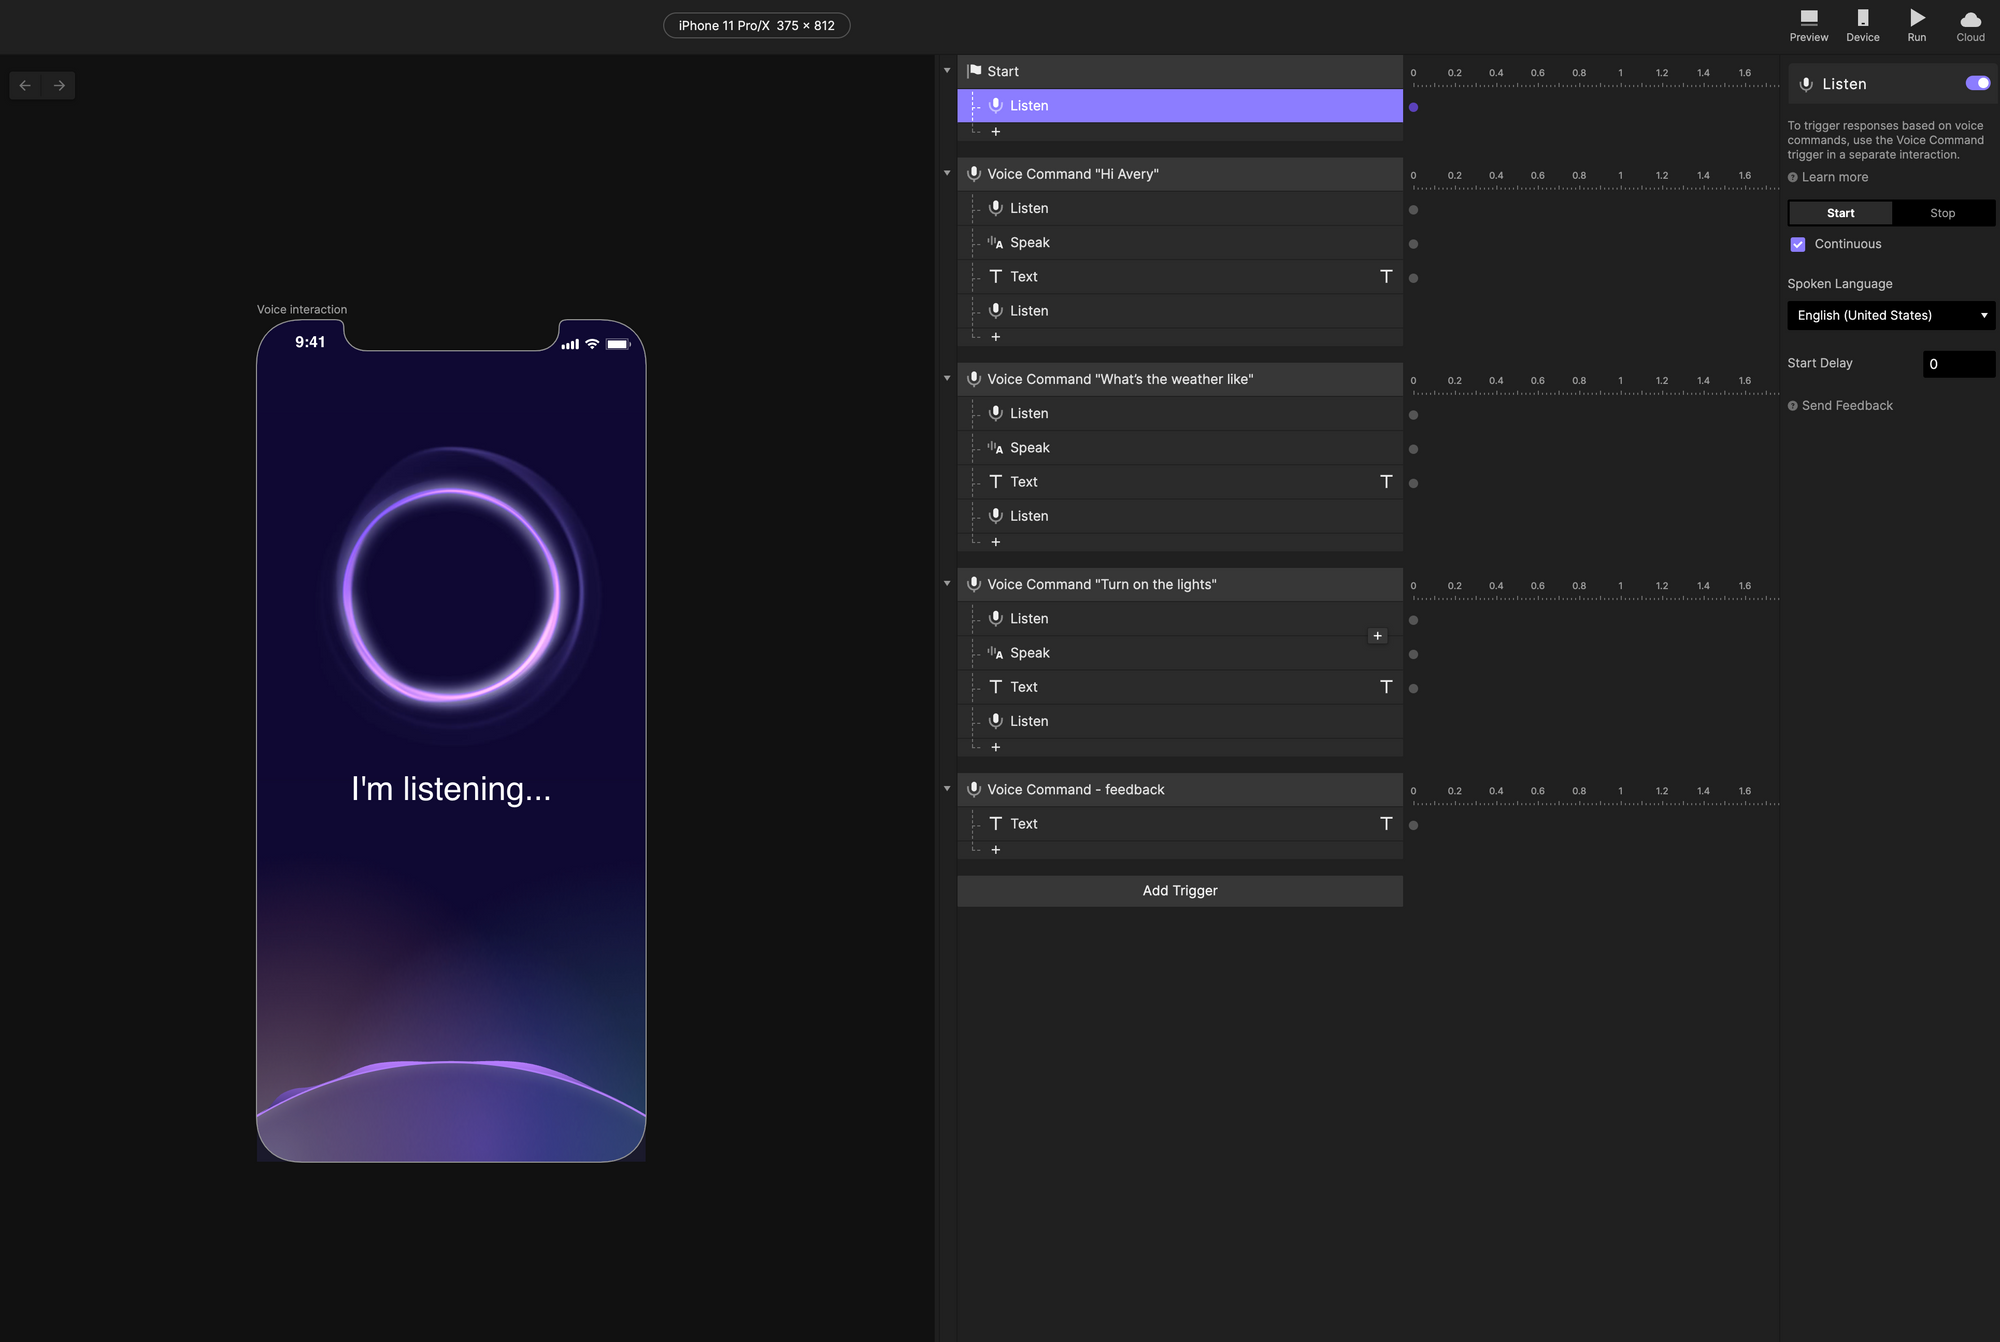
The next trigger will be speaking the voice command phrase 'Hi, Avery' and they will reply with the response phrase "Hi there, nice to meet you". So the app is going to listen for that command phrase which you would input in the listen field and the app will respond with the response phrase.
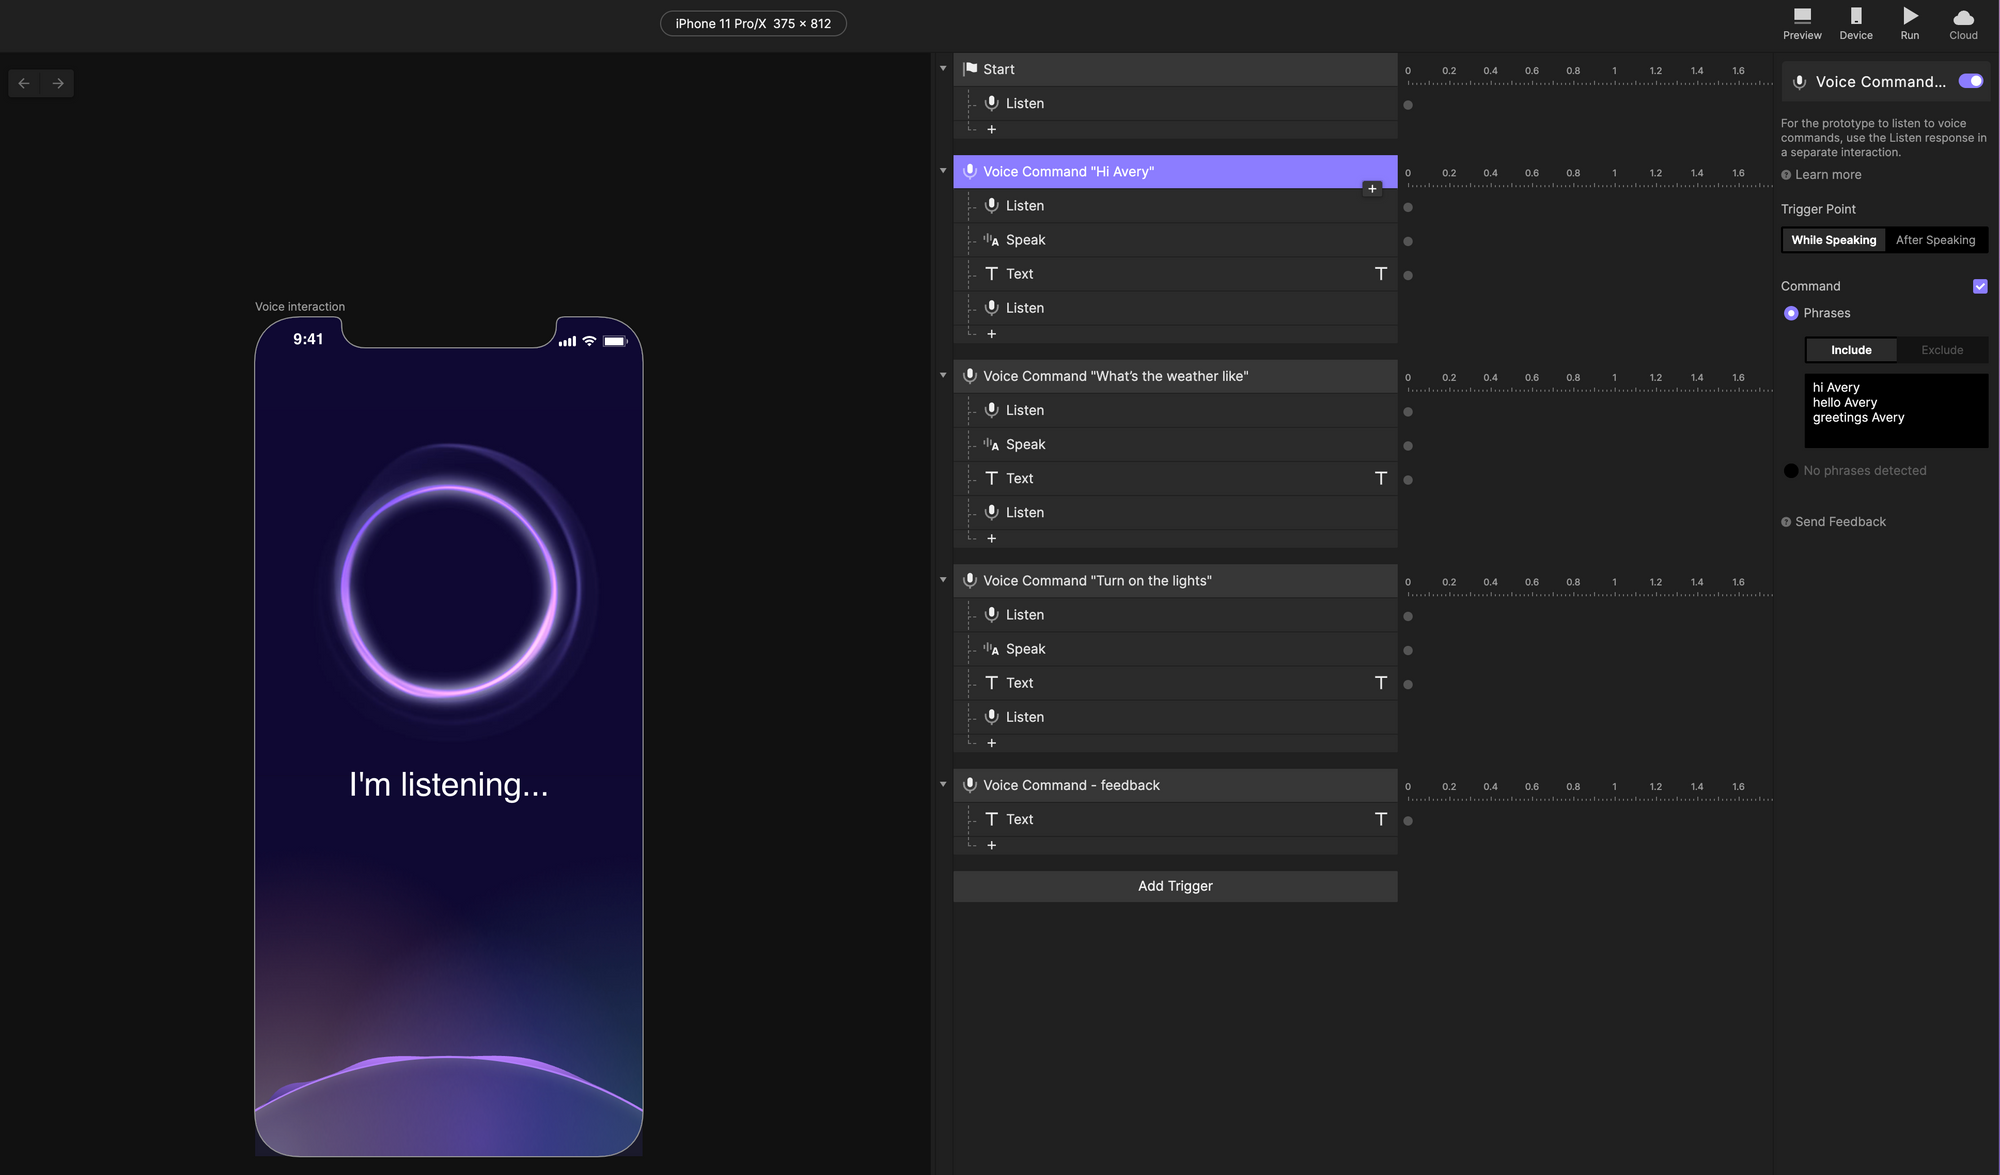
There's a listen, you speak, they reply, and then they listen again. Next, we're going to add another voice command, and we're going to ask them a question. I'll go with "What's the weather like?"
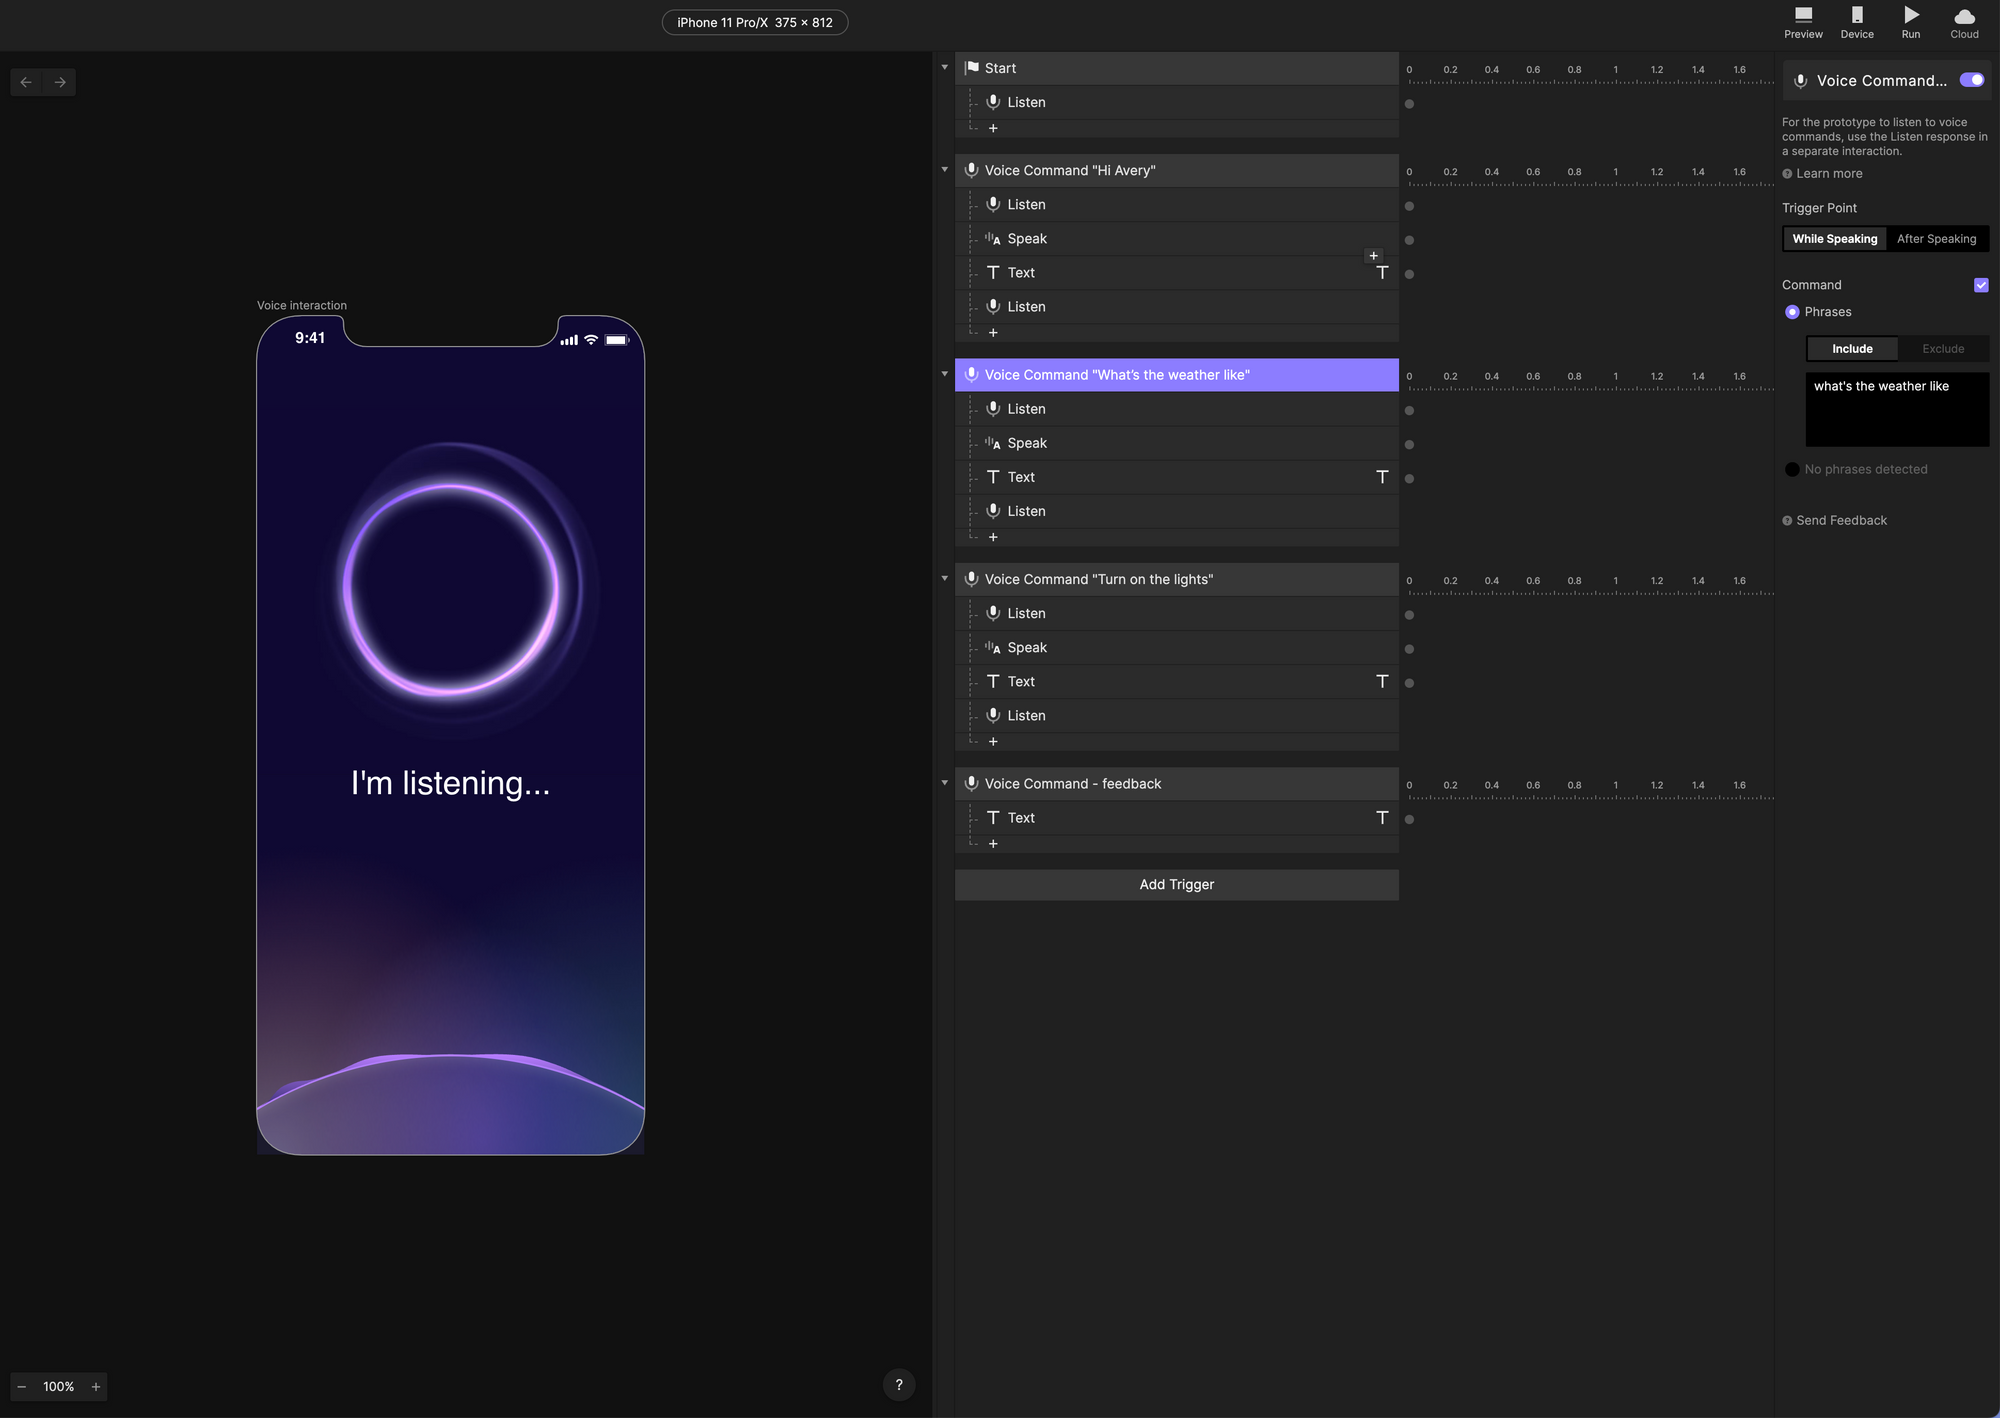
And then I'll add, "It's currently, 20 degrees and sunny." for the response phrase.
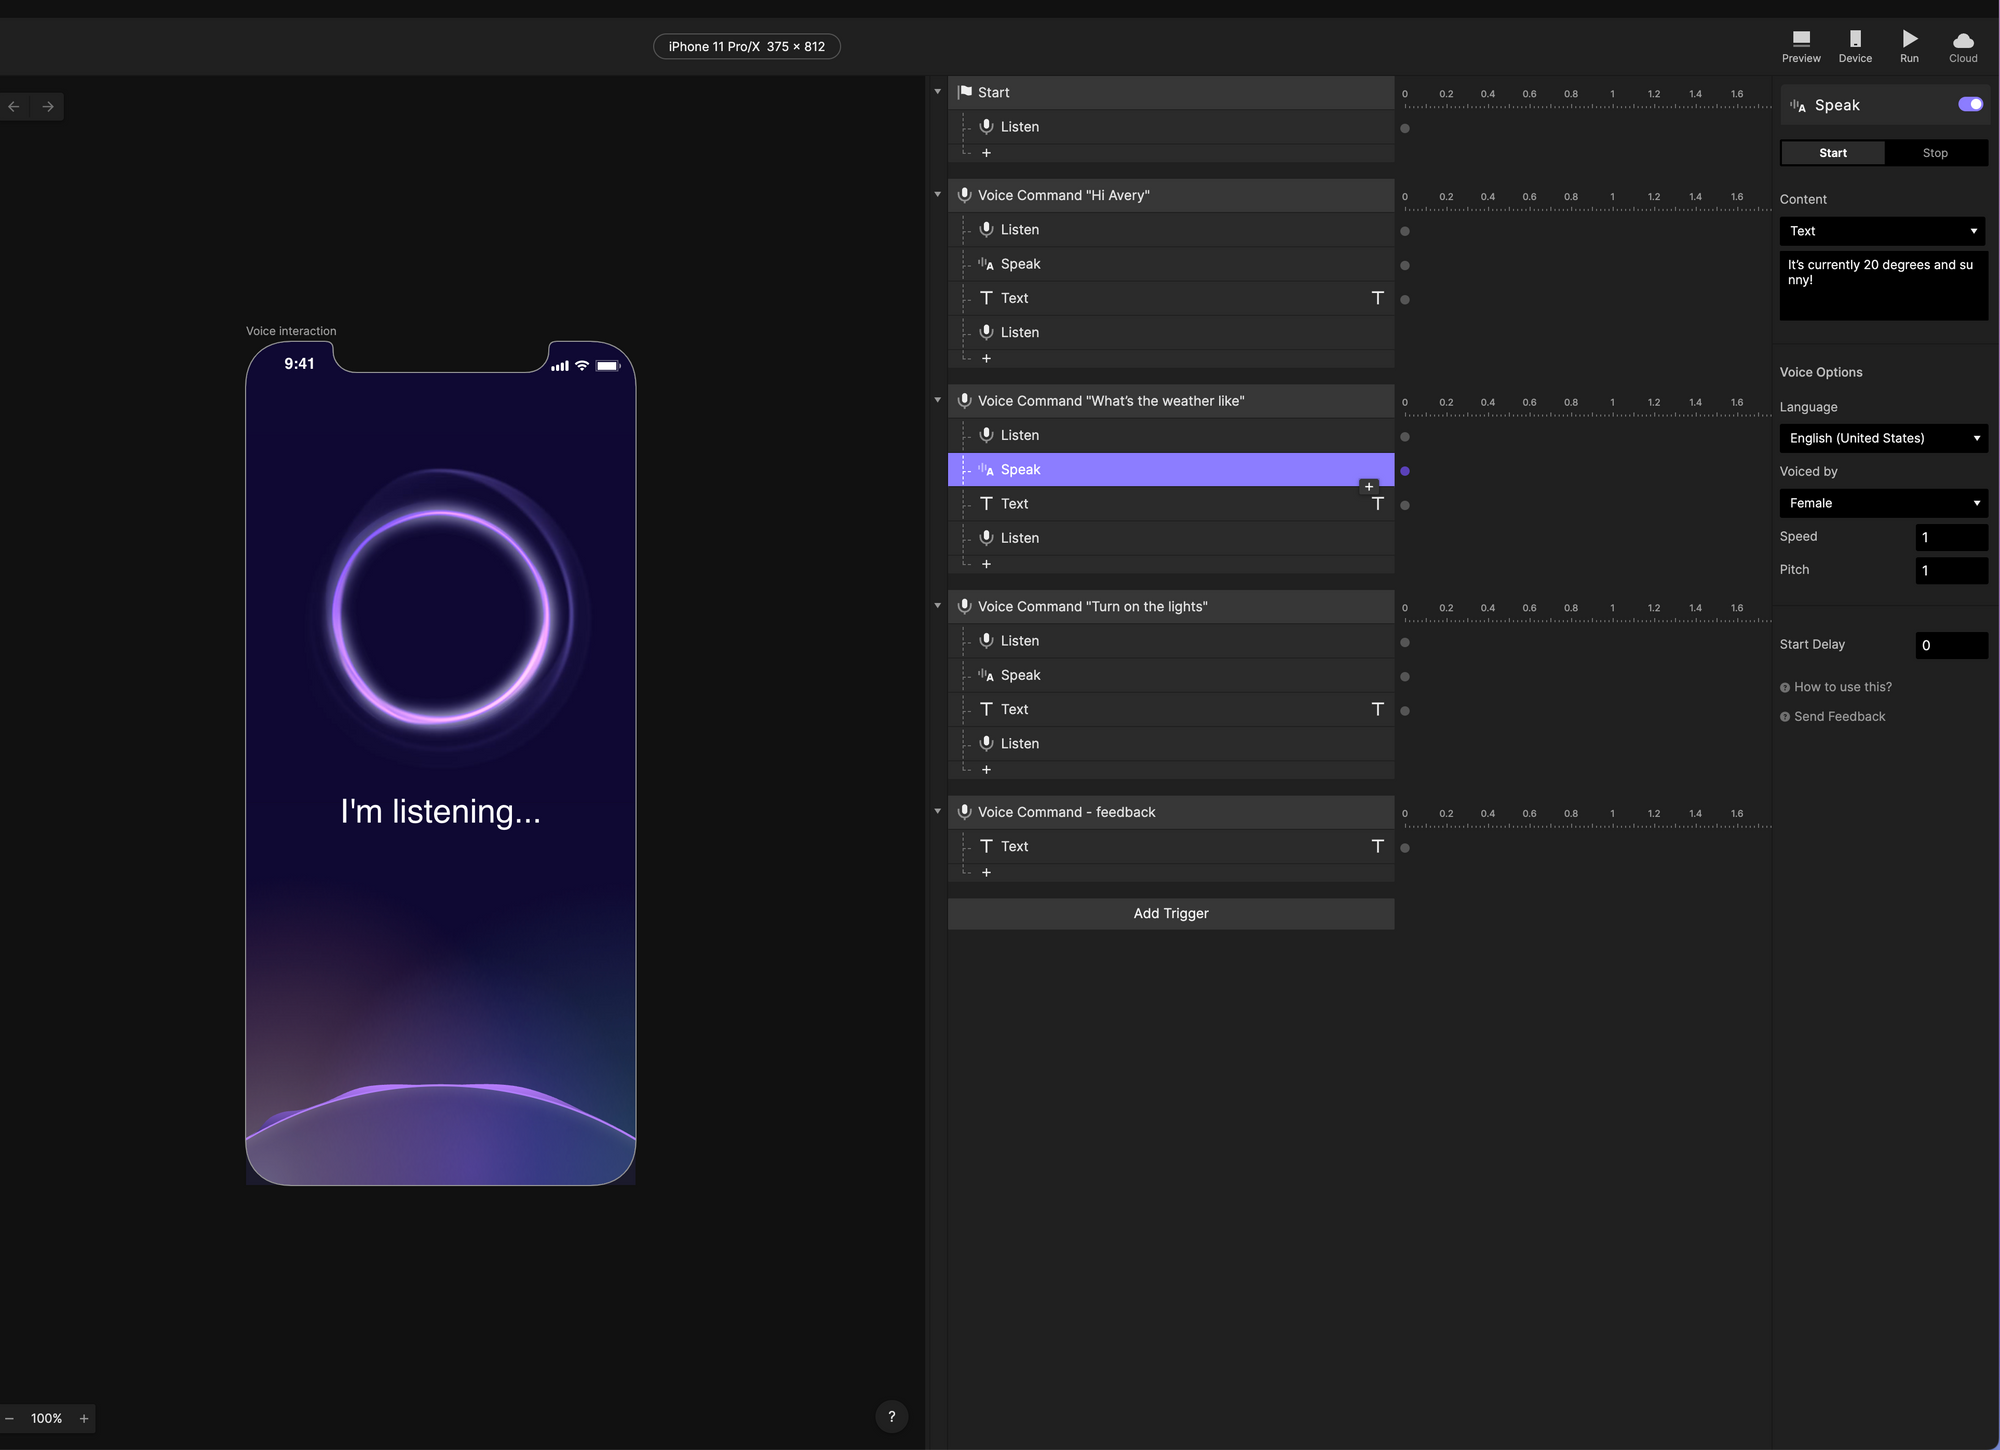
Now for the fun part, we're going to test it on our device. I've downloaded the ProtoPie app here on my phone (you’ll need this to test your prototypes on your mobile device), and I'm just going to scan that QR code right there on the screen. Now I can say, "Hi Avery, what's the weather like today?" and she replies “Currently, it’s 20 degrees and sunny."

In Summary
With ProtoPie, I was able to make these extremely realistic prototypes, micro-interactions and 3D animations that you just can't do easily in any other design software. And you don't have to take my word for it, companies like Google, Meta, and Microsoft, and thousands of other design teams from around the world are using ProtoPie to create these amazing advanced interactions and prototypes. Use this discount for 30% off and go check it out for yourself! I challenge you to start making the coolest and craziest prototypes you can come up with and share them with us @DesignerUp and @ProtoPie on social media. Happy Prototyping!