
I've spent hundreds of hours vibe coding and building apps this year trying out new tools and helping my students and businesses build products with AI. What I found is that most people are doing it wrong and wasting a lot of time and credits in the process.
What you're going to learn
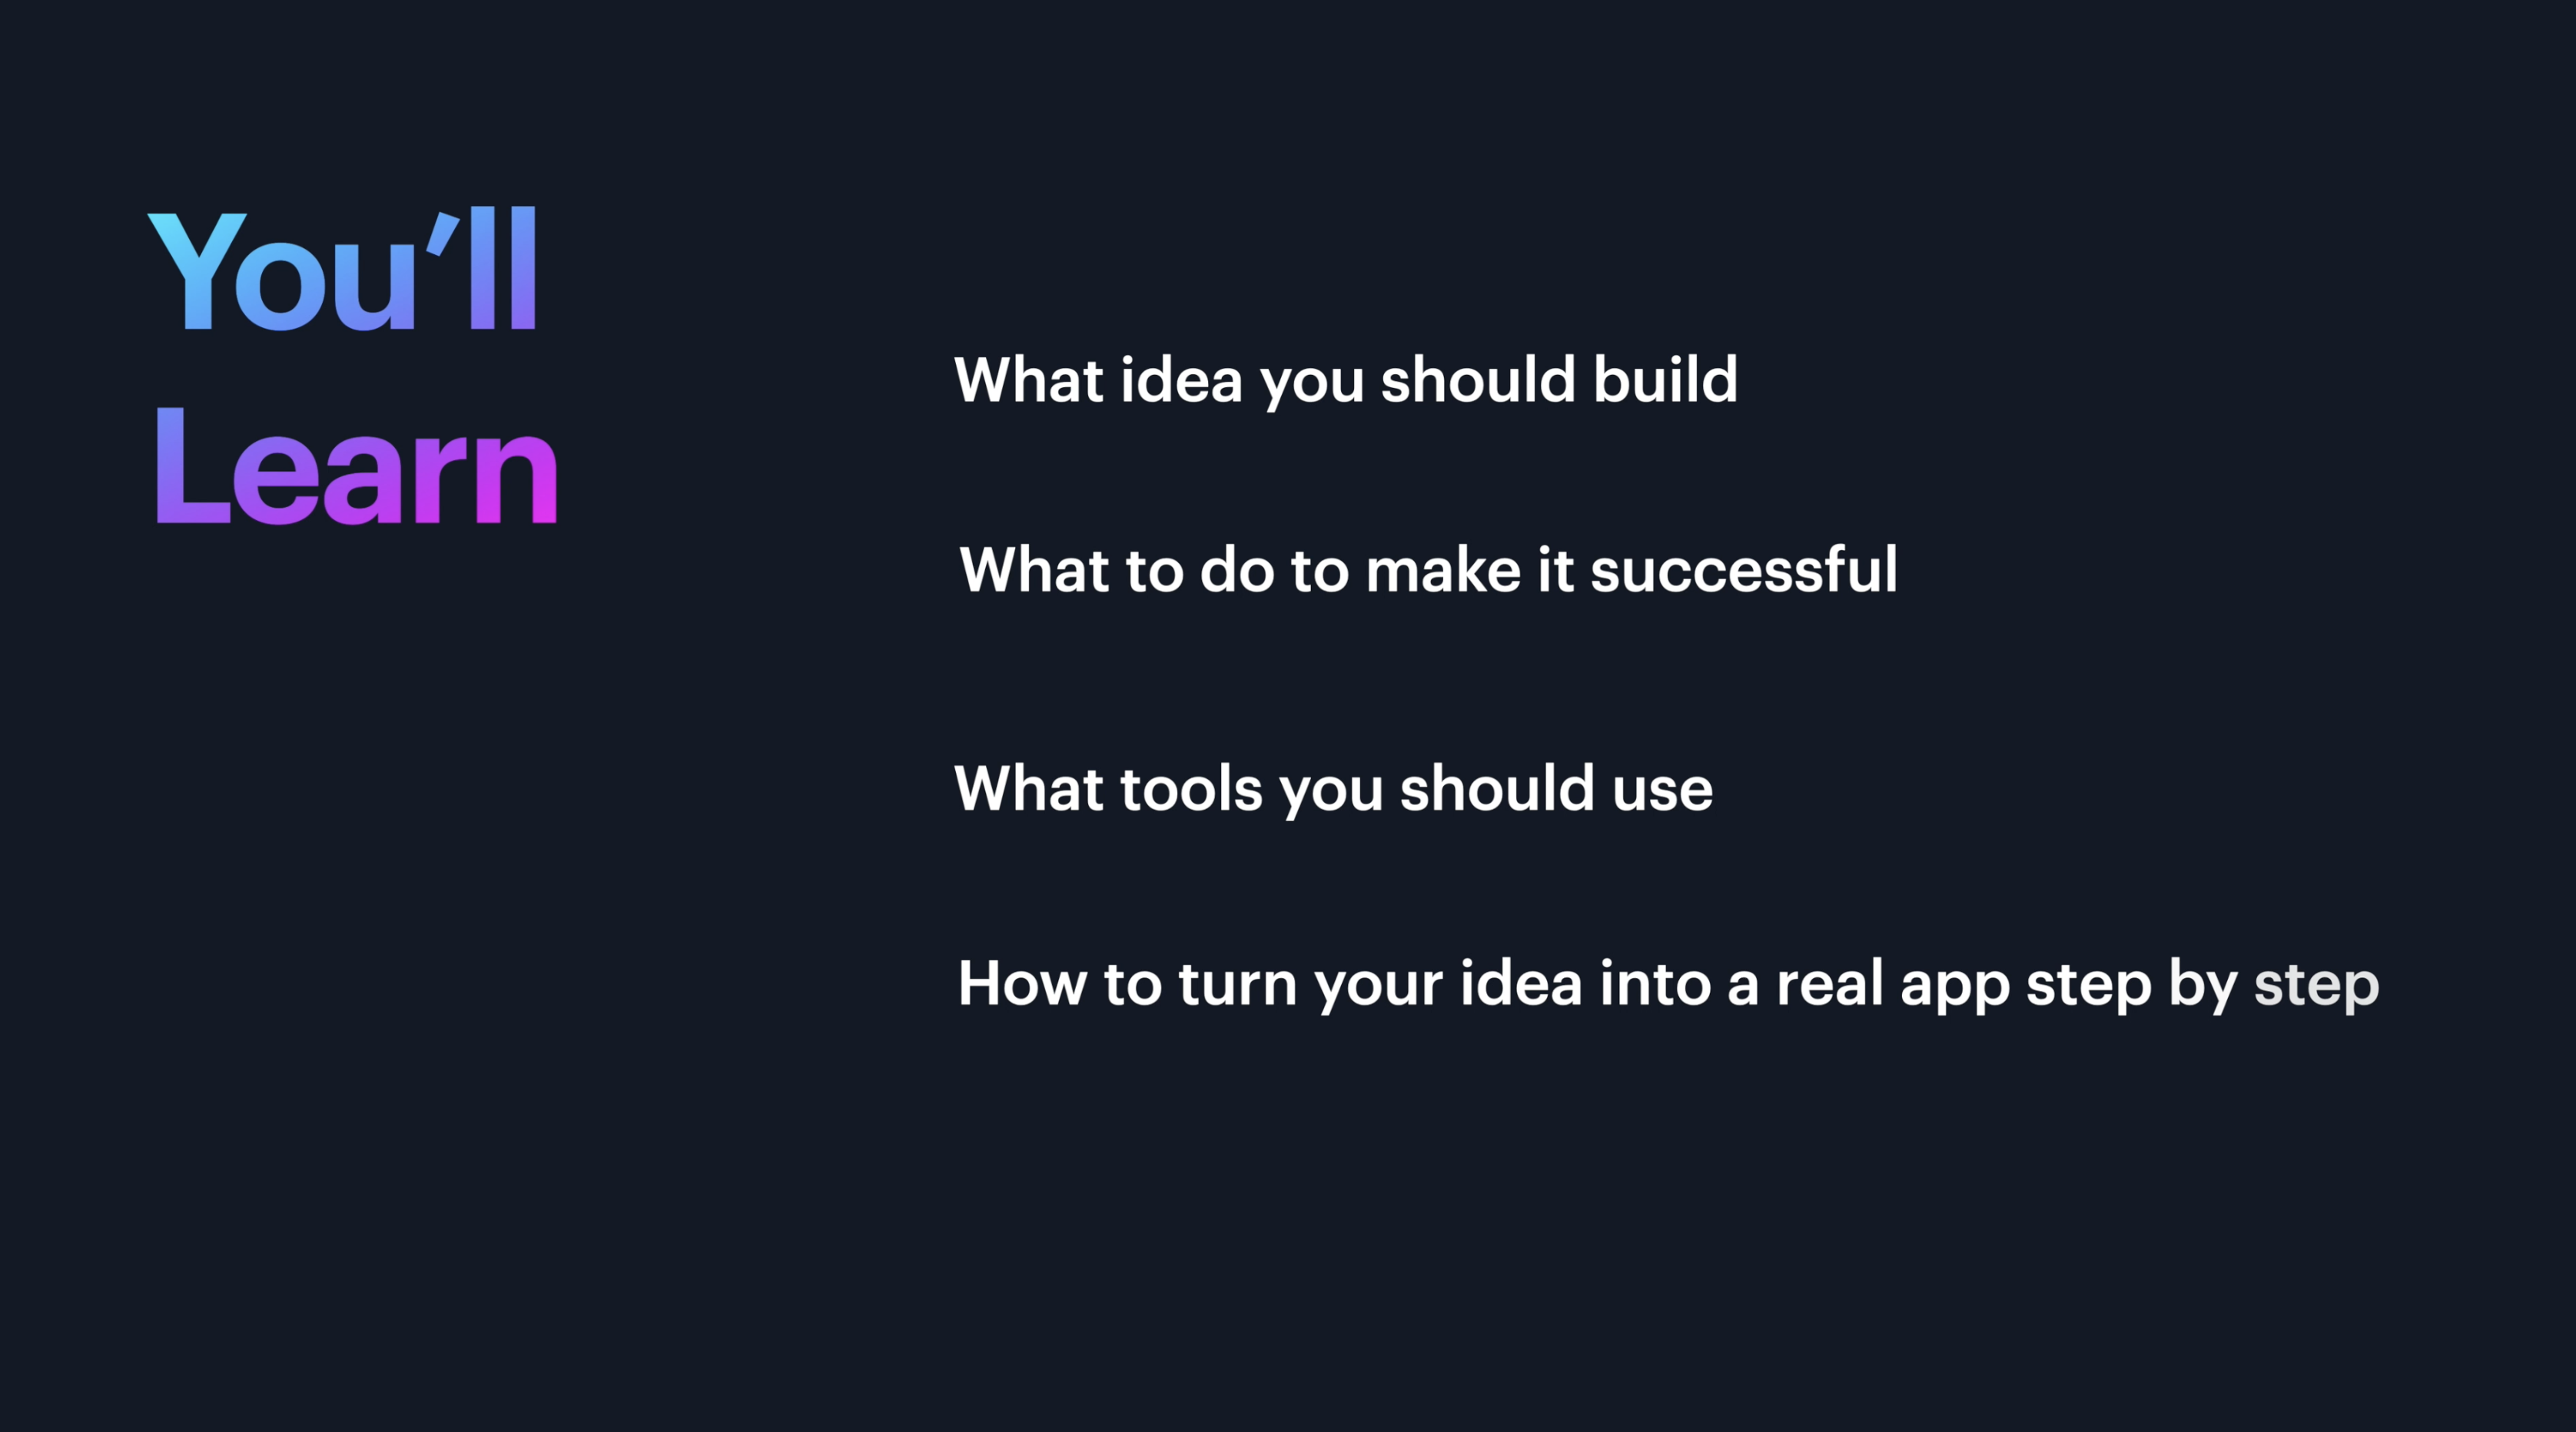
If you want to be better than most at vibe coding, I'm going to show you my four-step framework for figuring out what idea you should build, what to do to make it successful, what tools you should use, and how to turn your idea into a real app step-by-step.
We're going to do this by building a complex SaaS app together that integrates AI LLM APIs like OpenAI, Google Gemini 3 and Anthropic and third-party apps like Google Calendar.
Who this guide is for
Whether you’re a designer, a developer, a product manager, or a founder I'm curious– what is the closest that you have come to building a really good app? Did you get stuck at some stage? Was it learning the tool? Was it the prompting? Did you have trouble coming up with an idea?
If any of those things have plagued you in the past, this guide will help you overcome those hurdles and make something better than average and will save you a significant amount of trial and error—not to mention wasted credits.
Step One: Research and Problem
Step one is research and problem definition. This is by far the most important step, but it's the part that people don't spend nearly enough time on.
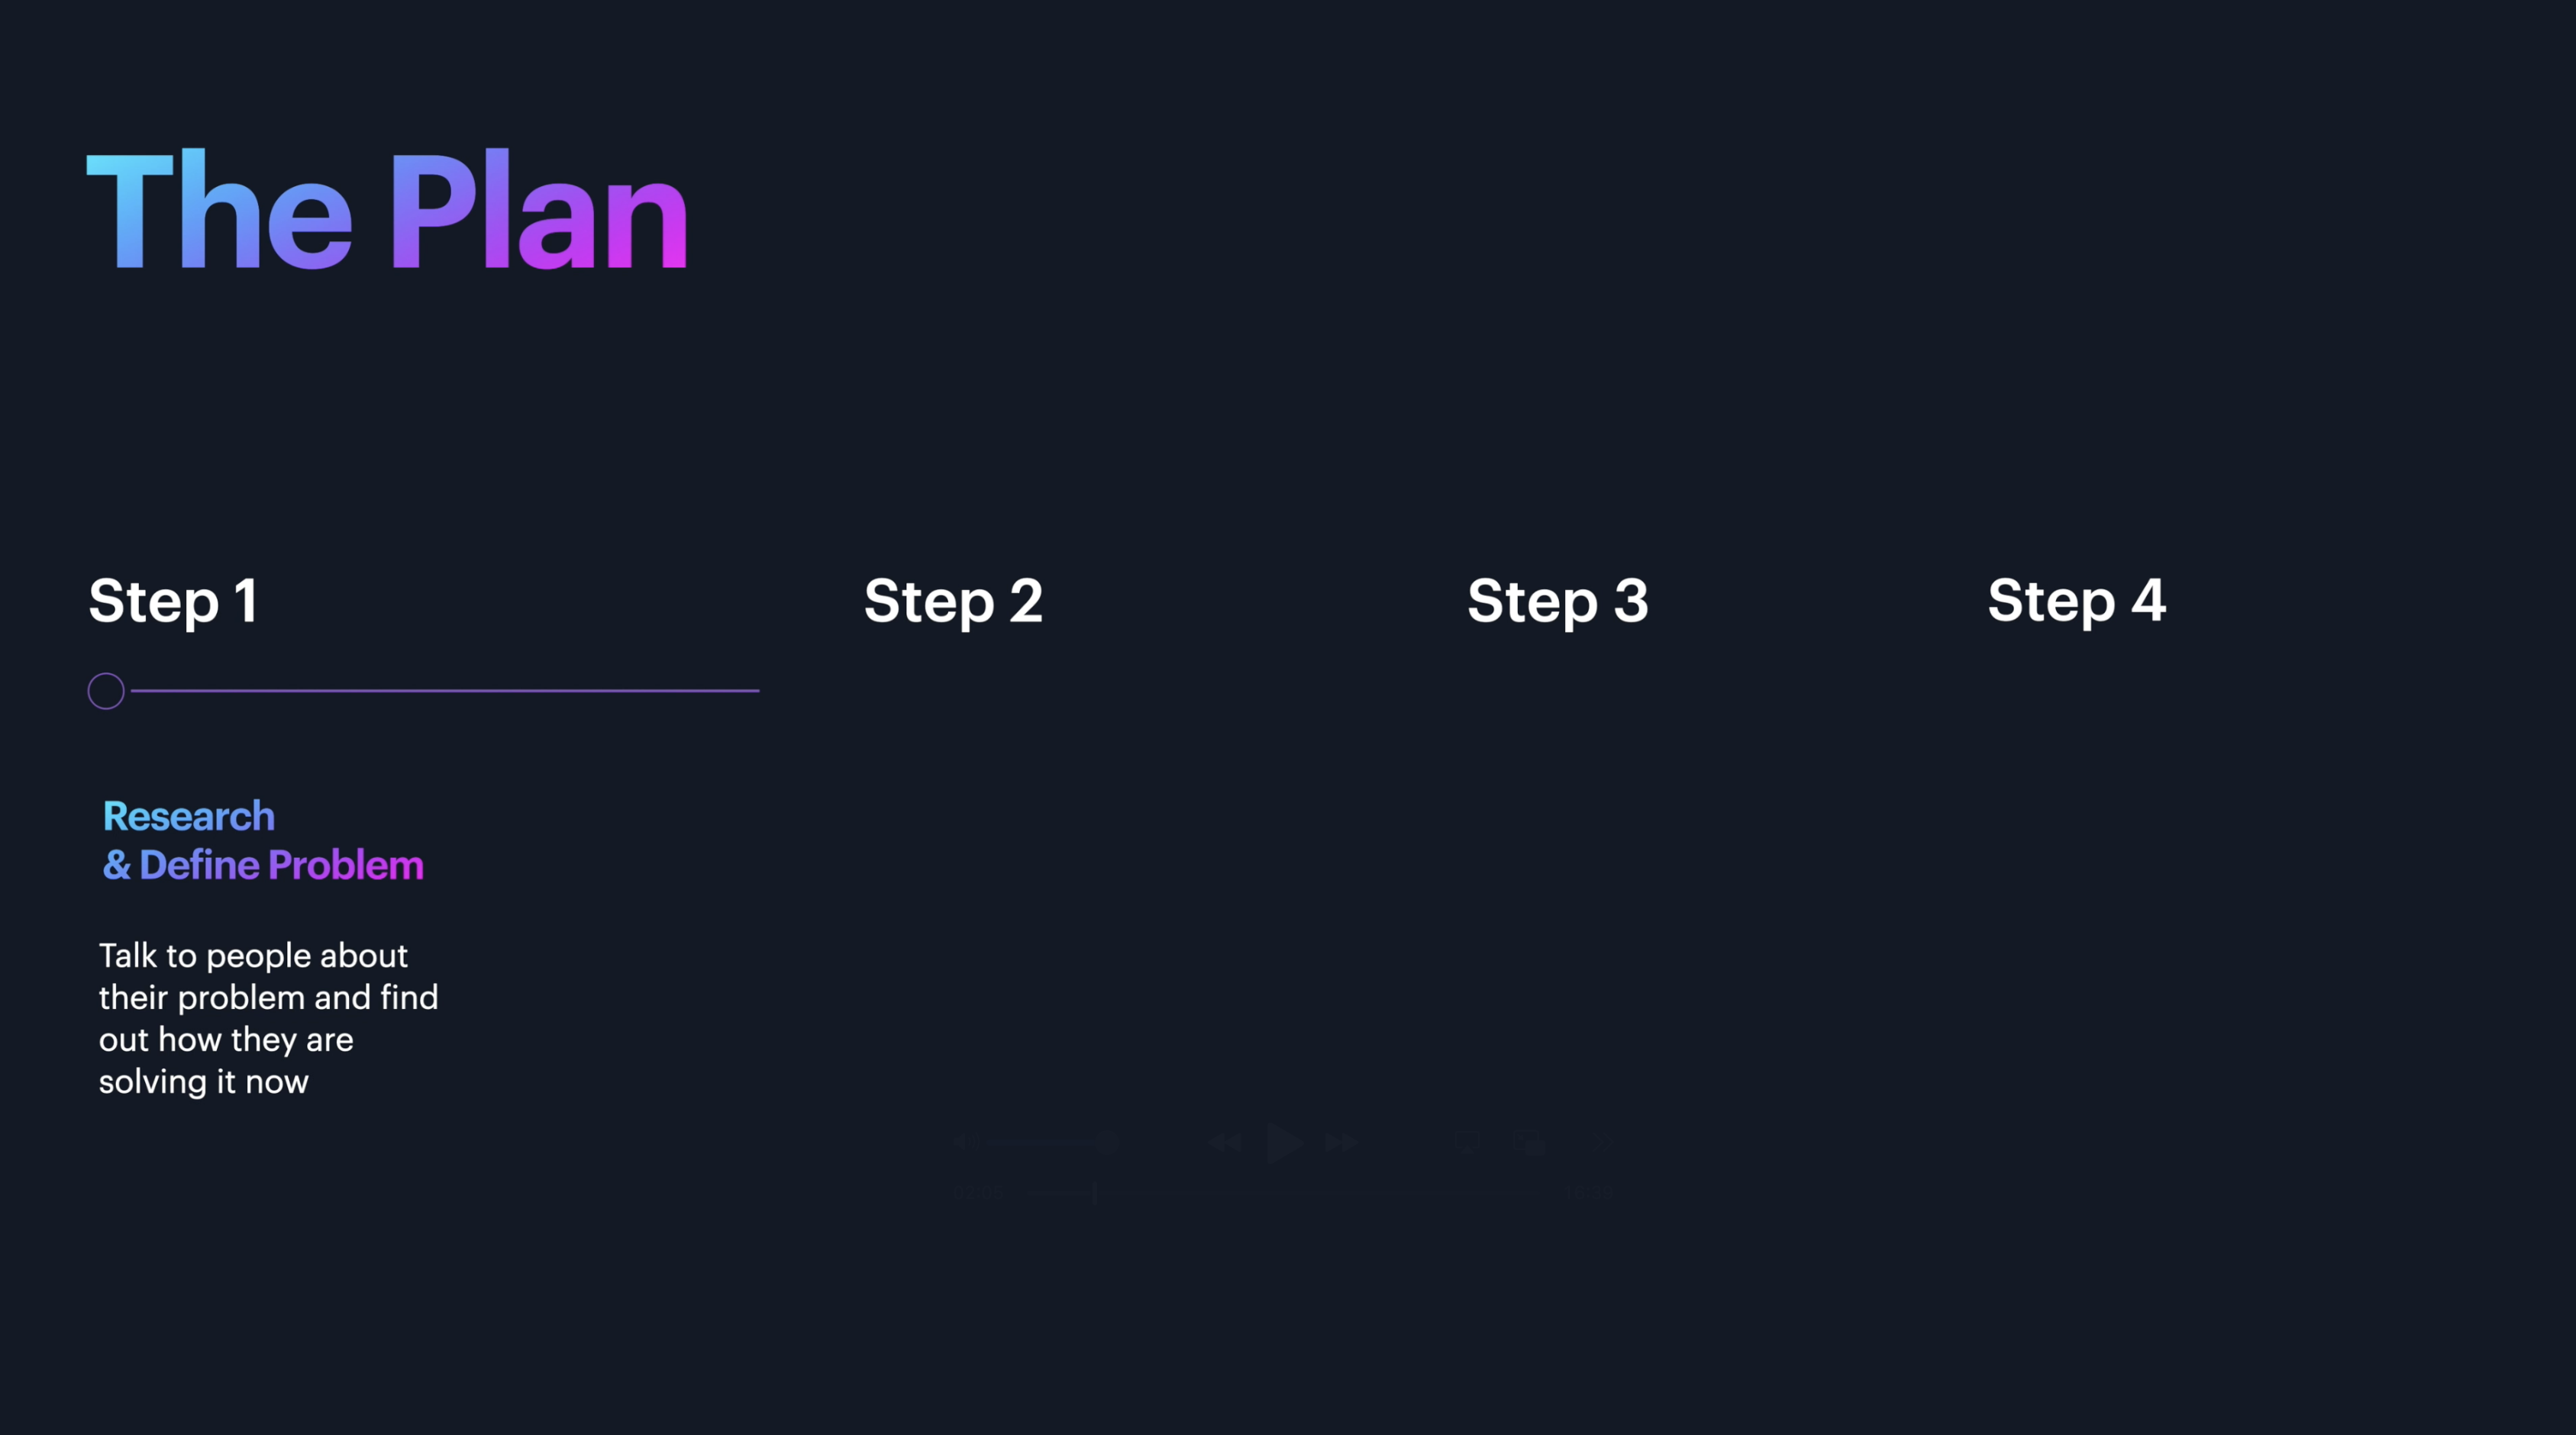
It all starts with picking the right problem to solve. And keep in mind that I said the right problem to solve and not the right solution to build. So I wanted to solve a problem that I had and that my fellow creators and teachers and founders that I know complain about constantly and that is
How do we create better social media posts to get more eyes on our content? So for this we need to do some good old-fashioned user and market research because honestly, building is easy now, good ideas and distribution are really hard.
I kicked off my research by talking to a bunch of folks that I know who are content creators to see what they're doing, what they're struggling with.
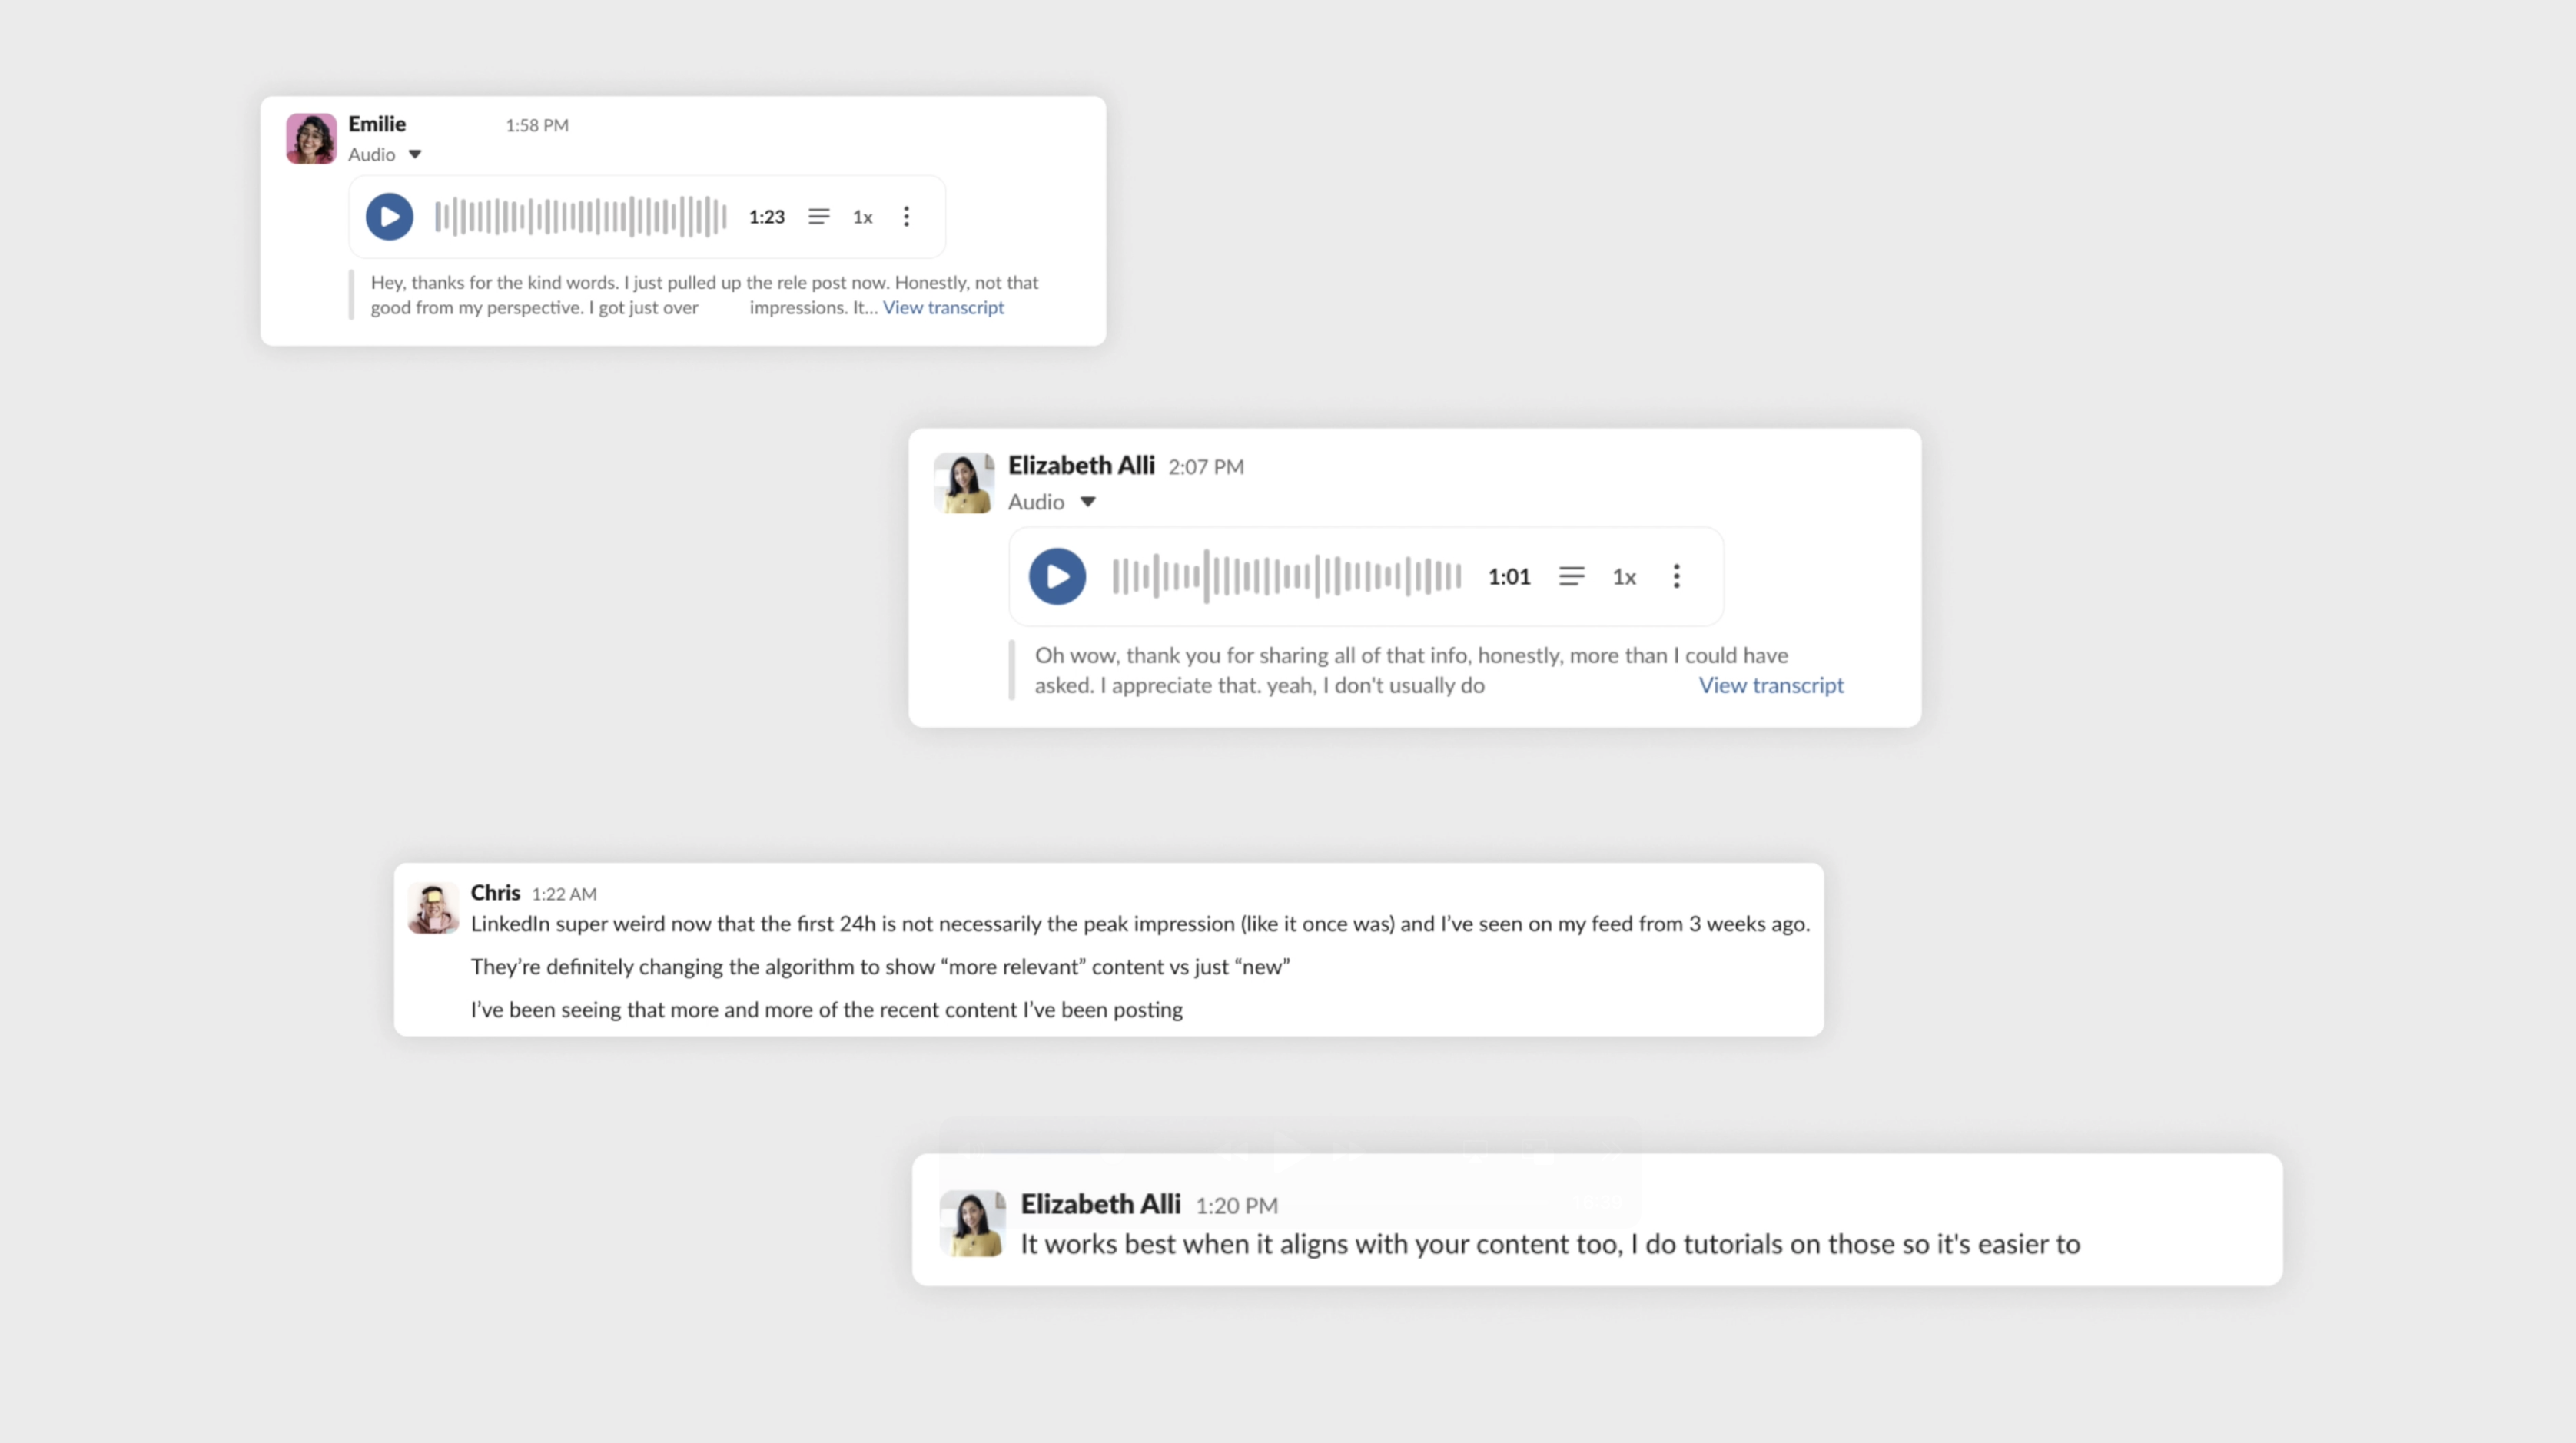
Whatever it is, spend as much time as you can getting to know the people and the problem space. If you're thinking about launching and monetizing later, this is even more important.
🔸Do enough people have this problem?
🔸How would you actually get out in front of them?
🔸Would they pay to solve this problem?
Competitive Analysis
What about existing products that already do this? Buffer is an example of one of the most popular social media scheduling tools, and this is what it generates with its AI assistant.
Buffer, for example, is one of the most widely used social media scheduling tools, and it now includes an AI assistant for generating posts. But examining existing products often reveals an important truth: the presence of a solution doesn’t guarantee the quality of that solution. And it certainly doesn’t mean there isn’t room to create something better.
Research Insights
The purpose of this early research phase is to uncover two or three meaningful insights and define a clear unique value proposition—something that will guide every decision that comes afterward.
After interviewing, surveying, and having long conversations with other creators and founders, here’s what emerged:
💡 Insight 1: Each platform has its own etiquette—and its own “invisible rules.”
There are subtle algorithmic preferences and formatting conventions baked into every platform. Most people only learn them by running countless small experiments, paying attention to what performs, and noticing what quietly gets suppressed.
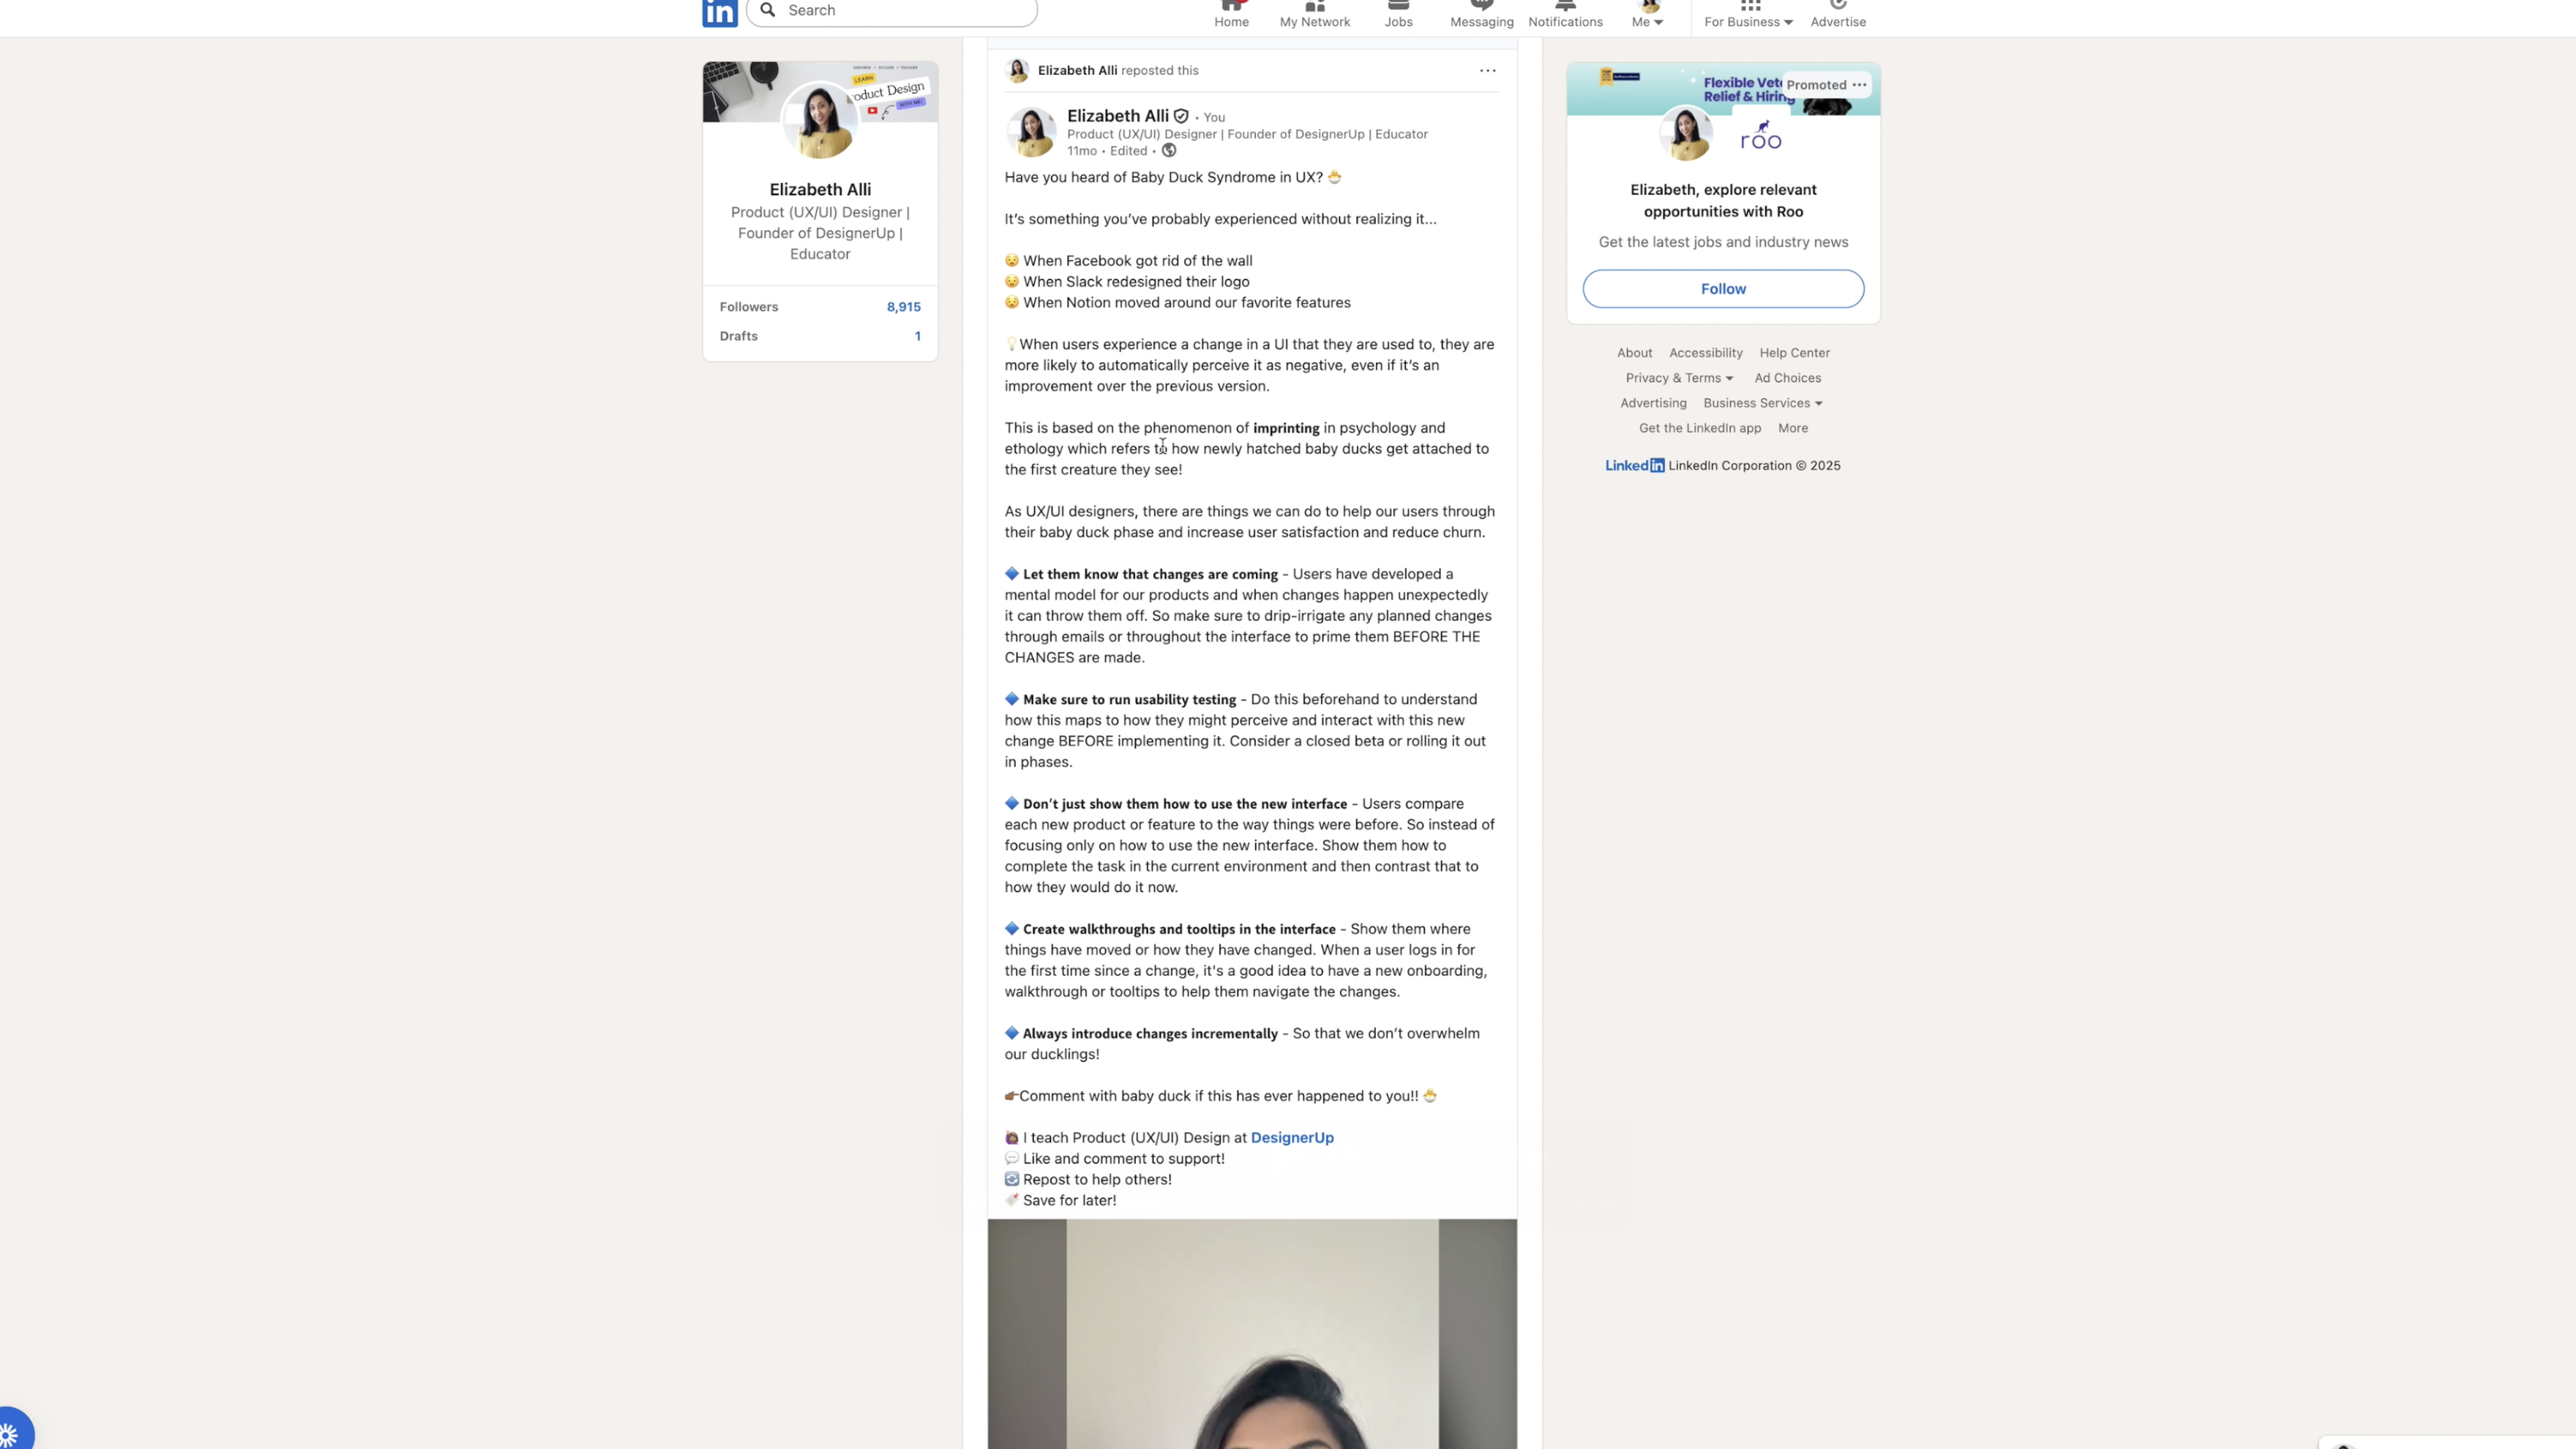
💡 Insight 2: AI thinks in content. People think in shapes.
AI can generate a persuasive block of text, but that doesn’t mean it will work on a platform like LinkedIn. Humans respond to structure—the shape of the post, the rhythm of the lines, the use of emojis, how much appears above the fold, and the overall scannability. These visual qualities often matter more than the words themselves.
What many creators are doing right now is cobbling together their own workflow: digging through past notes, asking friends for advice, and relying on a patchwork of tools. Meanwhile, those who have been writing online for decades have a strong intuition built from trial and error—not abstract theories.
Which leads to the unique value proposition for this project:
💡 The real value comes from the accumulated, hard-earned knowledge you can’t find by browsing the internet.
Capturing that lived expertise—those nuanced rules, patterns, and formatting instincts—is what will make this tool genuinely useful, and it’s why I feel confident moving forward with it.
Step Two: Plan and Strategize
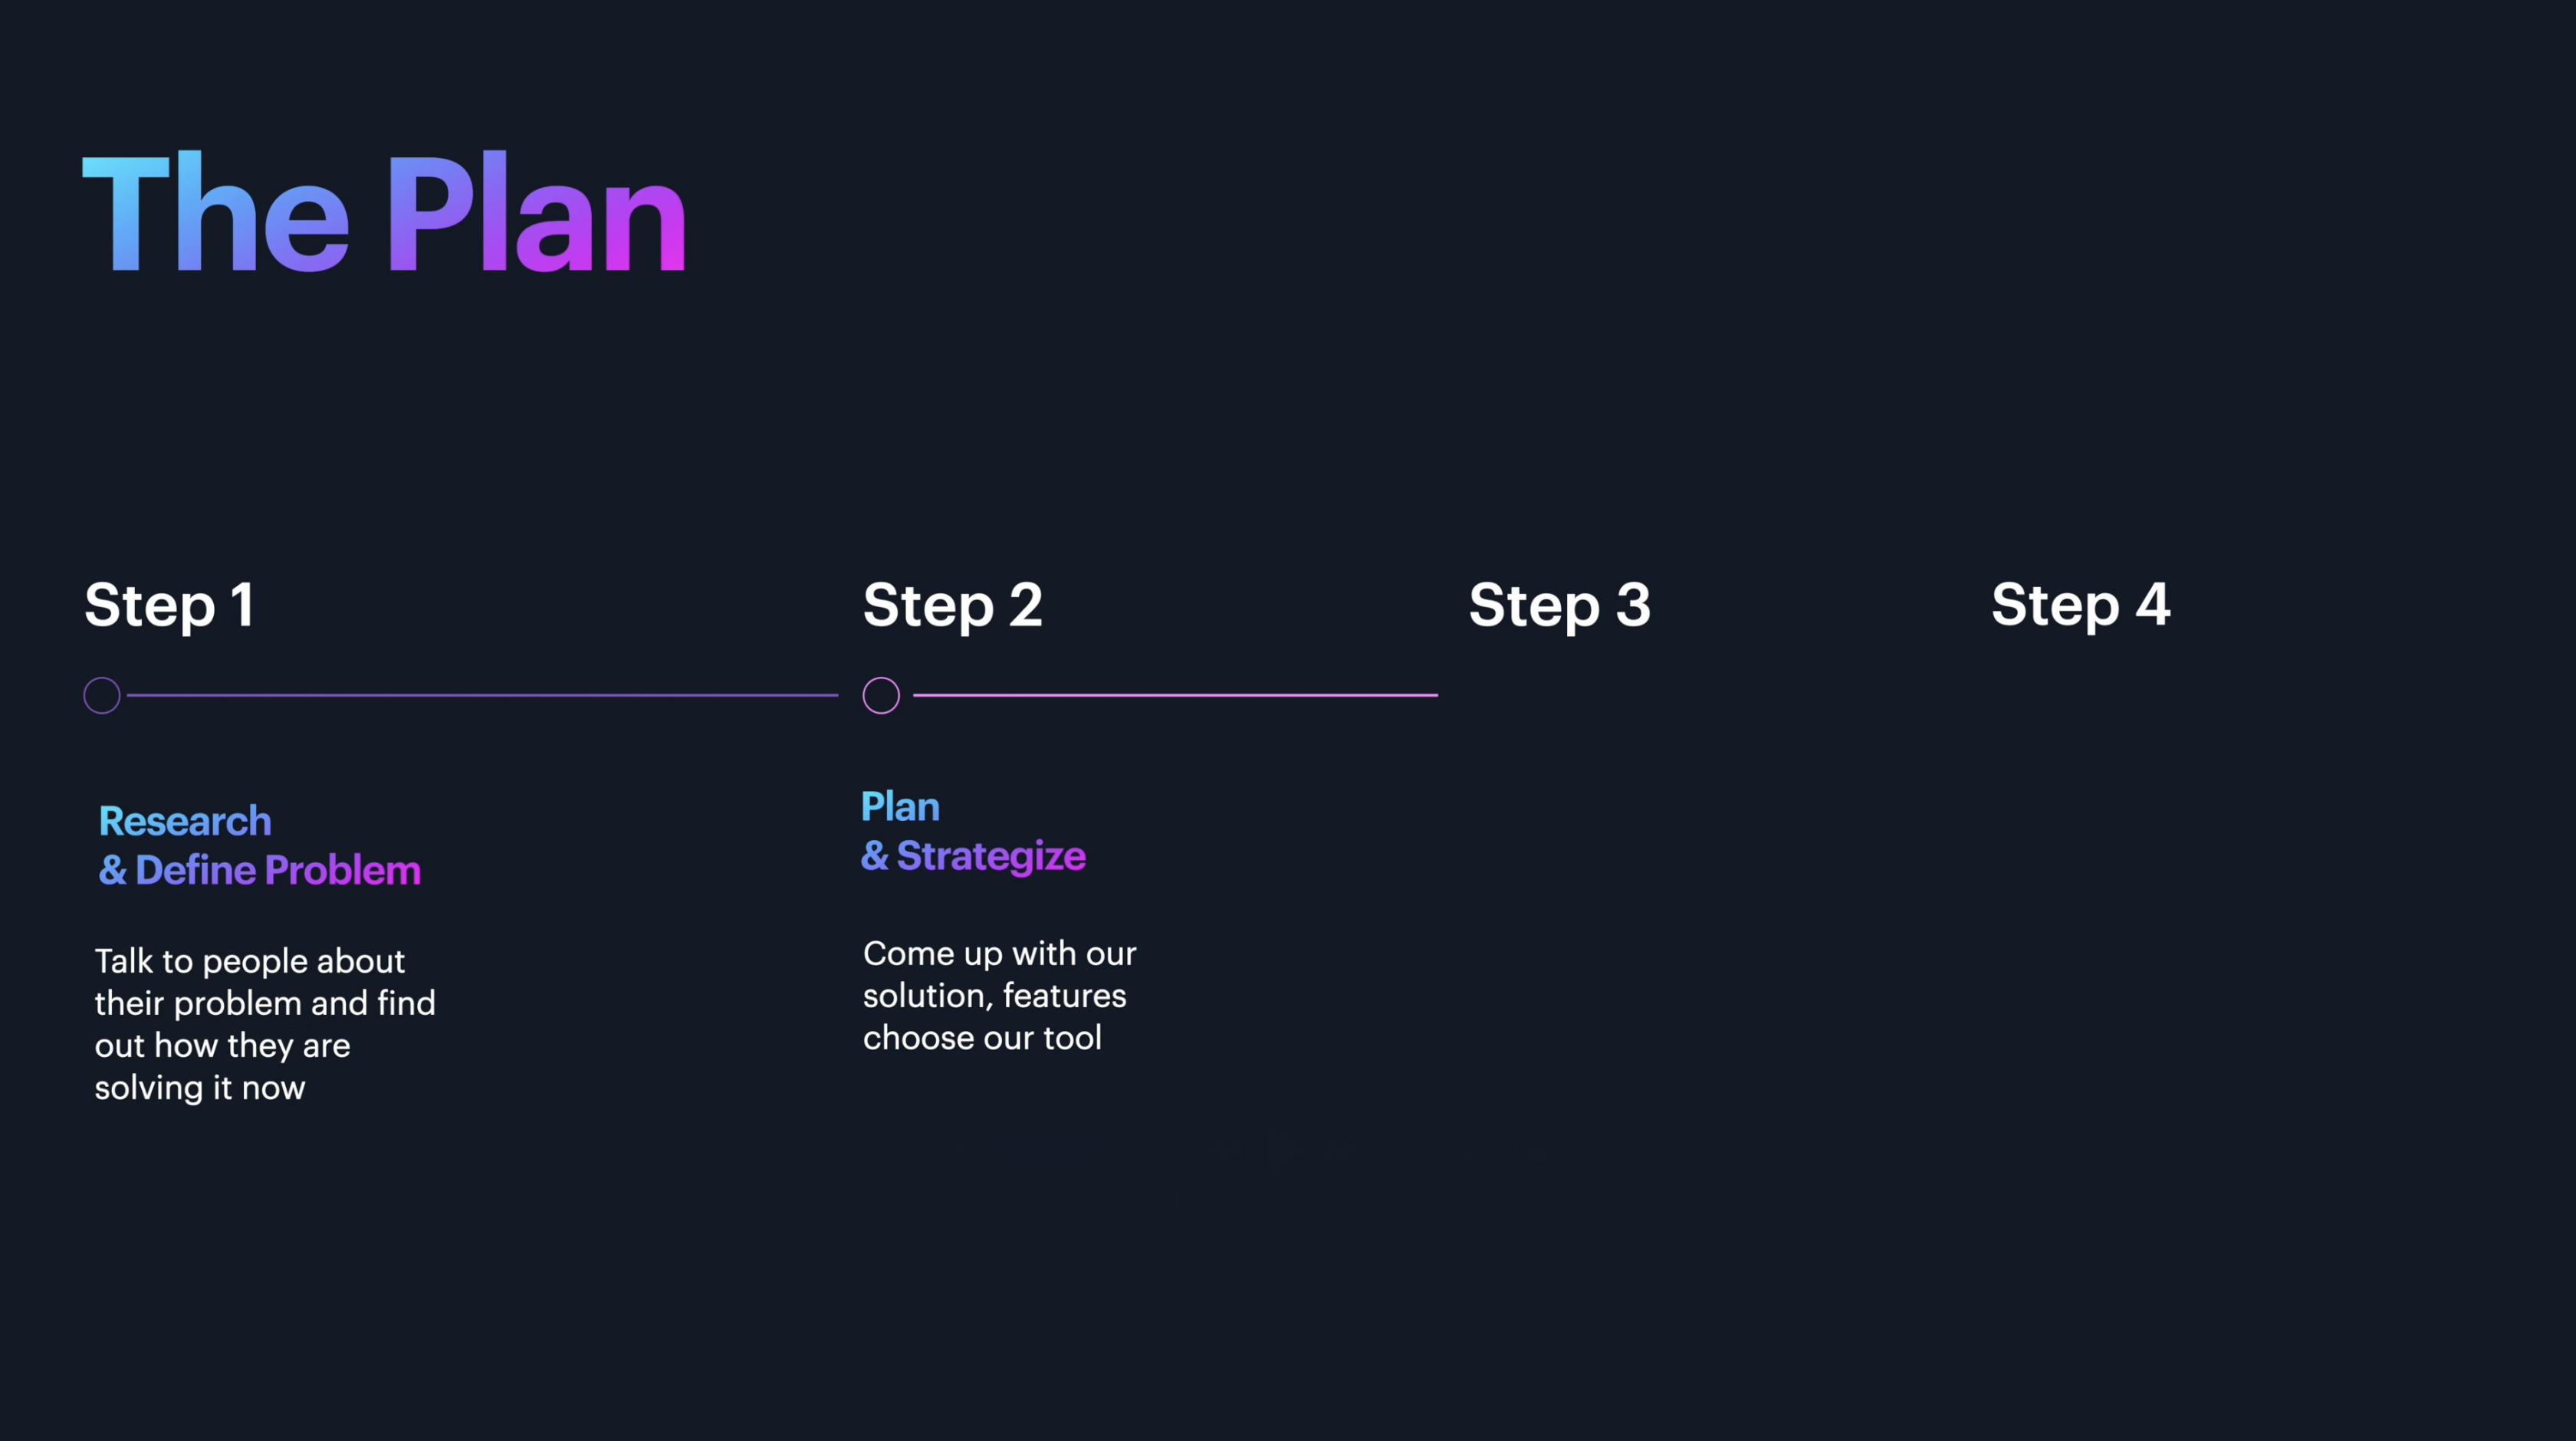
Step two is planning and strategizing. I need to come up with the features and the UI and the user experience that I want for the app. It doesn't have to be a massive startup idea, either it can be:
App Ideas
- An internal tool that saves you time
- Something that reduces a repetitive task
- A B2B tool like a dashboard or an automation
- Something that consolidates scattered tools
To save myself time here, I'm going to start by enlisting the help of ChatGPT.
I mentioned earlier, most people are doing it wrong. They just type in a single prompt asking the AI to build them something. But if you want to spend a lot less time going back and forth with the agent and debugging things, then I recommend ditching the prompt altogether and doing something called Metaprompting.
Prompting is telling the AI what to make.
Metaprompting is telling the AI how to think.
Usually, it's done by asking one AI to generate a complex prompt that you will then give to another AI.
That's exactly what we're going to do here with ChatGPT.
Generating a PRD (Product Requirements Document)
At this stage, I take all of my research—the notes I’ve gathered, the insights from conversations with other creators, and the unique angles I want this app to have—and paste it directly into ChatGPT. I usually format it as a set of bullet points so the model can clearly understand what matters most.
Then I give it a ChatGPT simple instruction:
I want you to act like a co-founder and help me build this app idea called Visual Virality. Ask me any questions you need to such as:
- Who is this app for?
- What is the problem statement?
- What are the user stories?
- What type of app am I building?
💡The goal here with the metaprompt is to generate a PRD, which is known as a product requirements document that I will then give to to my AI Coding Agent.
VisualVirality — PRD + User Stories MetaPrompt for AI Agent
You're building VisualVirality — a viral social media content generator and planner that creates platform-native posts, previews them visually, and helps users post at the right time using best-practice checklists. Use /OpenAI for generating content /Google Gemini for generating images /Anthropic for generating further content or doing research.
Product Description
VisualVirality helps brands grow organically by turning a single topic into multiple platform-specific viral posts. Each post is optimized for how people consume and engage with content on LinkedIn, X (Twitter), Instagram, Threads, TikTok, YouTube (script format), and Medium (article outline). It adapts tone, formatting, and style per platform and helps users post smarter with visual previews, performance scores, and scheduling tools.
How It Works
Users start by entering a topic, goal (used internally), and keywords. They can paste in a viral post URL as a reference or let the app pull high-performing examples based on their topic.
Next, users choose the platforms they want to generate content for. Each version of the post is automatically rewritten with the correct tone, length, structure, formatting quirks, and cultural fit for the platform selected. Posts are displayed in realistic visual mockups that show exactly how they’d appear in the feed.
Each post also includes:
- A Tone Adjuster to shift between calm, bold, friendly, etc.
- An “Angle Regenerate” feature to try new framings (e.g. story-driven, contrarian, listicle, emotional).
- A “Rules to Avoid” section for banned phrases, cringey buzzwords, or brand-specific voice filters.
Virality Score & Post Preview
Each post receives a Virality Score — a prediction of how well it might perform — visualized with a fluid, animated “liquid metal” virality bar. Below it are suggestions to improve the score, such as strengthening the hook or adjusting line rhythm.
Posts are styled with attention to line breaks, emoji use, spacing, and scroll rhythm to mimic real high-performing content.
Smart Posting Checklist
Every post also generates a platform-specific checklist that guides users on how to post for best results. The checklist includes best practices and timing reminders, such as:
- “Don’t edit your LinkedIn post for 2 hours.”
- “Add your link to the comments after 1 hour.”
- “Repost your X thread with a new hook after 24 hours.”
- “Reply to your original tweet within 15 minutes to add context.”
- “Save your Instagram post to Stories the next day.”
Each checklist is time-aware (before post, after 1 hour, etc.), platform-specific, and toggleable in the UI.
Google Calendar Scheduling (Core Workflow)
After generating and reviewing a post, the user can schedule it by selecting a date and time. This will:
- Create a Google Calendar event.
- Automatically title the event with the platform and topic.
- Include a deep link back to the post inside VisualVirality.
- Optionally copy a short version of the post into the calendar description.
- Send a reminder before the scheduled time so the user can post manually.
Users can also opt into a weekly flow: select approved topics at the start of the week, and the system will generate content for each, schedule them, and handle reminders.
Scheduling & Storage
All posts are saved in the user’s library, including version history and tone/angle variations. Each scheduled post includes its associated Google Calendar event ID and timestamp for easy updates or rescheduling.
User Stories
- As a user, I want to enter a topic and keywords so I can generate smart, tailored social posts.
- As a user, I want to paste viral links or fetch examples so I can learn from what’s working.
- As a user, I want to choose multiple platforms and get native versions so I don't just cross-post the same thing.
- As a user, I want to see real feed previews so I know exactly how it will look.
- As a user, I want a post checklist with reminders so I know when to take follow-up actions (like adding links or replying to comments).
- As a user, I want to schedule a post directly to my Google Calendar so I don’t forget to post it.
- As a user, I want calendar links to take me straight to the post in the app so I can copy, publish, or edit.
- As a user, I want a tone adjuster and banned phrase filter so it sounds like me, not a generic AI bot.
- As a user, I want to plan my week of content in advance so I can stay consistent without overthinking it.
From there, ChatGPT generates a full metaprompt tailored for the agent. It prepares a structured PRD, user stories, and the checklist logic I'll need for platform-specific formatting and algorithm-aware best practices. It even outlines the core user flow and captures details like microinteractions and small animation moments I want to include.
Looking at the output, it’s clear that this project will require support from multiple tools—likely several third-party integrations and definitely some AI assistance. The PRD becomes a guide for choosing which AI models or coding agents will work best for each part of the build.
Since this project branches into so many “side quests”—content generation, platform previews, research tasks, design details—the agent that I want to use is Replit.
Vibe Coding Agent Features
I've tried out a lot of different AI generation tools this year and by far, Replit is the most non-technical-person friendly that's still capable of making really complex apps without having to do any technical stuff.
✅ It lets you design it, build it, and deploy it.
✅ It has a super smart agent to help you.
✅ It integrates really well with Figma, which I like because it's a tool that I'm in all day anyway as a designer.
✅ I don't need an API key or to make like a developer account in order to integrate my app with things like Claude or OpenAI. I can use third-party connectors and integrations like Google Calendar.
✅ I don't have to worry about losing all of my work because it has built-in version control.
Those are just some of the things to consider when you're choosing what tools to build your app with. And for all of those reasons, I'm going to go with Replit.
Step Three: Design and Build
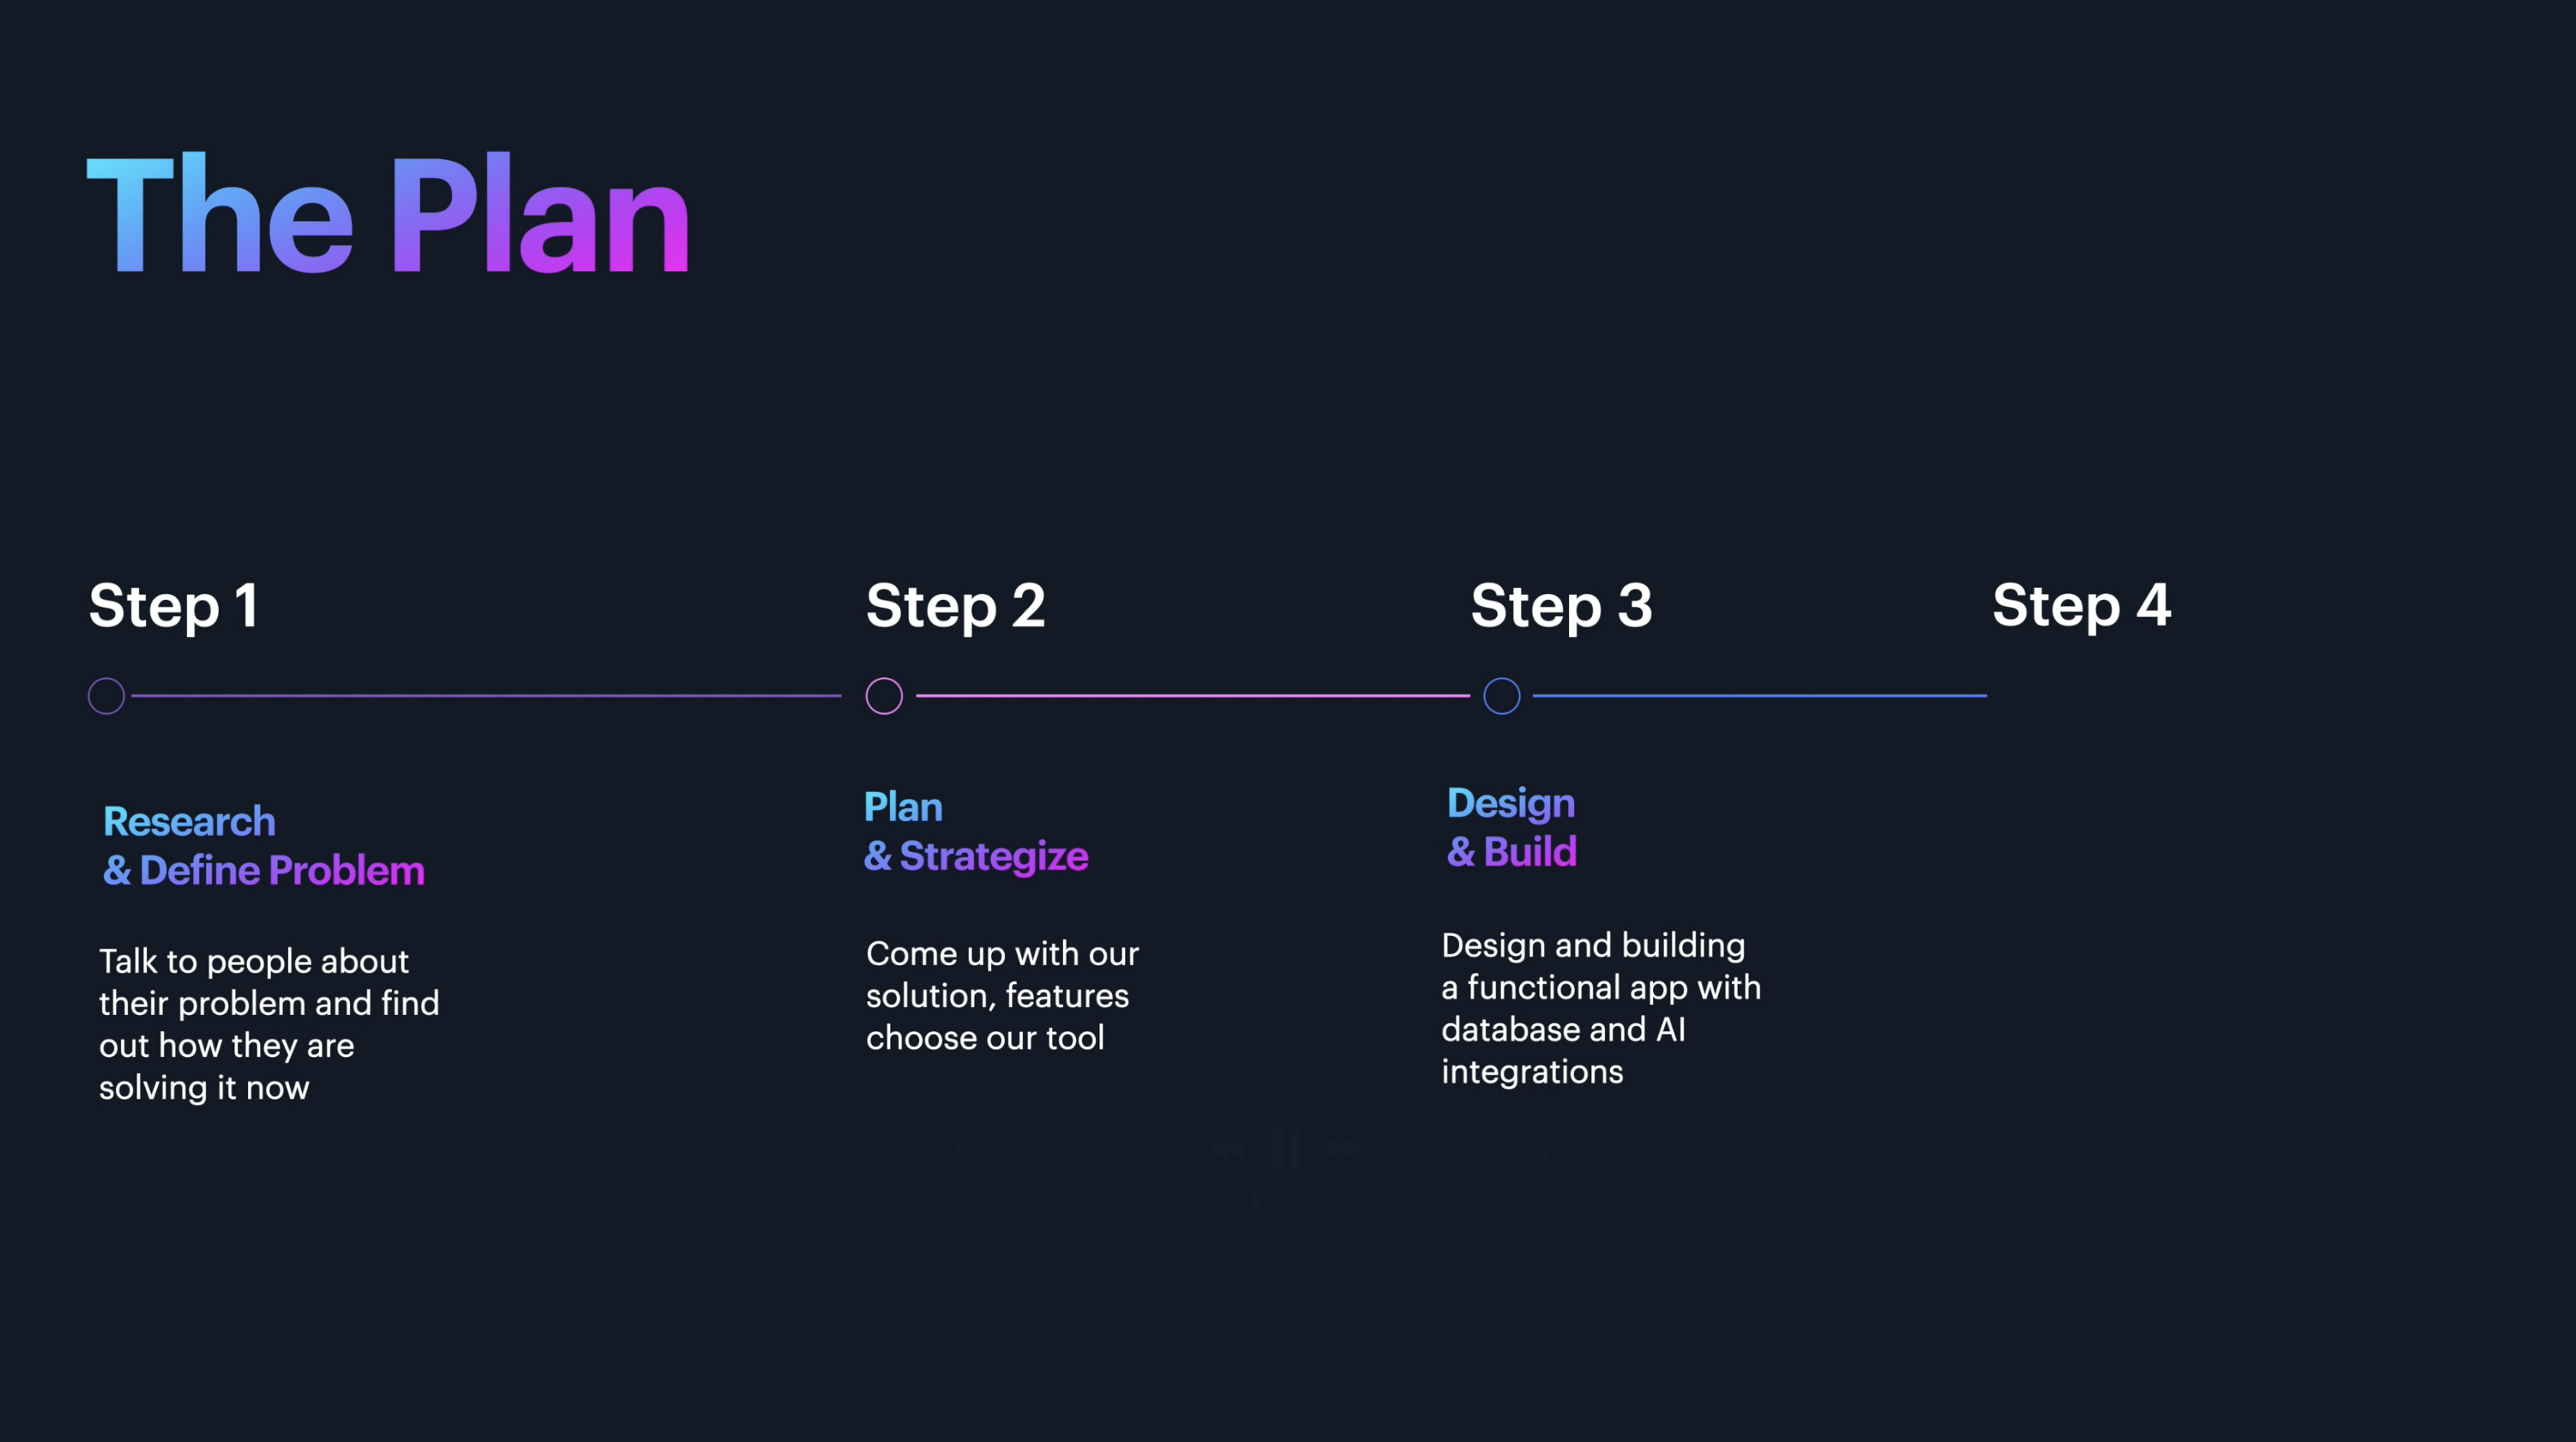
Once inside of Replit, the first thing you’ll notice is the main prompt screen. From here, you can decide how you want to begin: either by generating a quick design prototype or by diving straight into a full build that includes integrations, a database, and complete app scaffolding.
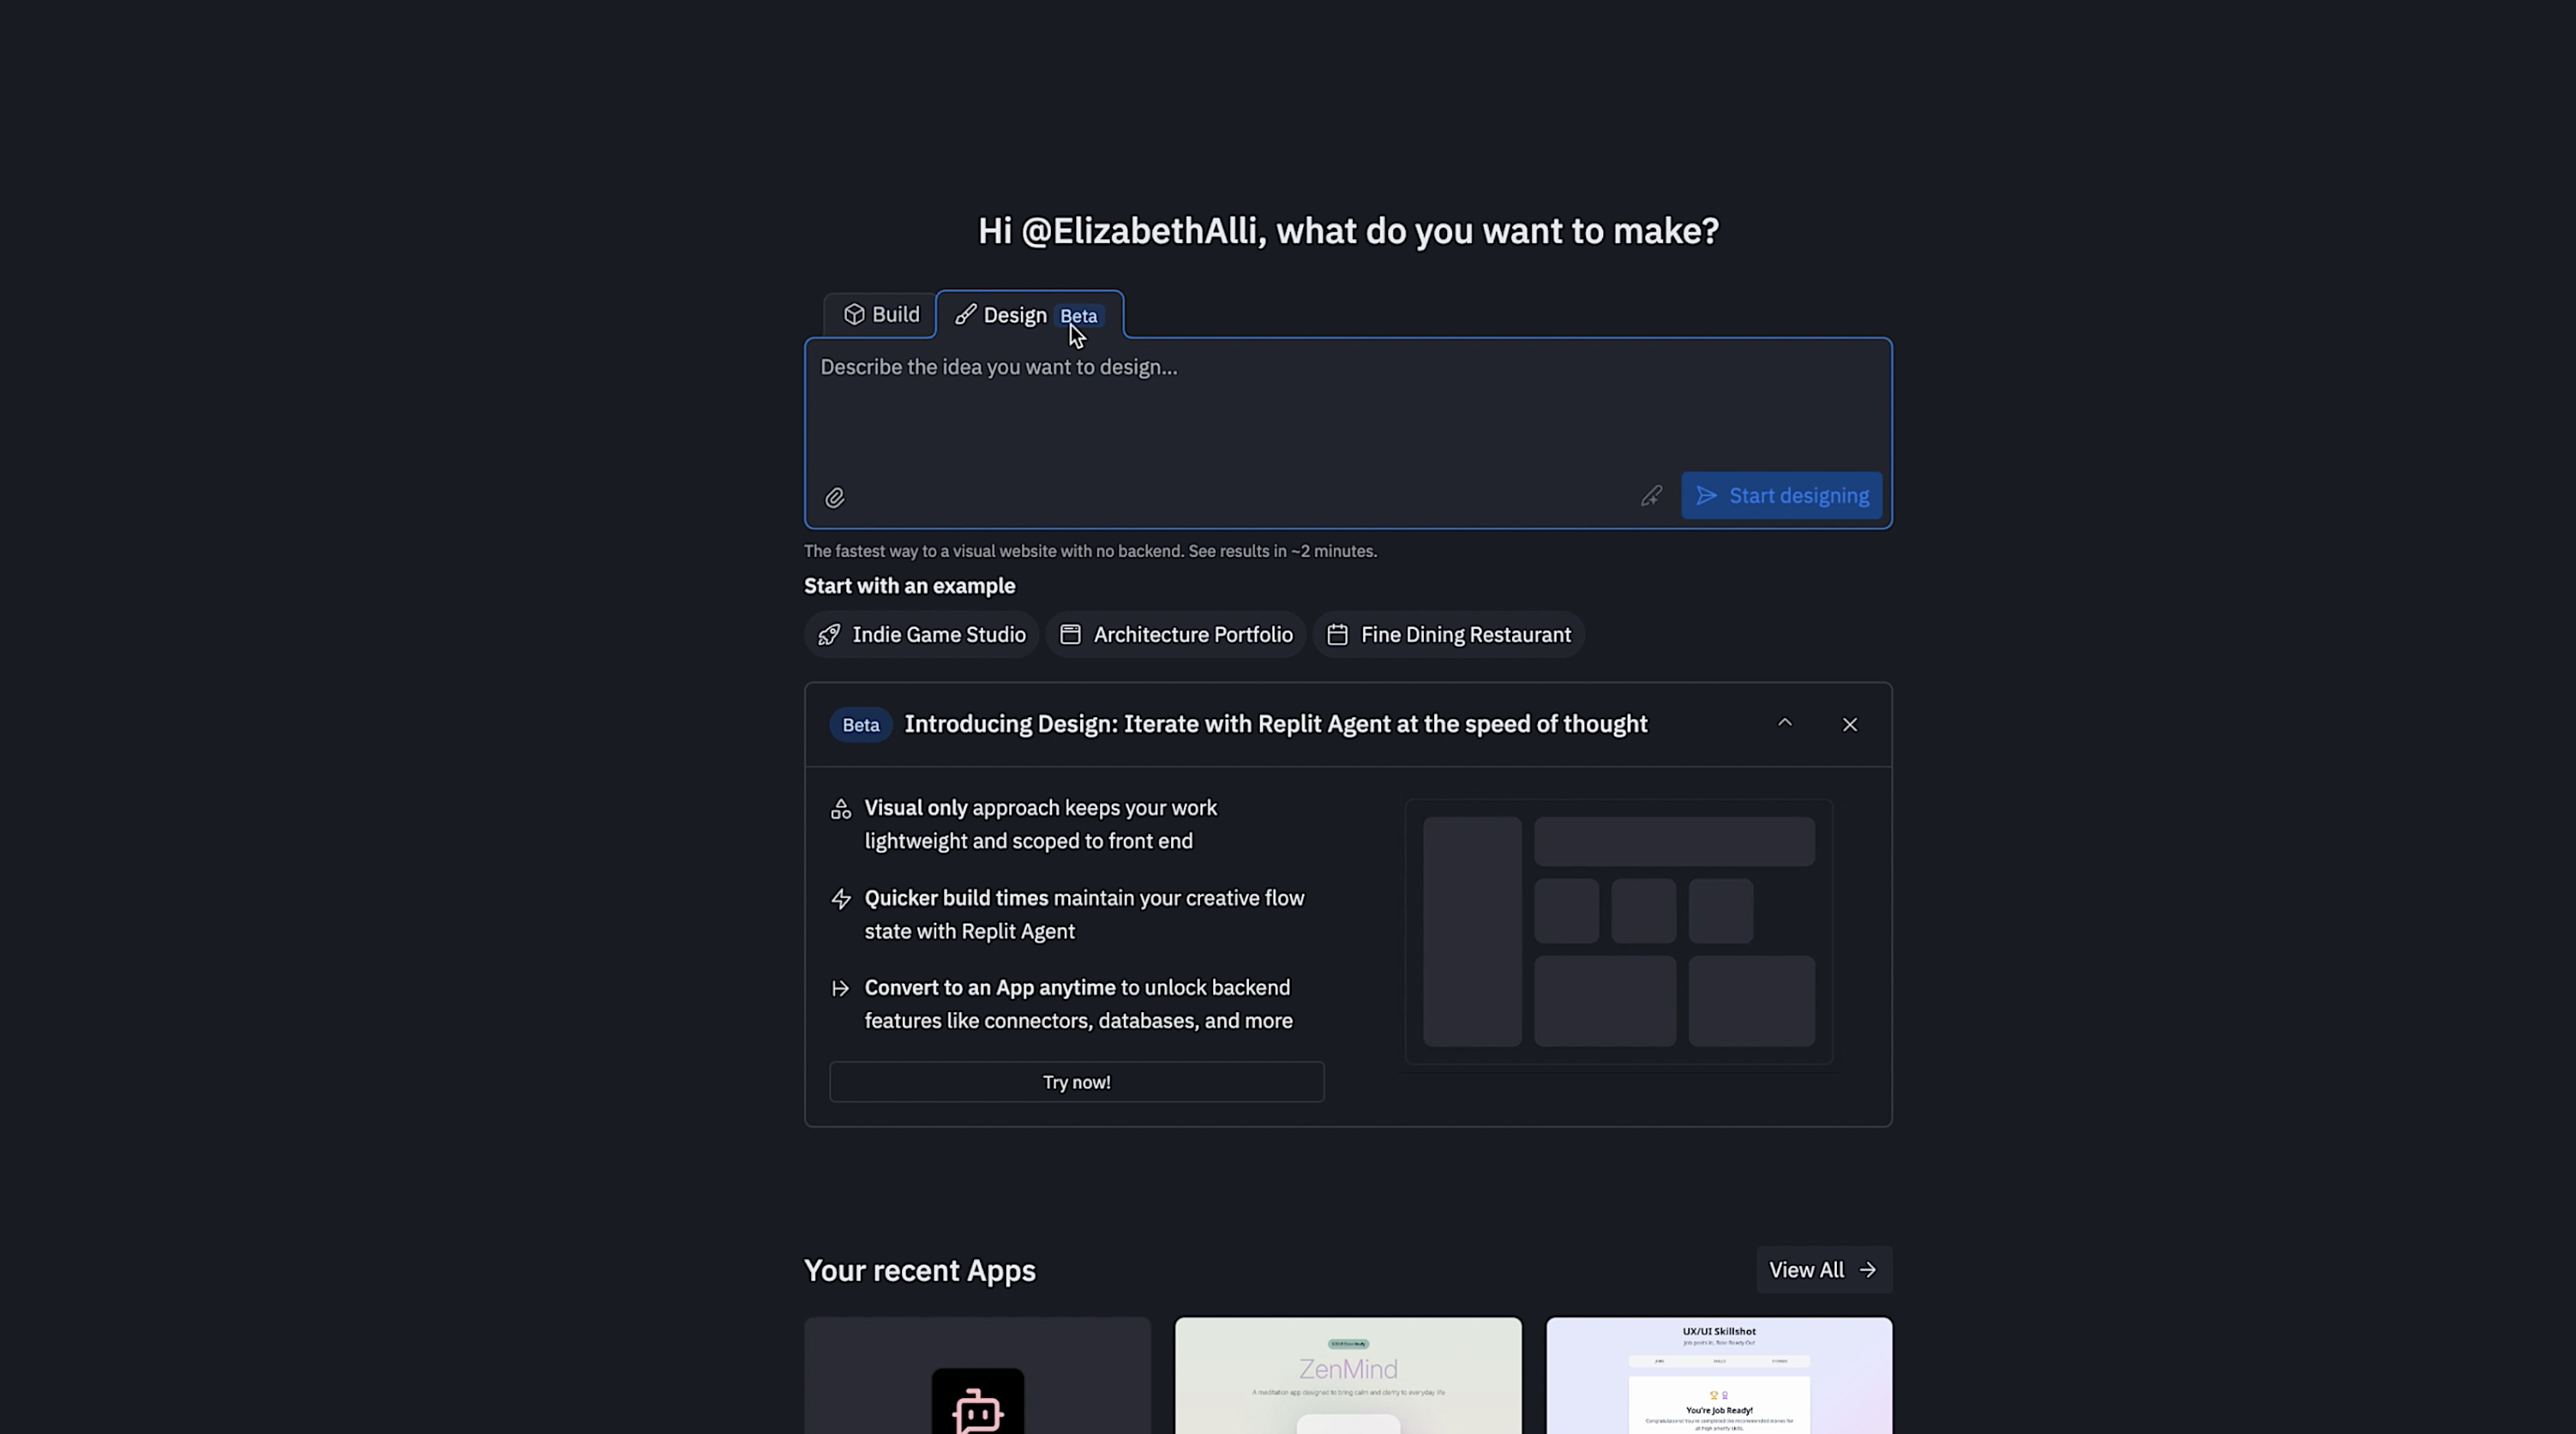
The Design feature is a prototyping tool - this route is lighter and faster—essentially a visual draft—while the full build creates the structural foundation for a working application. You can start with either and choose which direction to go in once you finalize your plan in the next step.
Adding LLM APIs and Tool Integrations
I started by pasting in my problem statement and the general description of what I want the app to become. After that, I added the specific integrations and LLM's that will power the app.
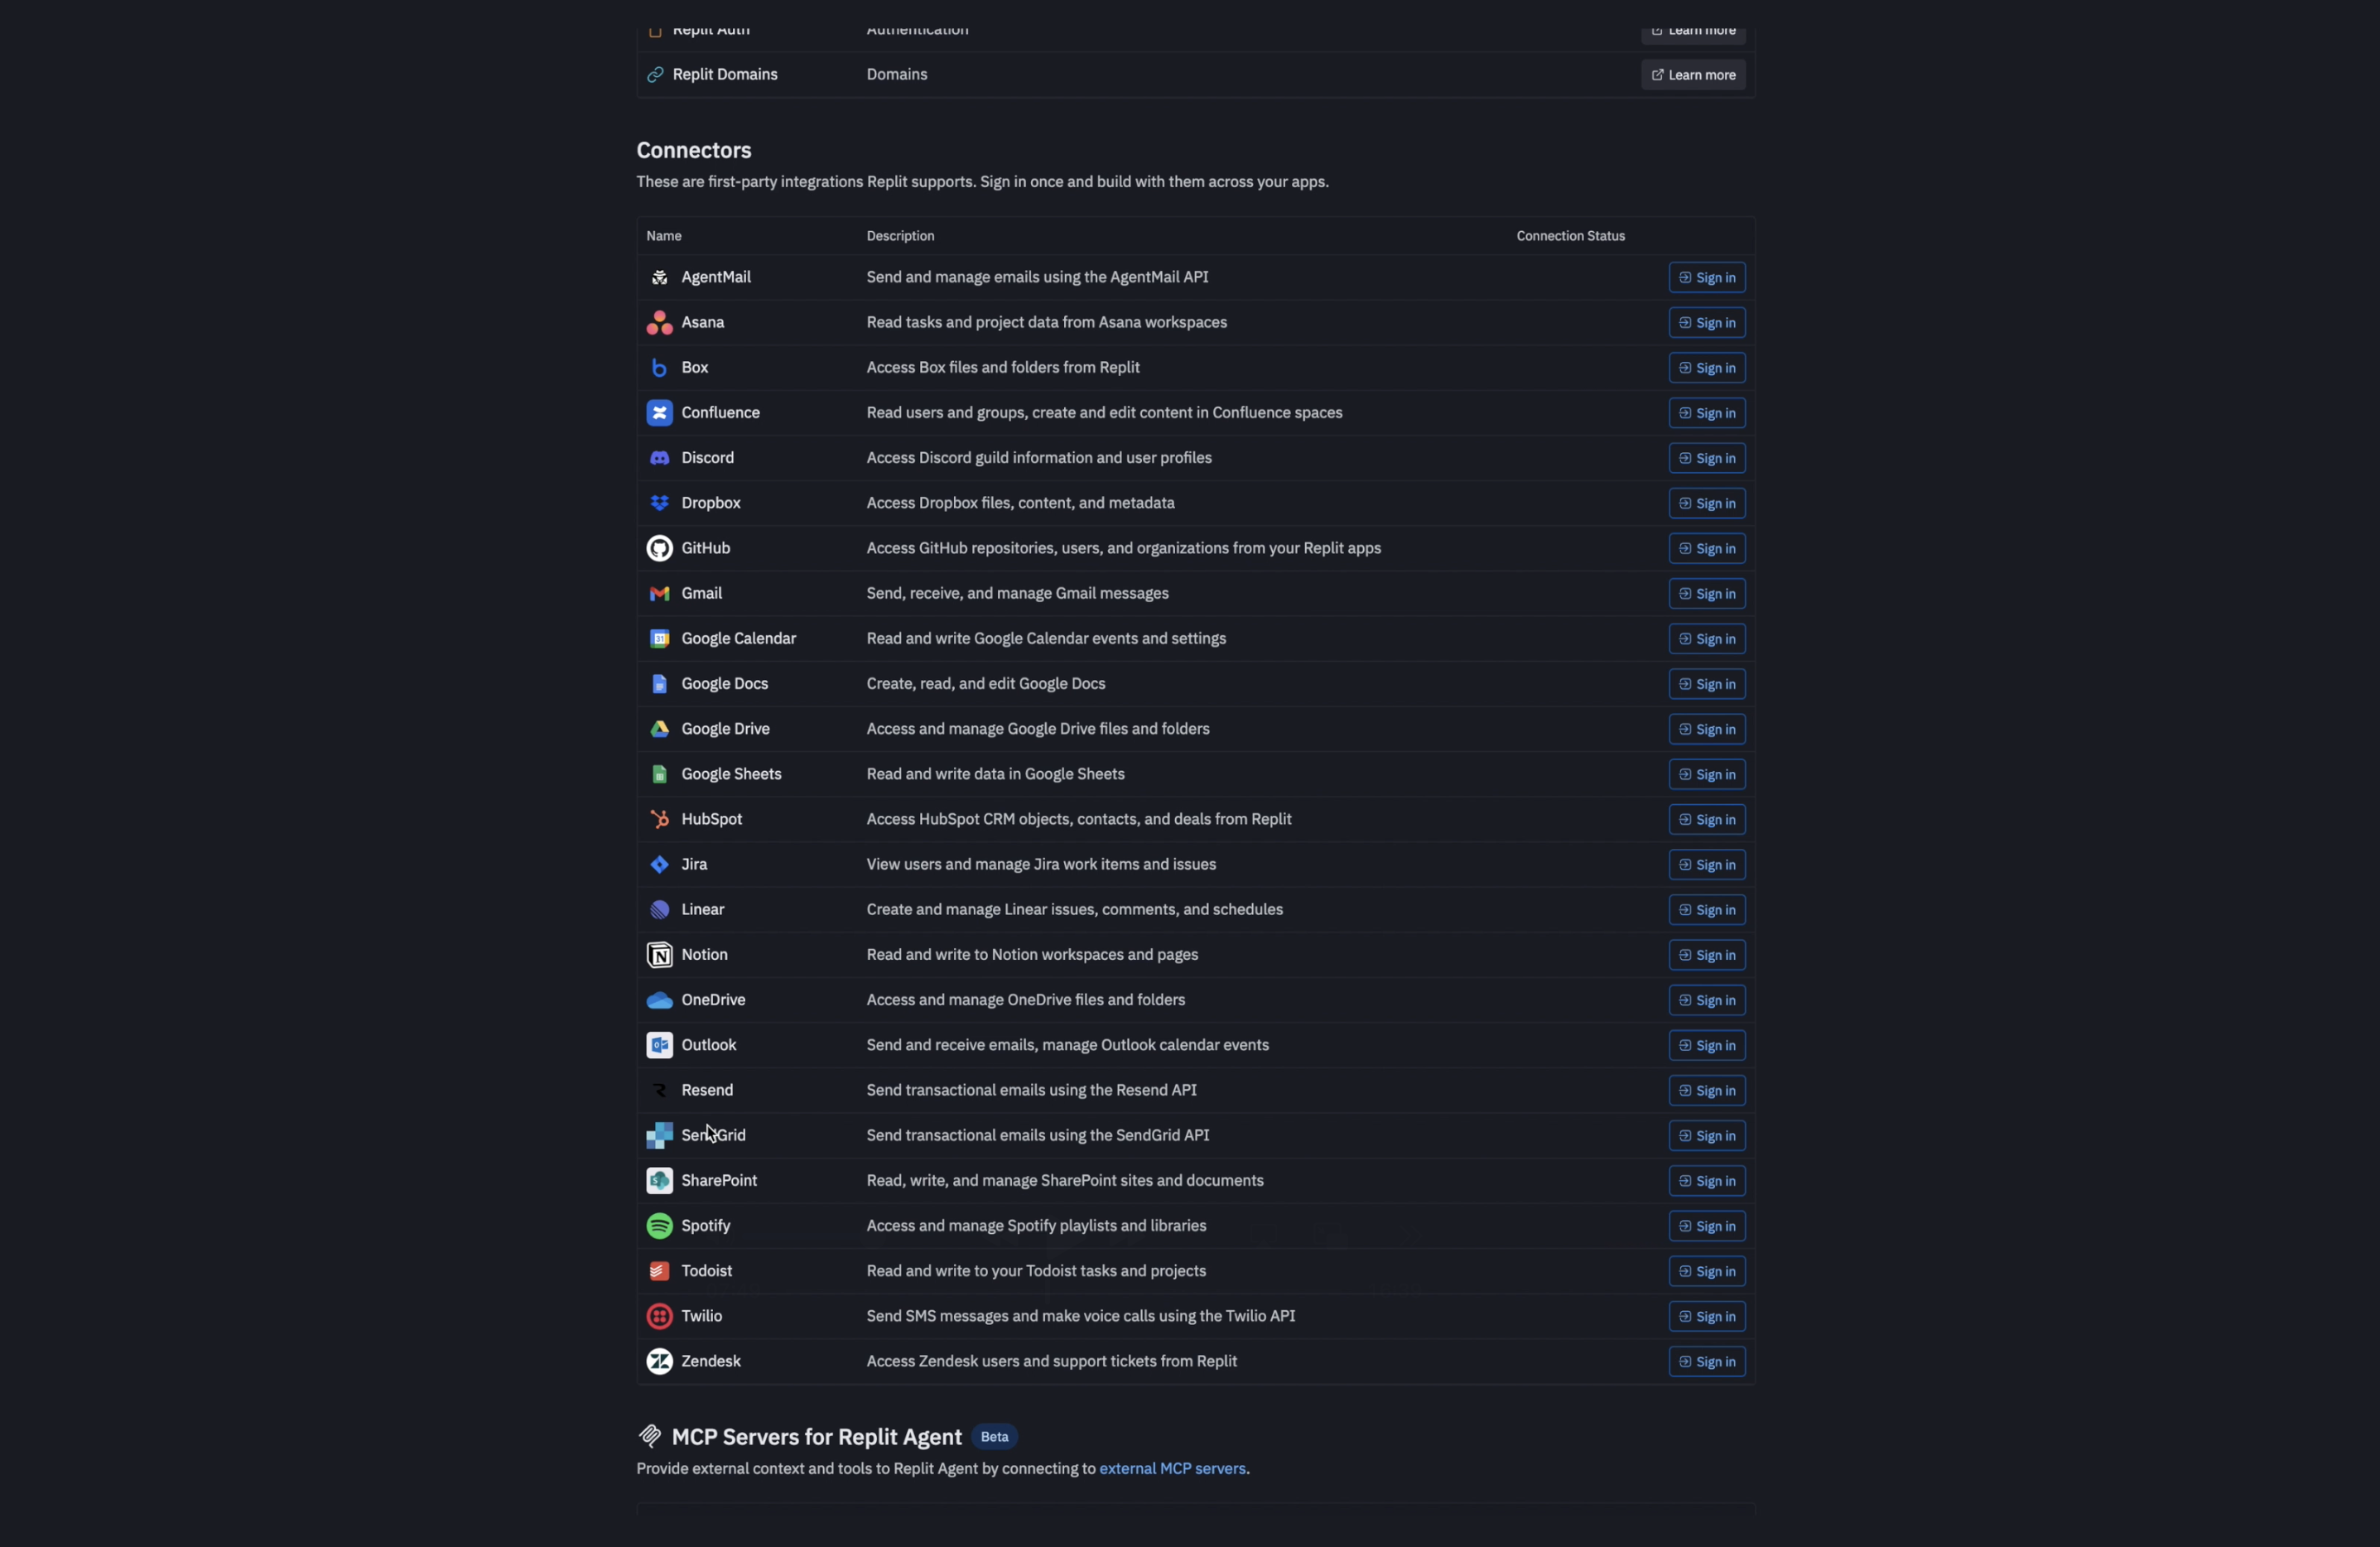
In Replit, integrations and connects are added using a simple backslash command. The left panel also shows every available integration, including newly added options for OpenAI and other large language models. You can search for what you need or scroll through the list to explore what’s available.
/openaifor generating written content/geminifor image generation using the latest Gemini 3 model/anthropicfor deeper content generation and research-oriented tasks
I also pasted the full PRD into the prompt so the system has a clear blueprint for what it’s building.
If you already have mockups or screen examples or even a Figma design file, Replit lets you upload those as well, which helps guide the layout and interactions.
Within a few seconds, it produced a complete plan and confirmed that all of the integrations were active. It’s a surprisingly seamless way to set the foundation for a more complex AI-driven app.
Adding Google Calendar Integration
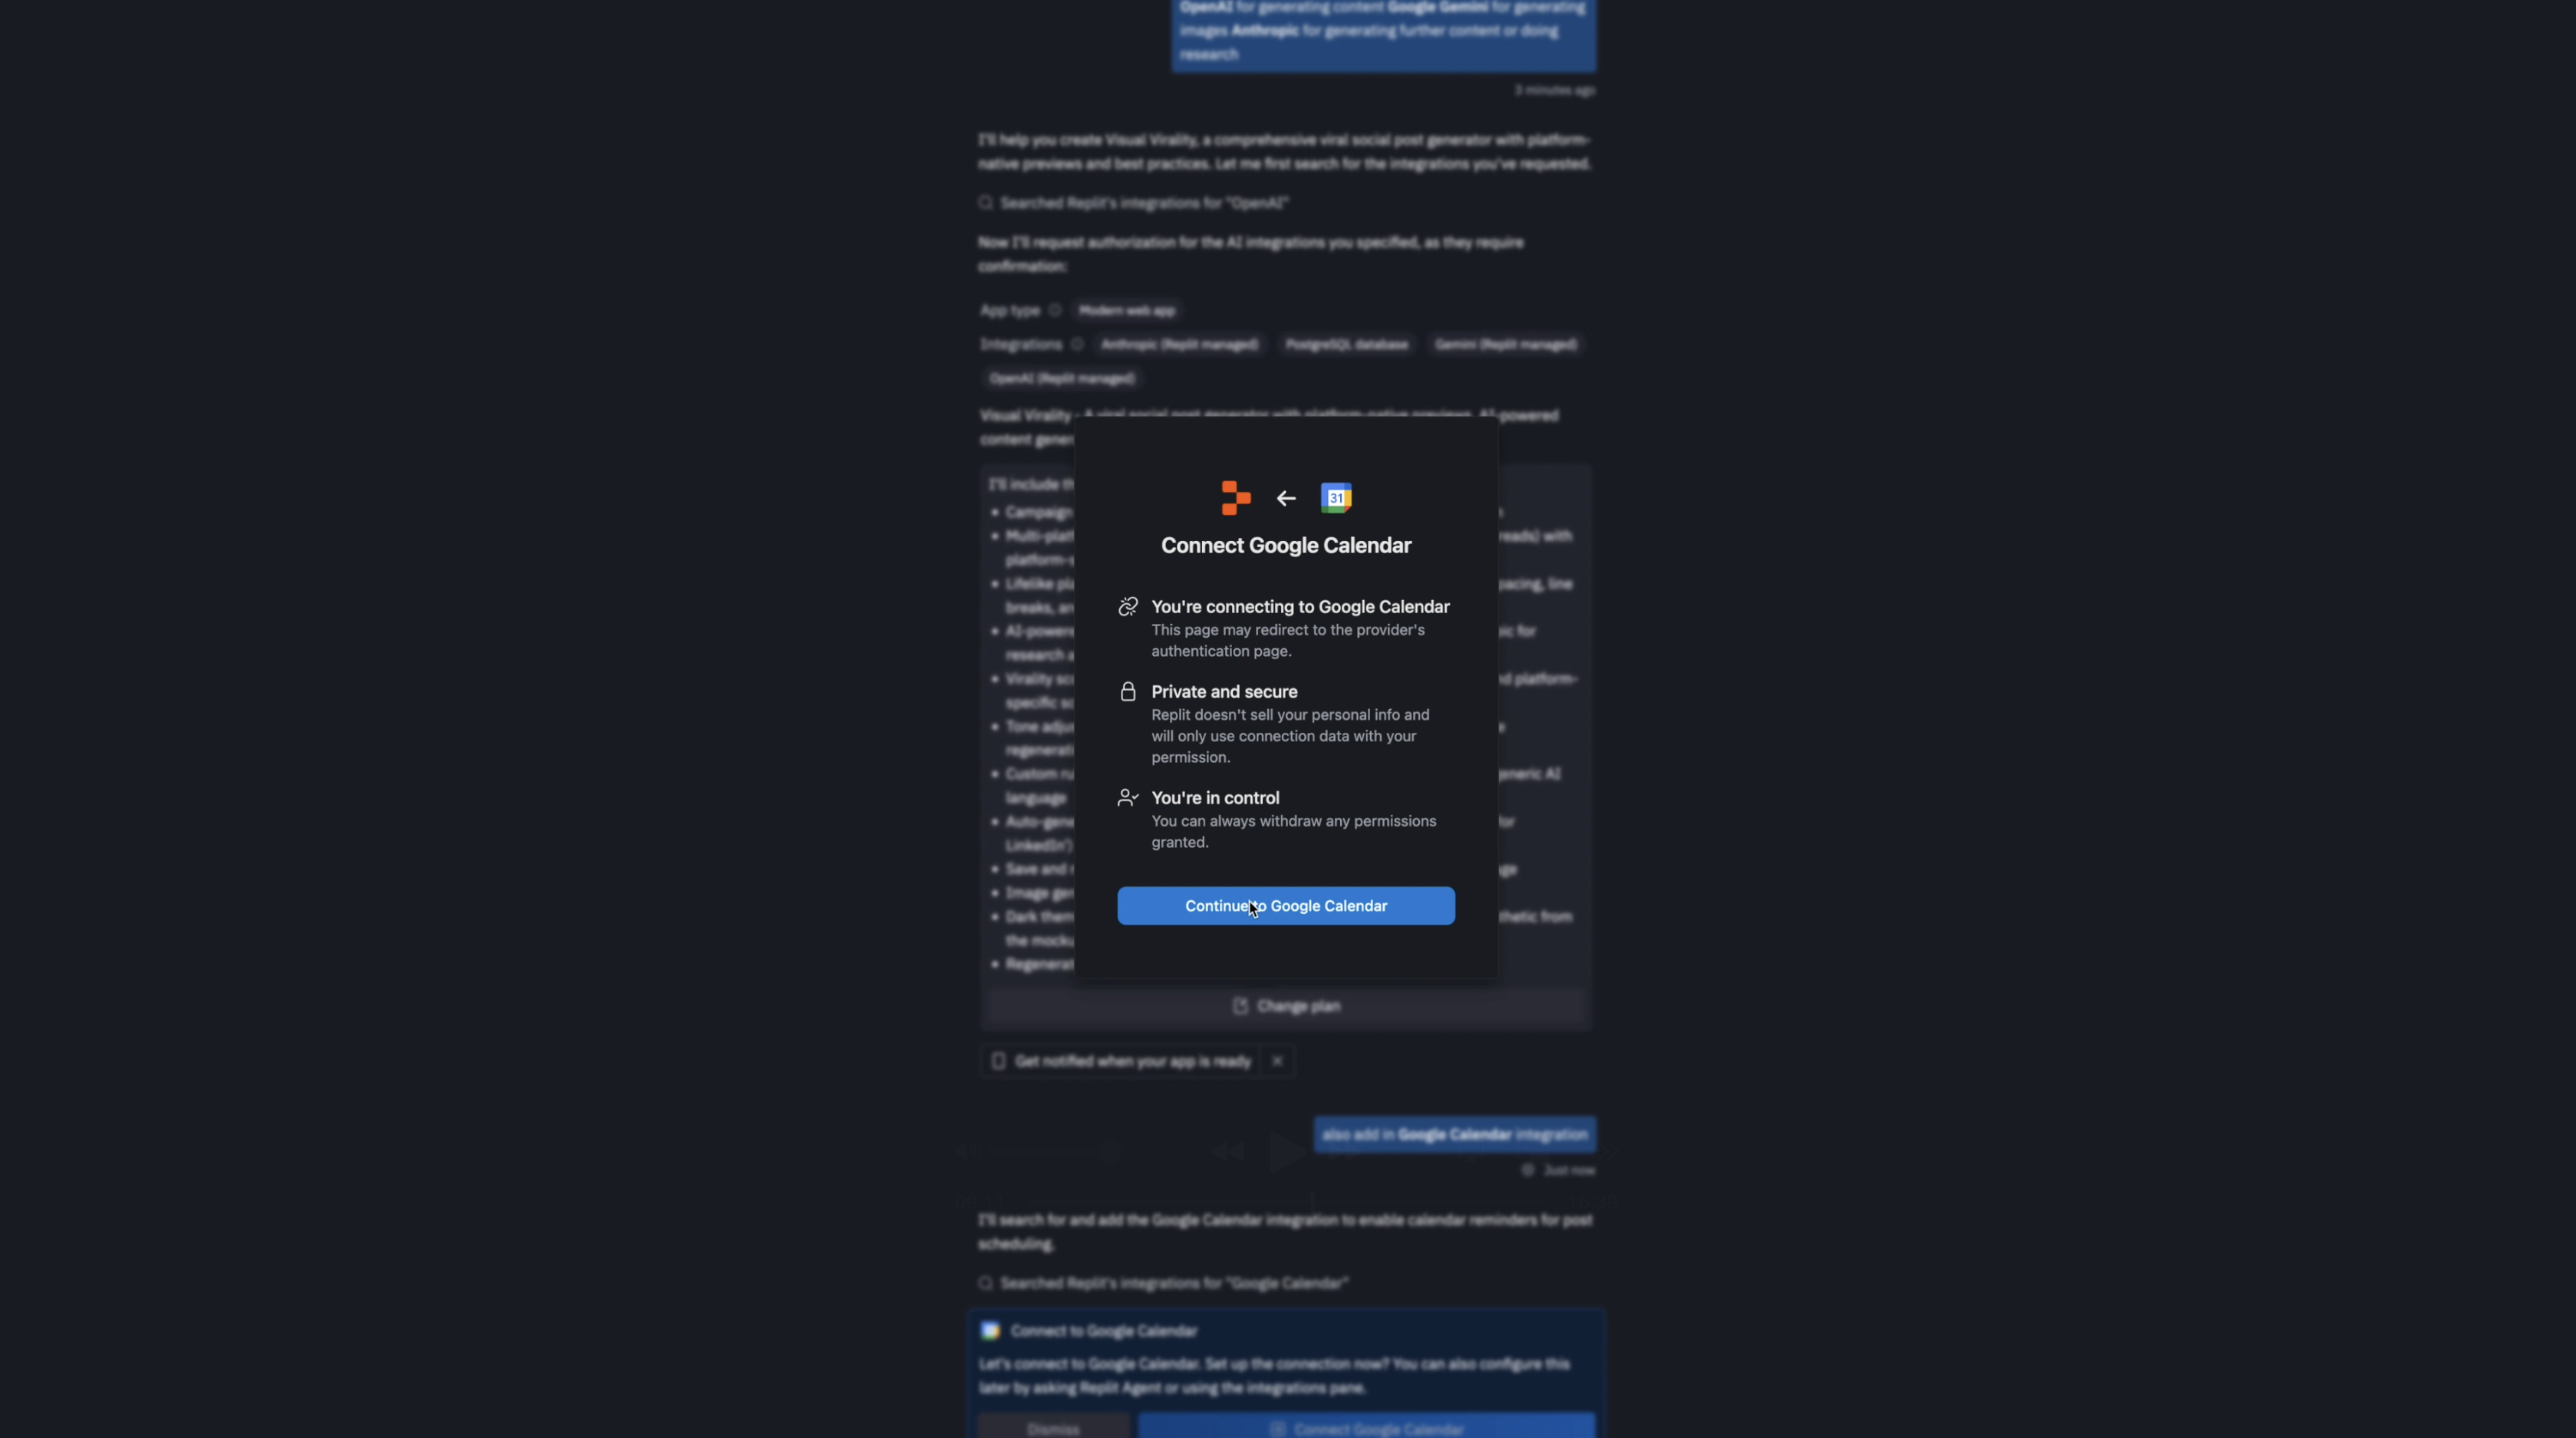
When I’m setting up an AI-assisted build in Replit, one of the first things I do is check and tweak the project plan. In this case, I realized I forgot to include a Google Calendar integration, so I went back into the plan to add it. Replit makes this part simple: after adjusting the details, it immediately surfaced the Google Calendar connector, and I connected it to my account. Once authenticated, the plan refreshed itself with the new functionality woven in.
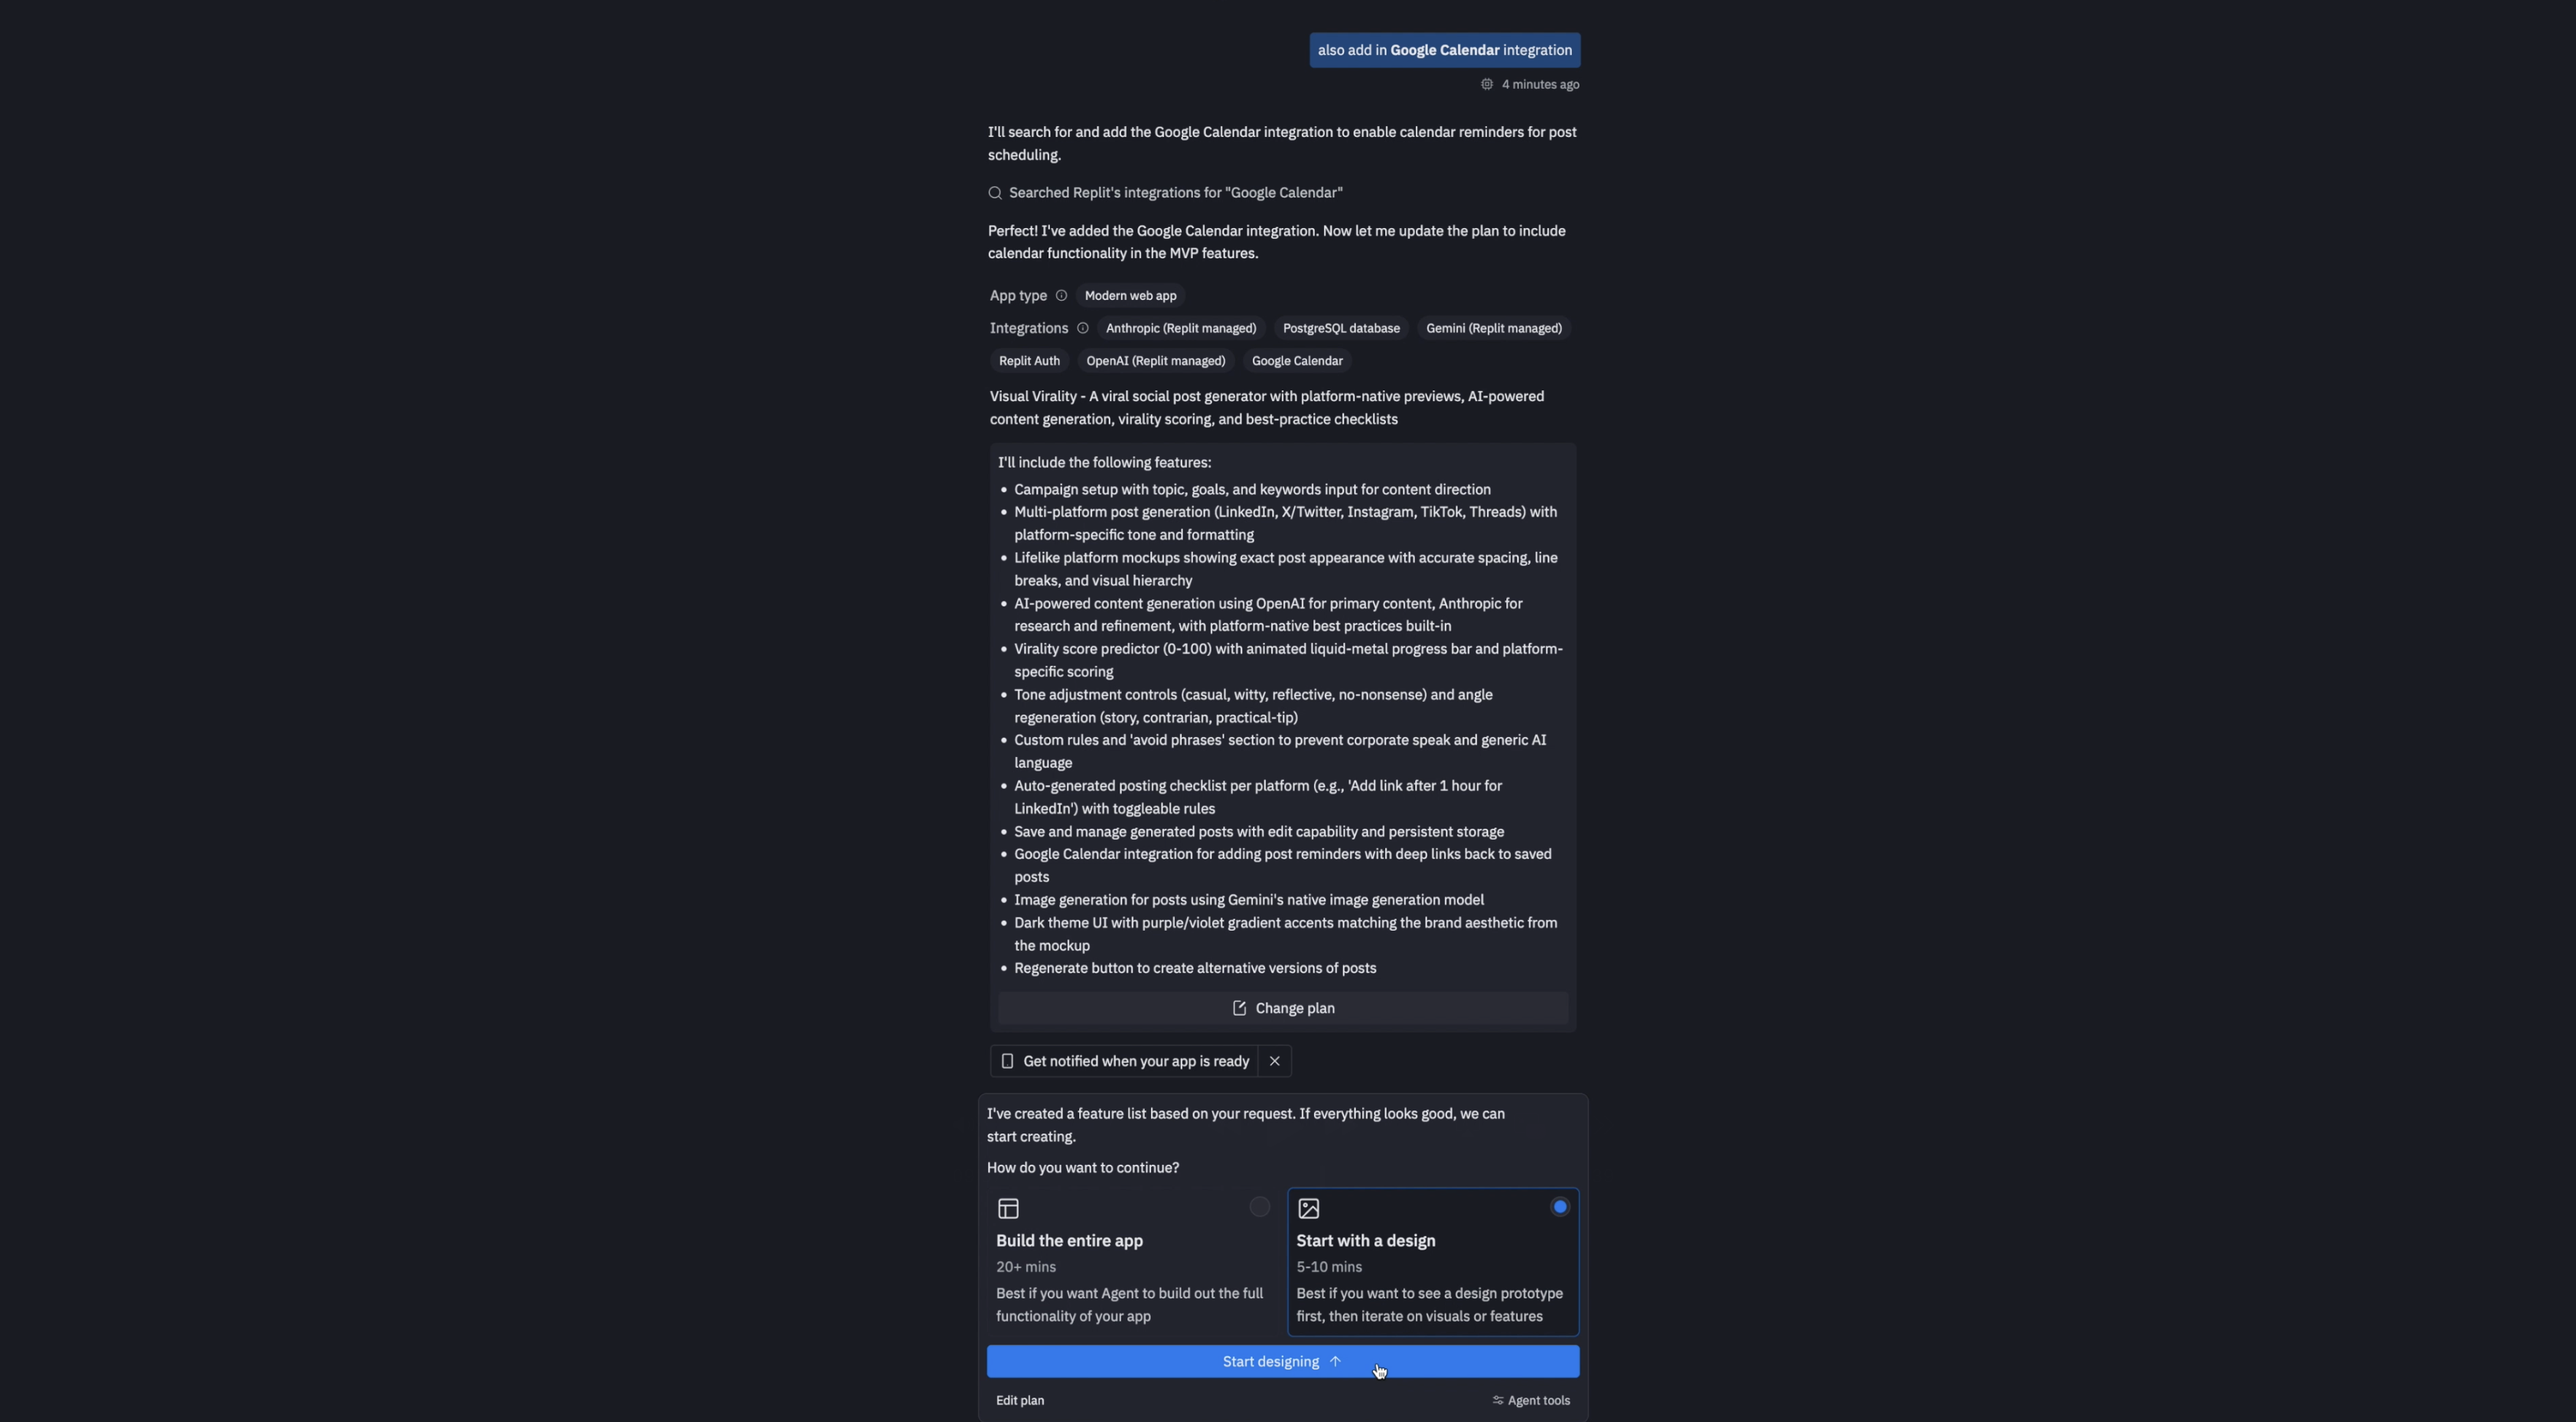
At this stage, Replit gives you a choice: you can generate a full build with the database scaffolding included, or you can begin with a design prototype. Starting with the design is usually the faster route—it takes about five to ten minutes—and it gives me a chance to check whether the layout and general direction feel right before committing to a longer build. The full version, with everything wired up, takes closer to twenty minutes.
For this project, I opted to begin with the design prototype. It’s a good way to get a sense of the app’s structure and aesthetics before moving into deeper implementation.
Designing the prototype with Replit Agent
Once you click Start Designing, Replit opens up a split workspace. On the left is the agent—a conversational assistant you can collaborate with to create features, test ideas, and make adjustments. On the right is the live preview area, where the app begins to take shape.
Replit starts by generating the interface as a lightweight prototype. You can actually watch it assemble components, iterate through design steps, and stitch everything together into an interactive layout. In my case, the entire process finished in about eight minutes, and the cost of that work came out to $2.34. For what it produced, that’s remarkably efficient.
The prototype included all the foundational sections I planned for:
- Posts, backed by a database where everything gets stored
- A calendar view for upcoming scheduled content
- A Google Calendar sync option
- Even a built-in analytics section
It’s impressive how much Replit can scaffold with very little input. If the final version resembles anything close to this prototype, we’re in great shape.
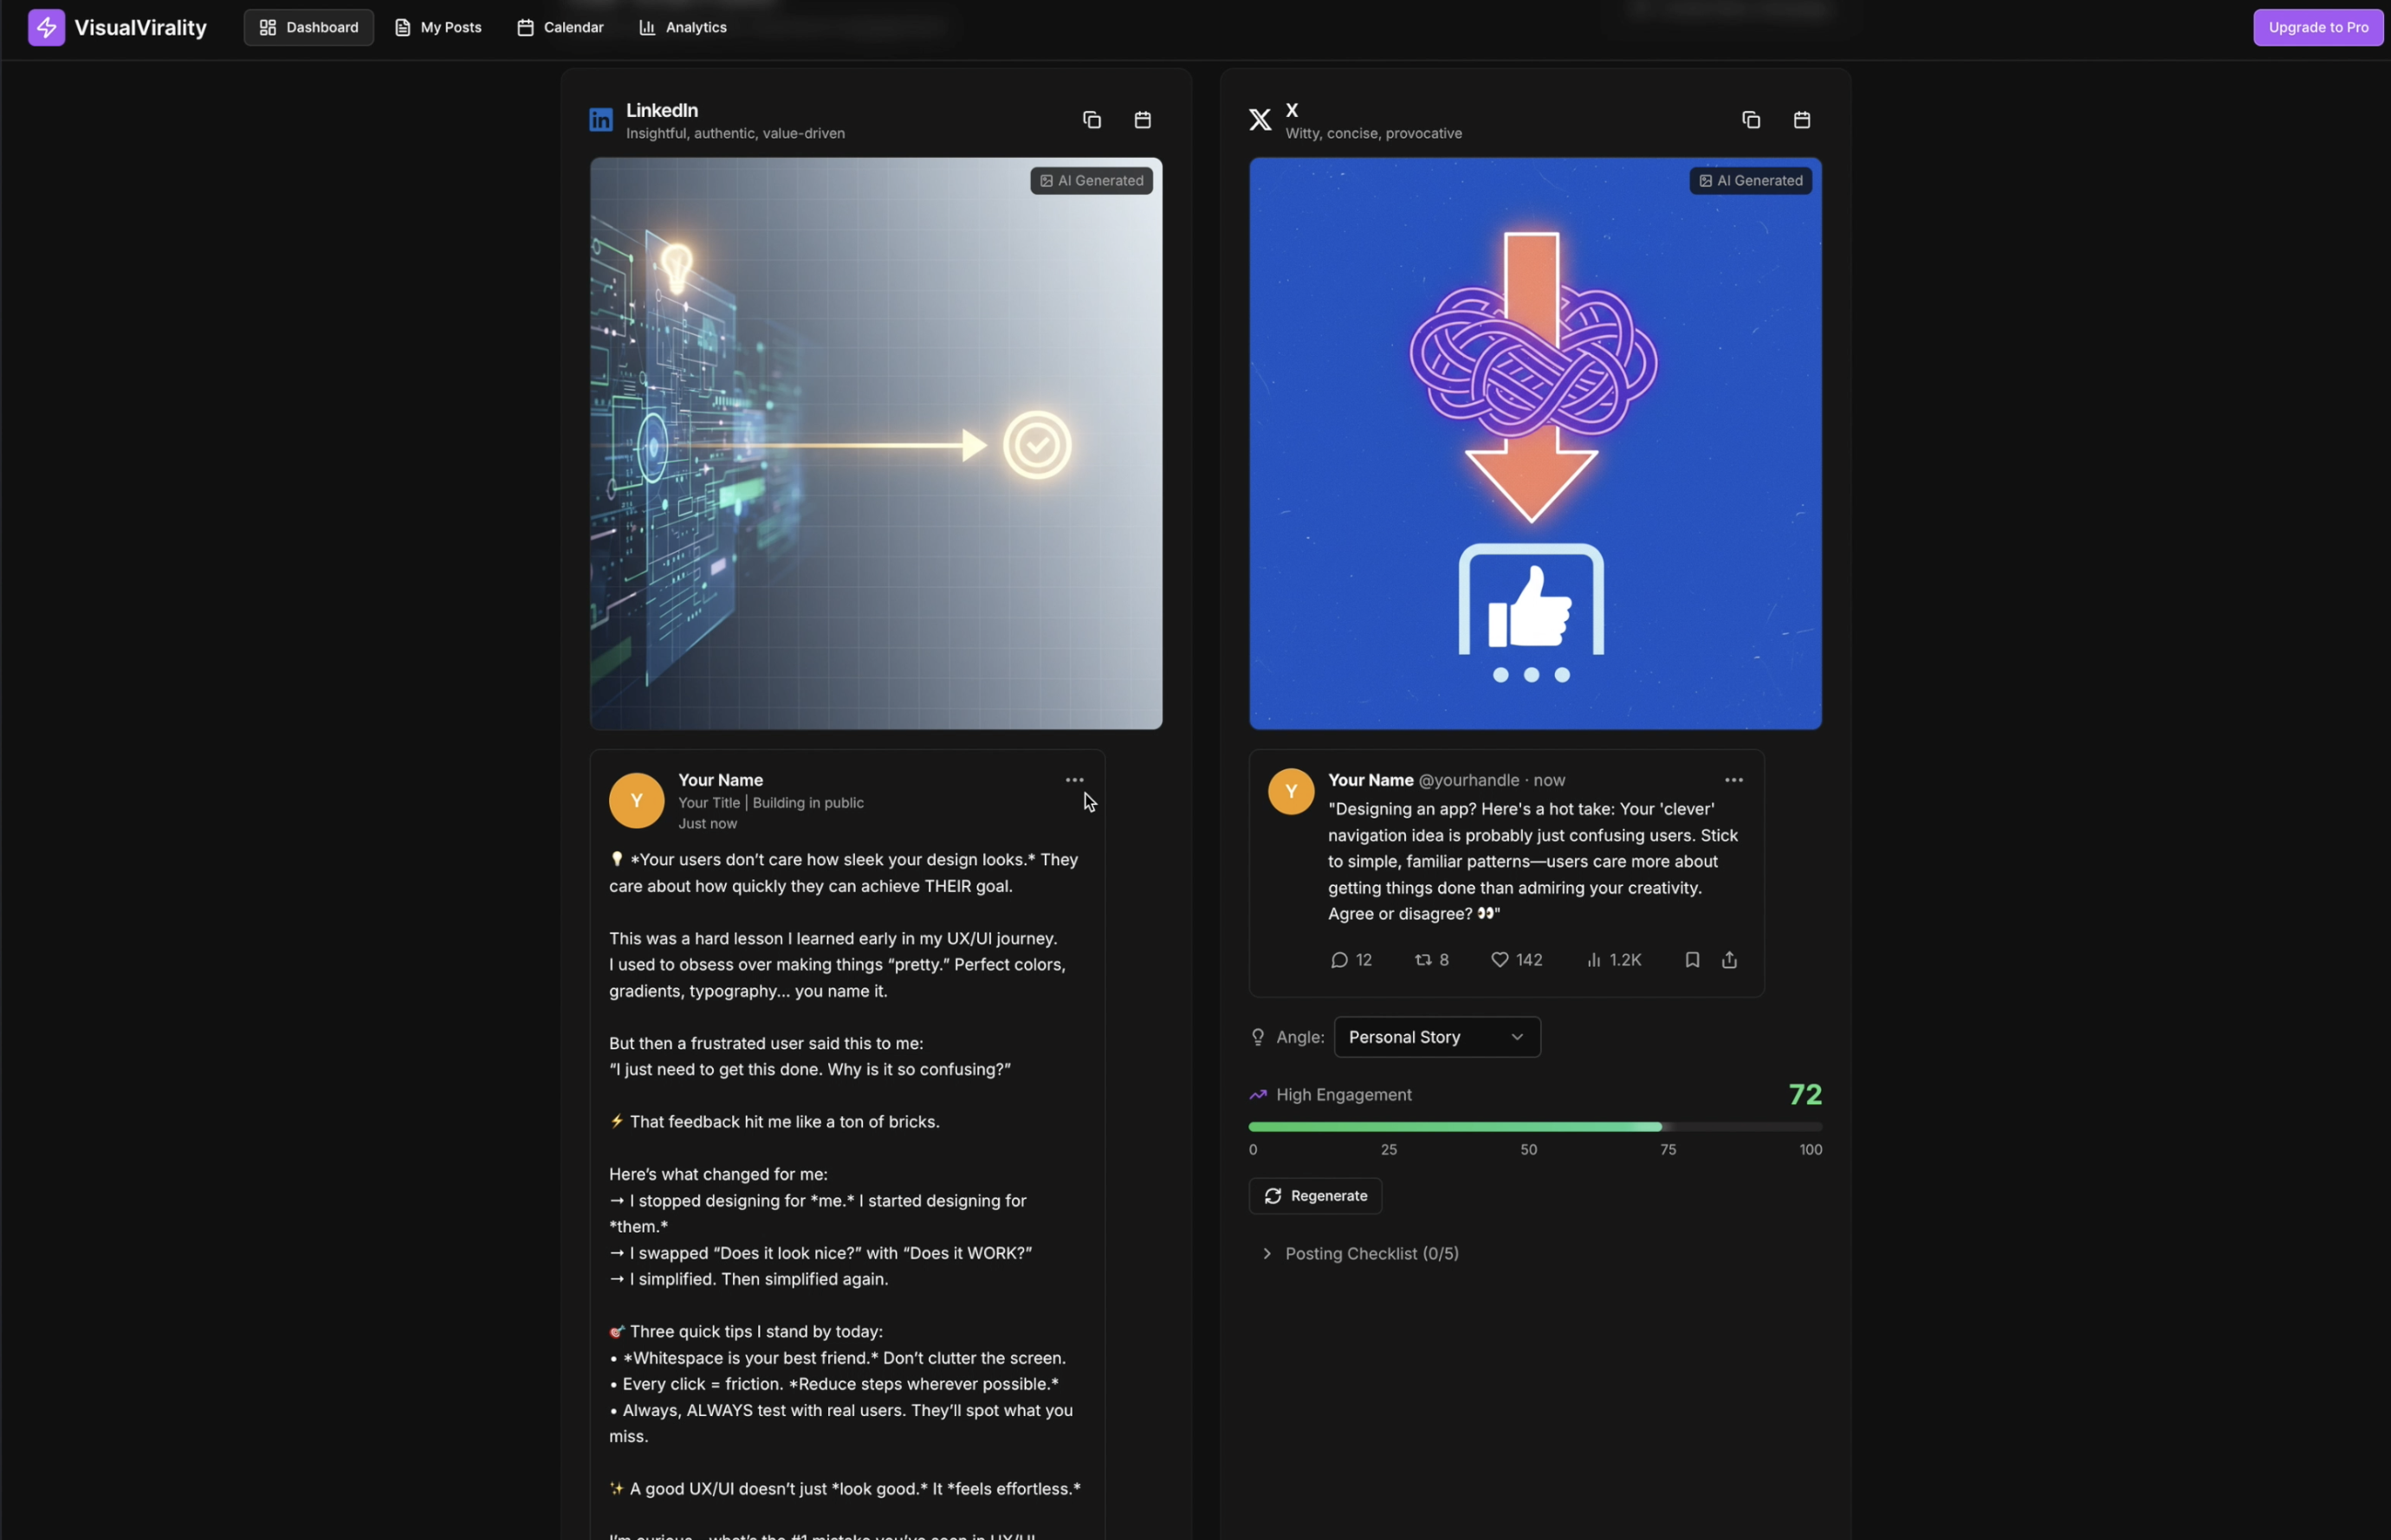
Testing it out, I selected a topic—productivity—and set the campaign goal to comments. From there, I generated a batch of “viral” posts. The interface responded with smooth microinteractions and subtle animations, the kind of polish that makes an experience feel thoughtful and intentional.
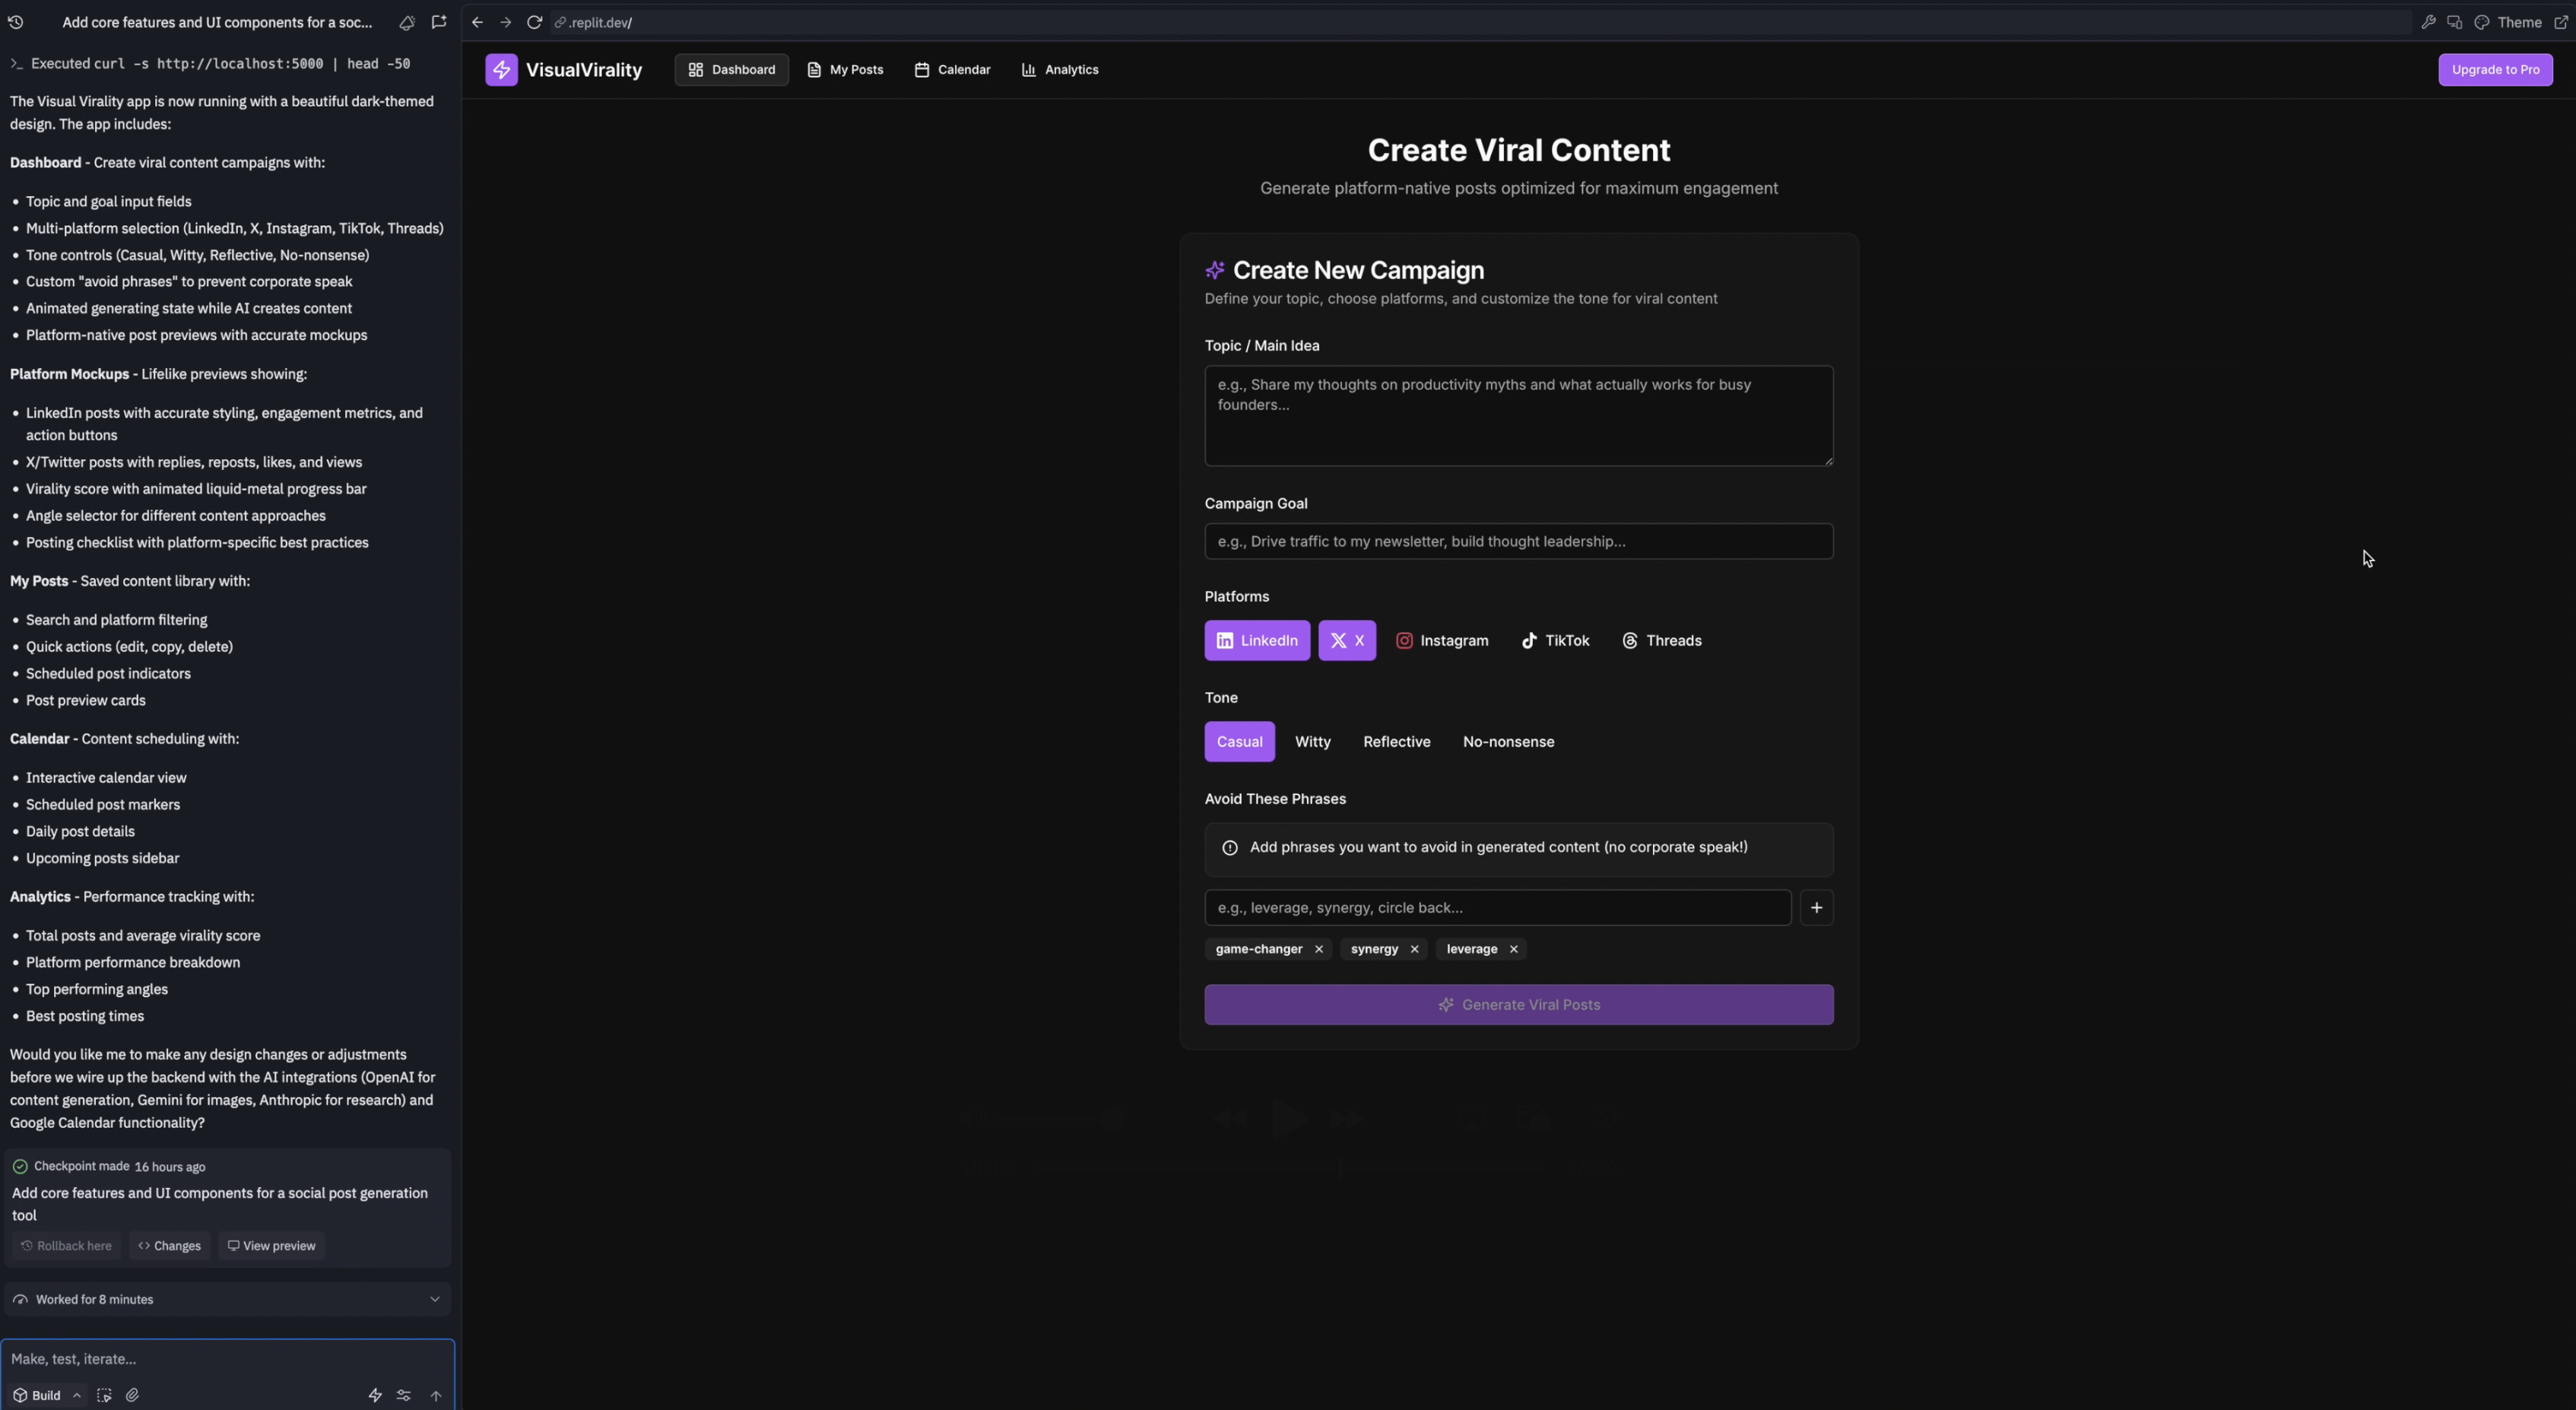
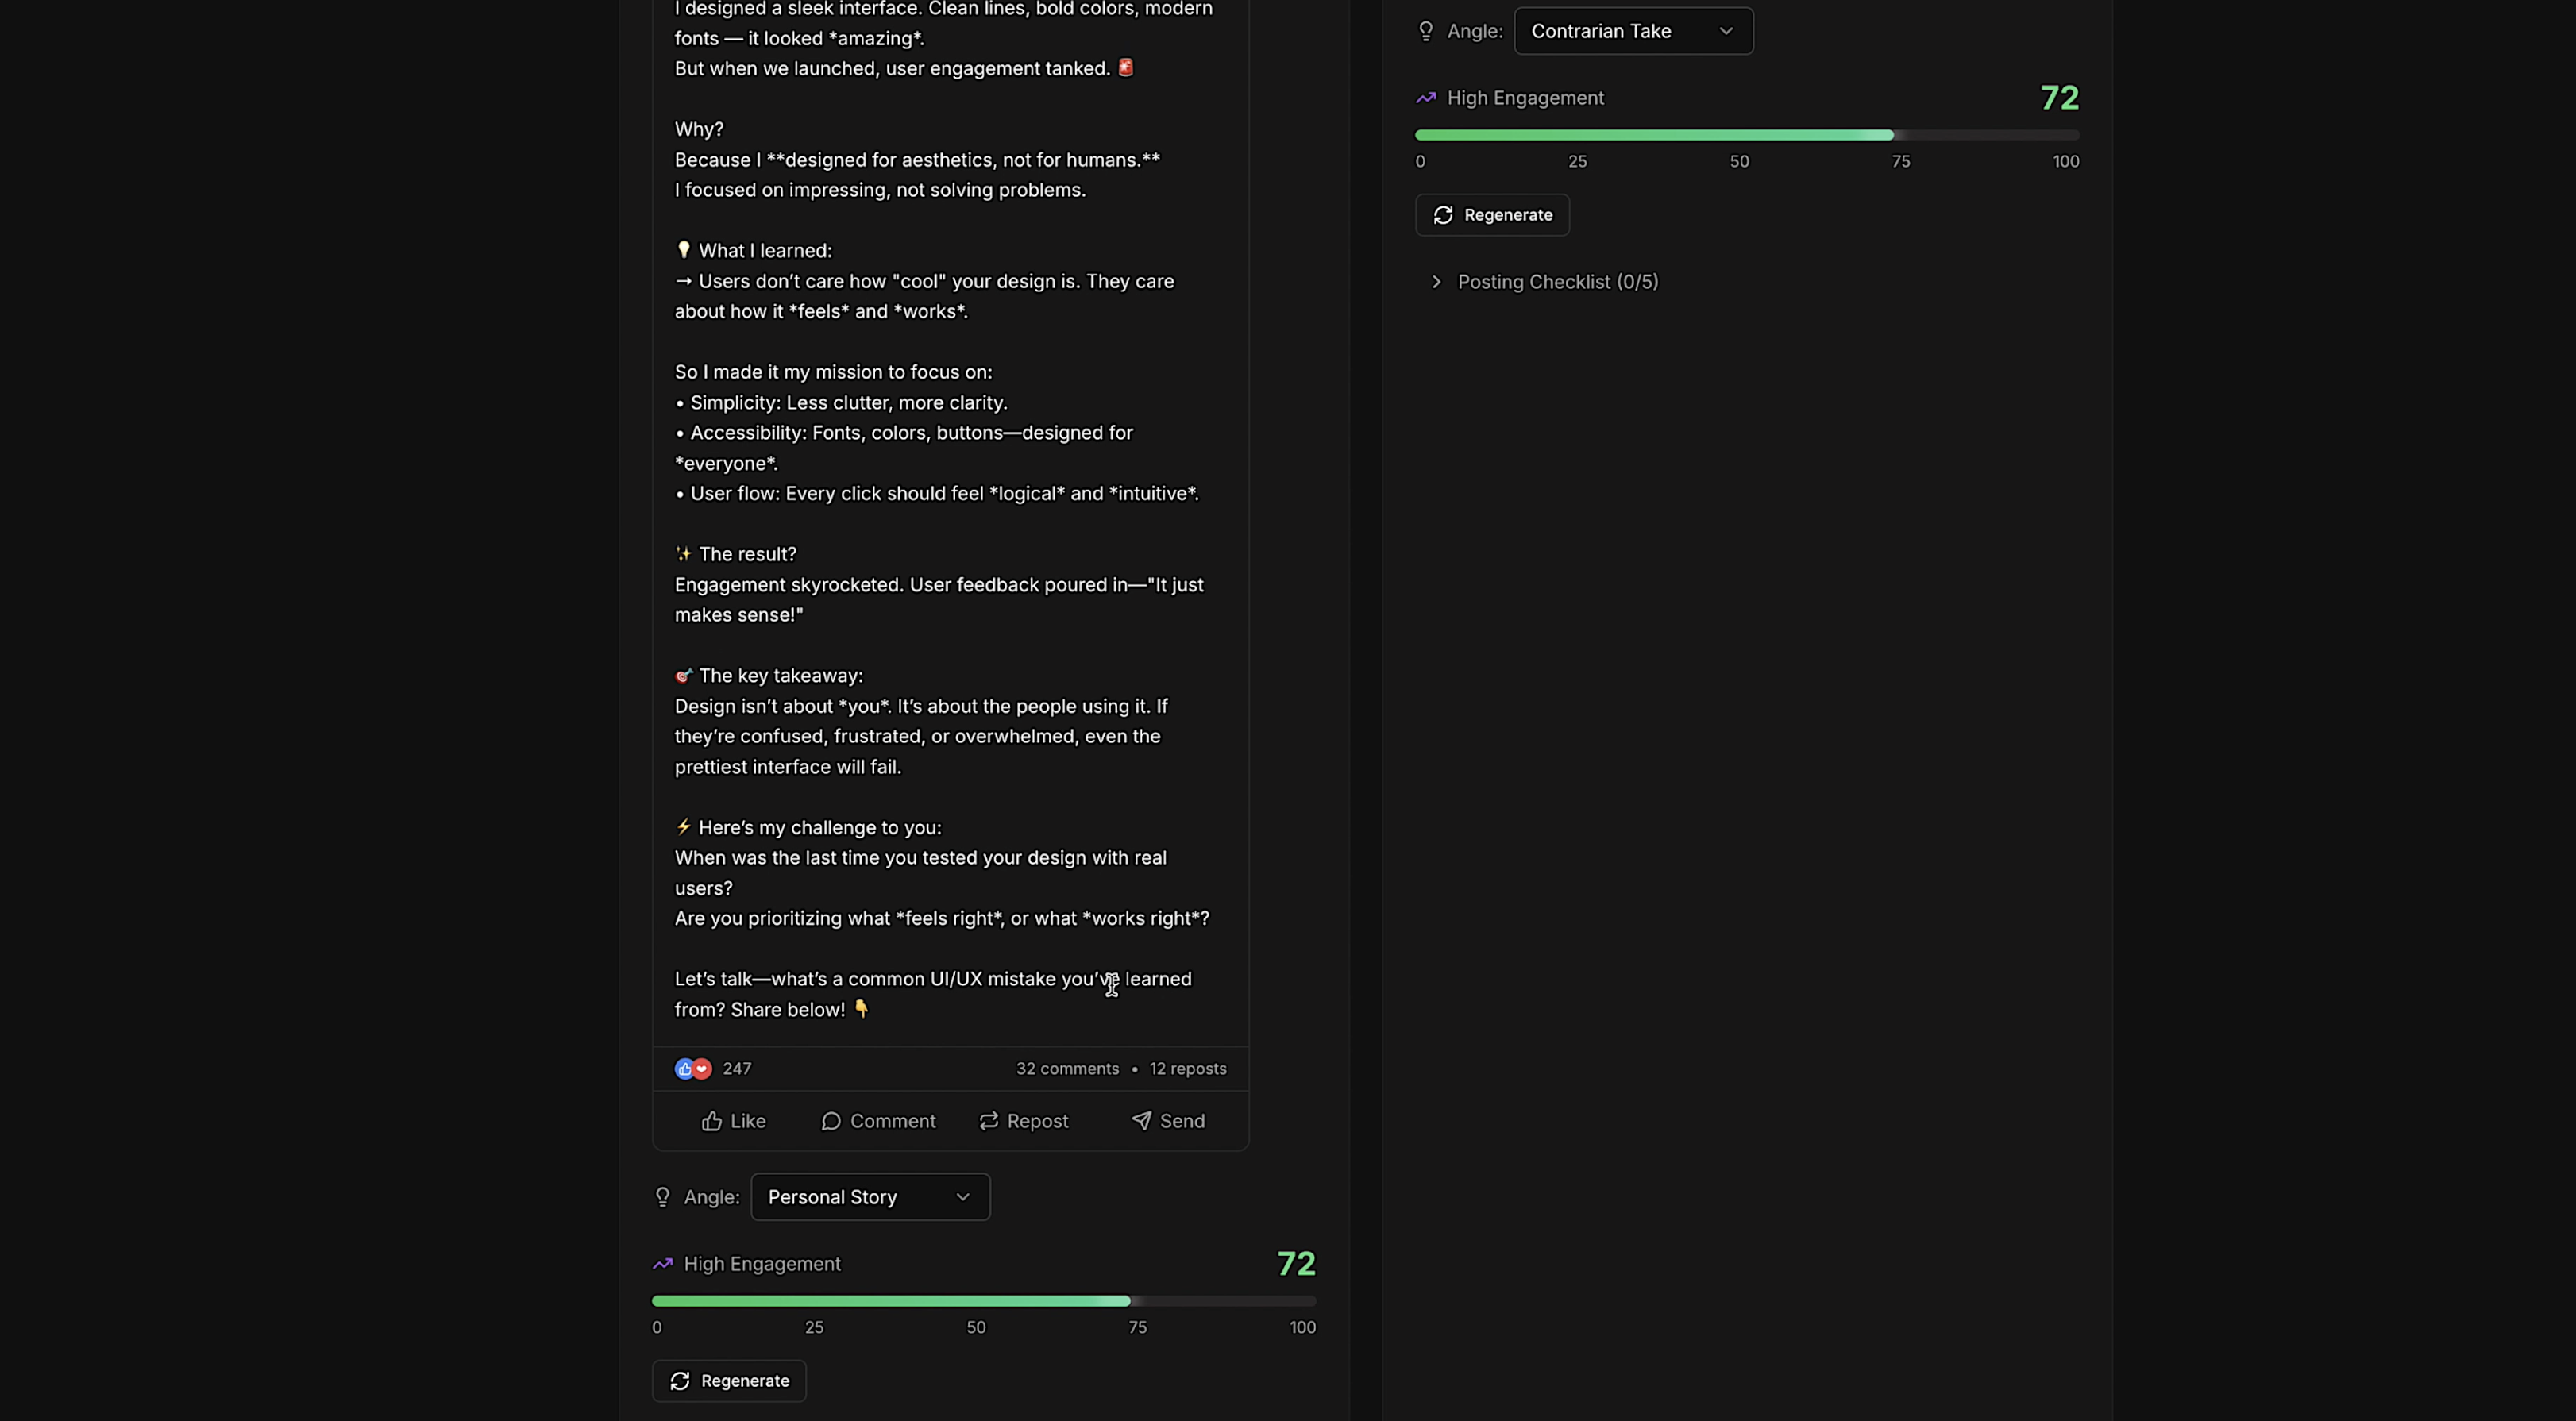
The preview displays every post on a single canvas so you can see the variations side by side. You can adjust the “angle” or framing of the post based on different characteristics, regenerate alternatives, and evaluate how everything reads visually.
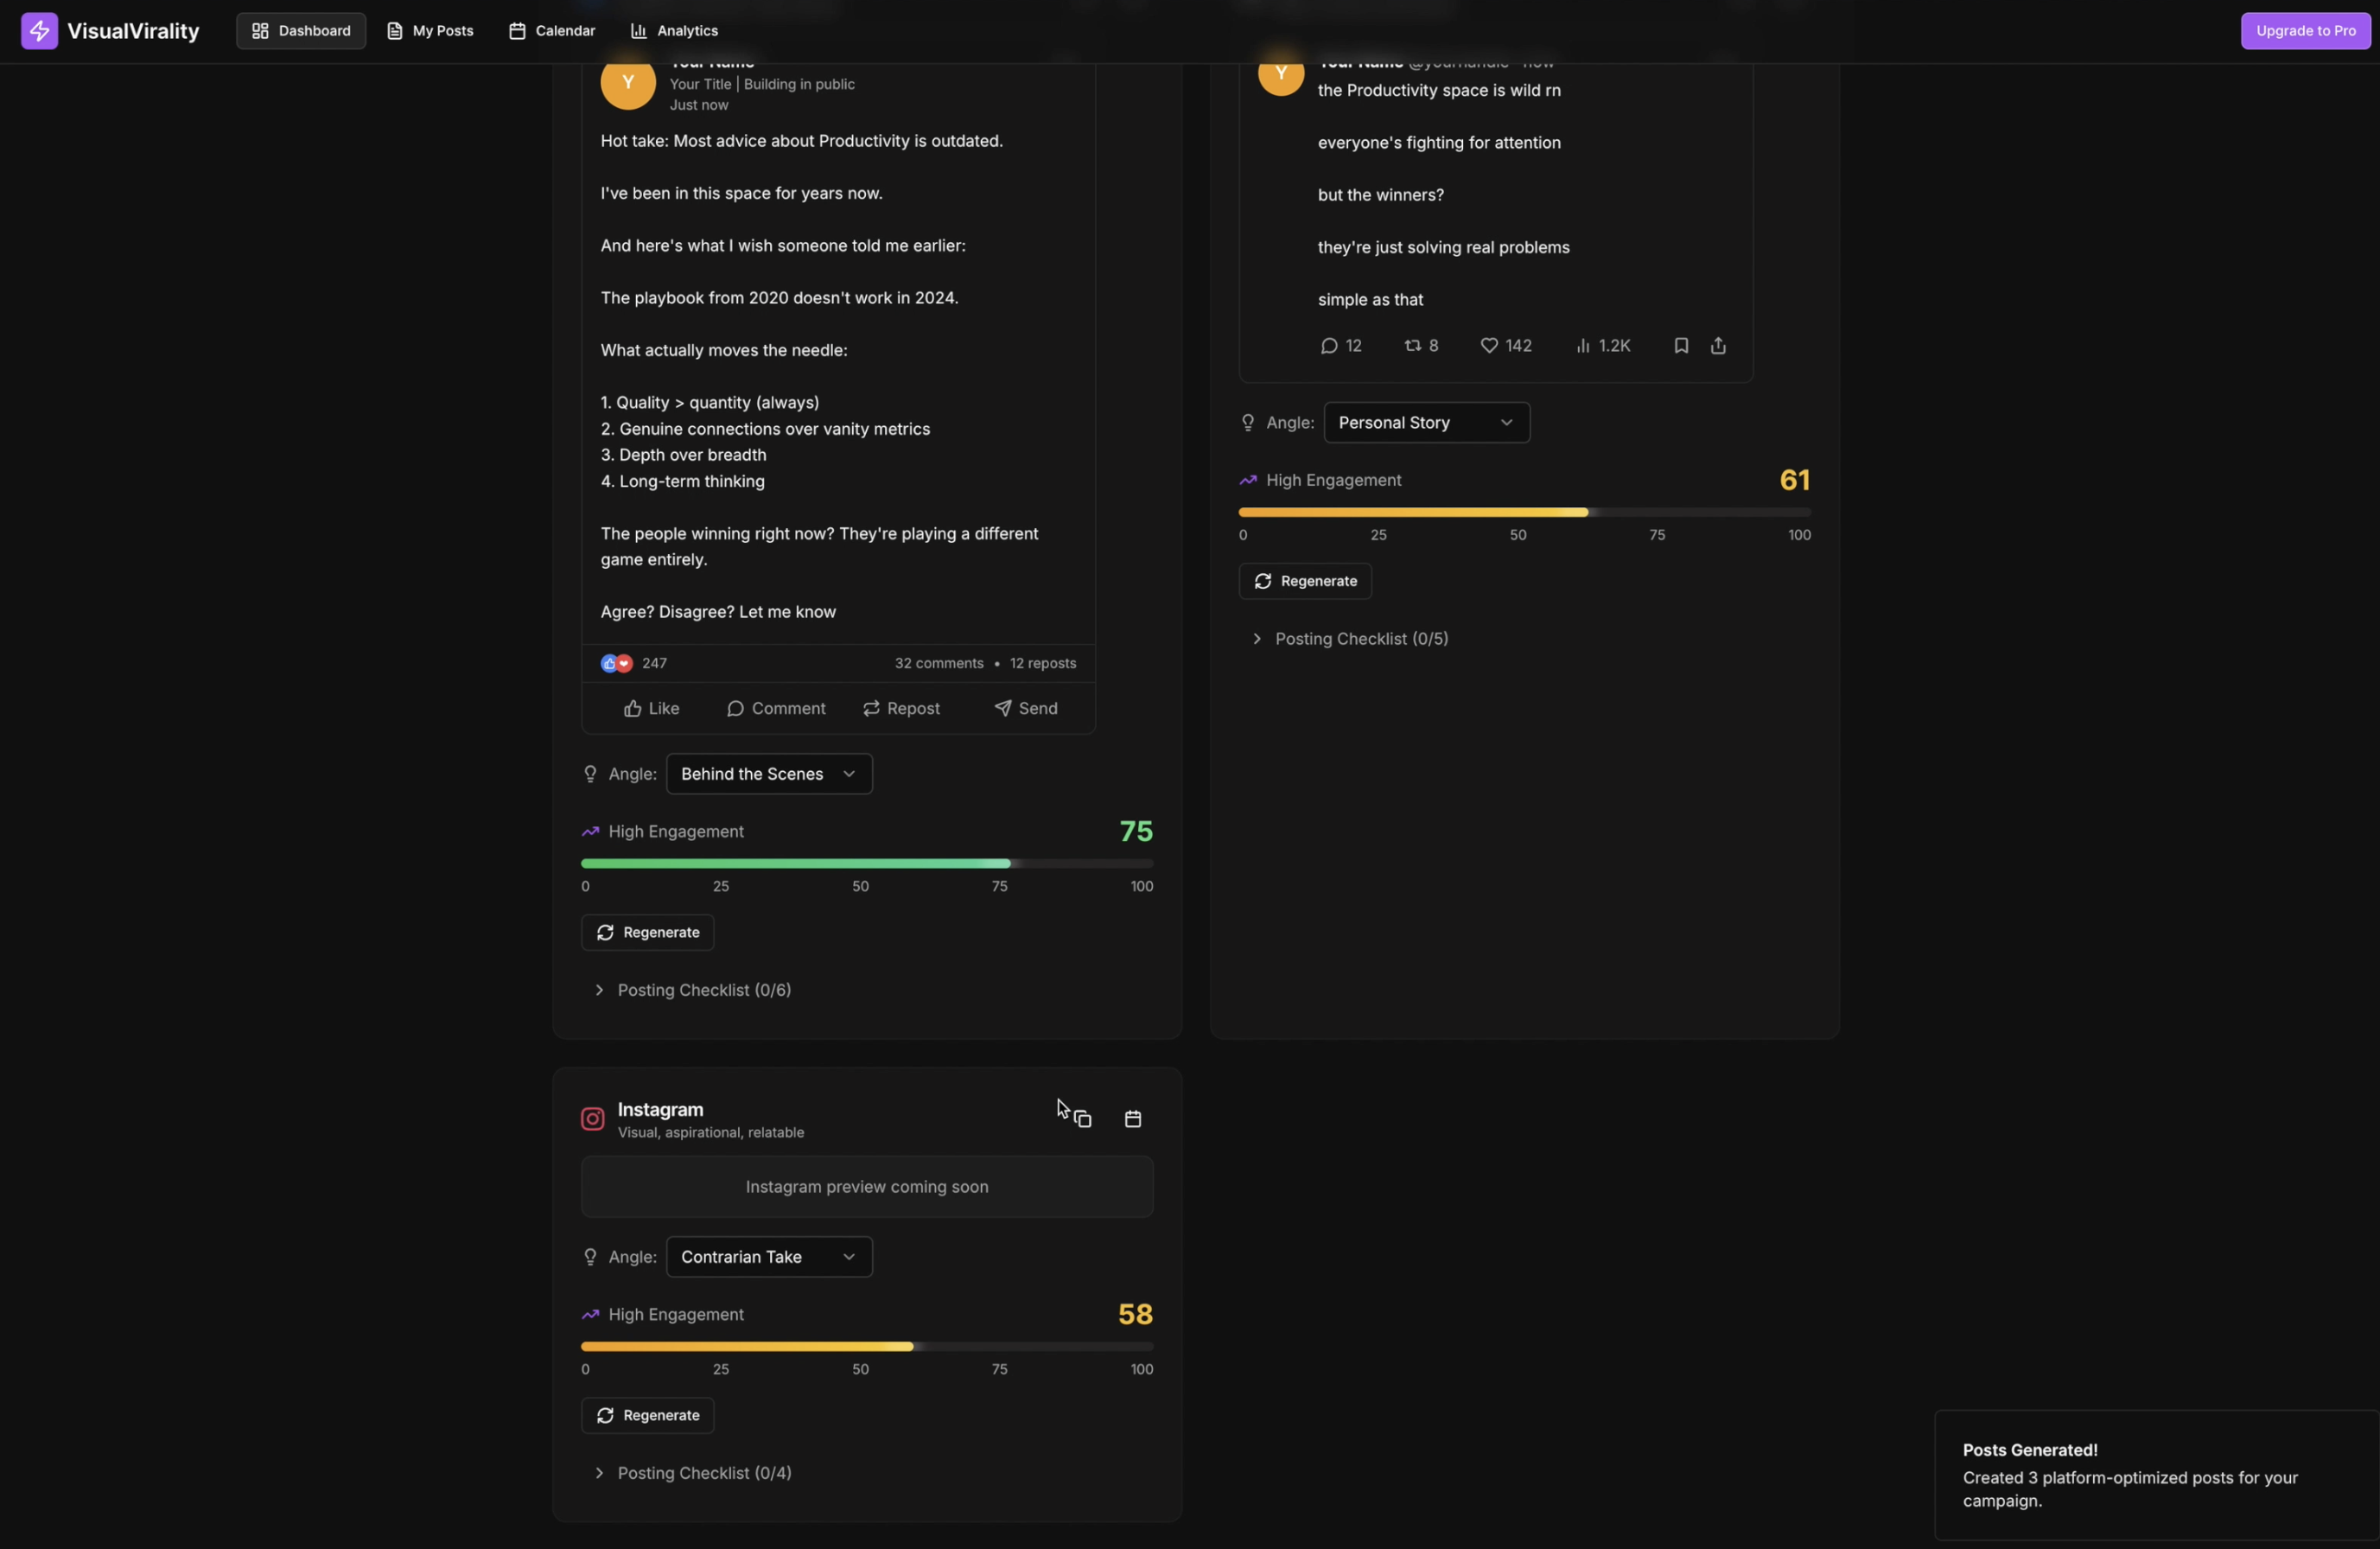
At the bottom sits the posting checklist—a set of best practices sourced directly from the interviews and research I compiled earlier and then encoded into the PRD. It’s the small, experience-driven details like these that help the tool feel genuinely useful rather than generic.
Editing the design
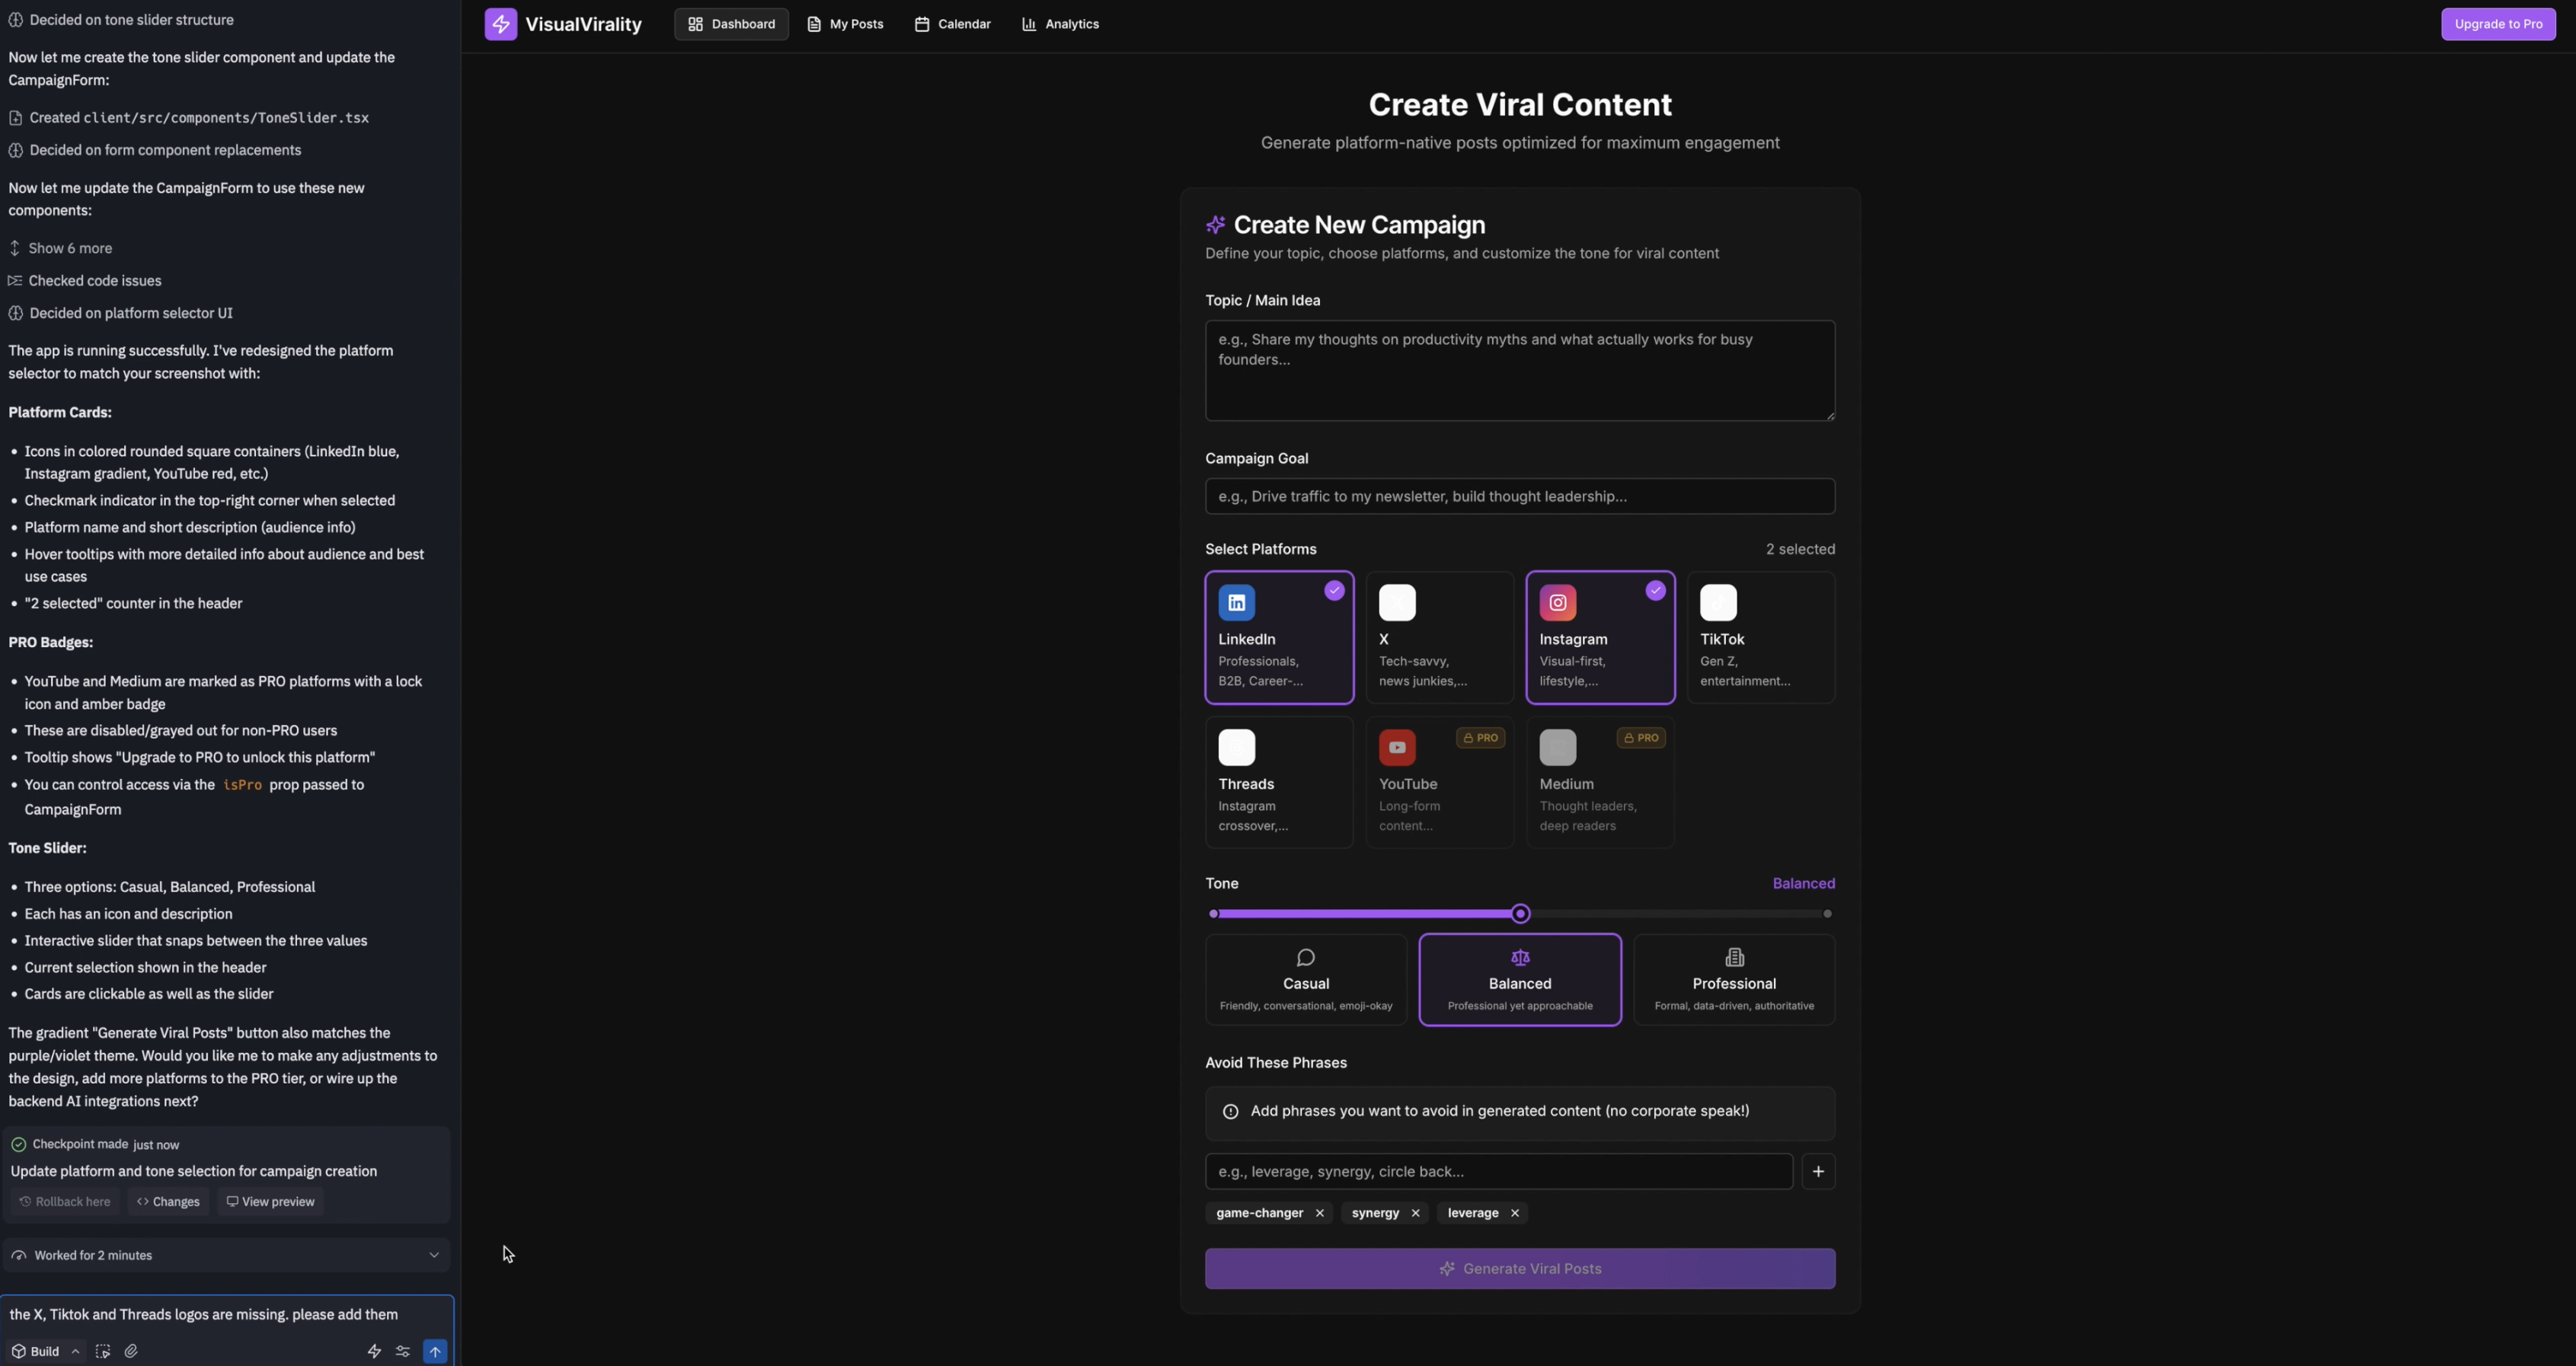
While reviewing the prototype, I noticed a design pattern I really liked—something I remember seeing on Mobbin. To incorporate it, I grabbed a quick screenshot (though mocking it up in Figma would work just as well). Replit allows you to attach Figma designs, link prototypes, or upload reference files directly, so I uploaded the image to guide the next iteration.
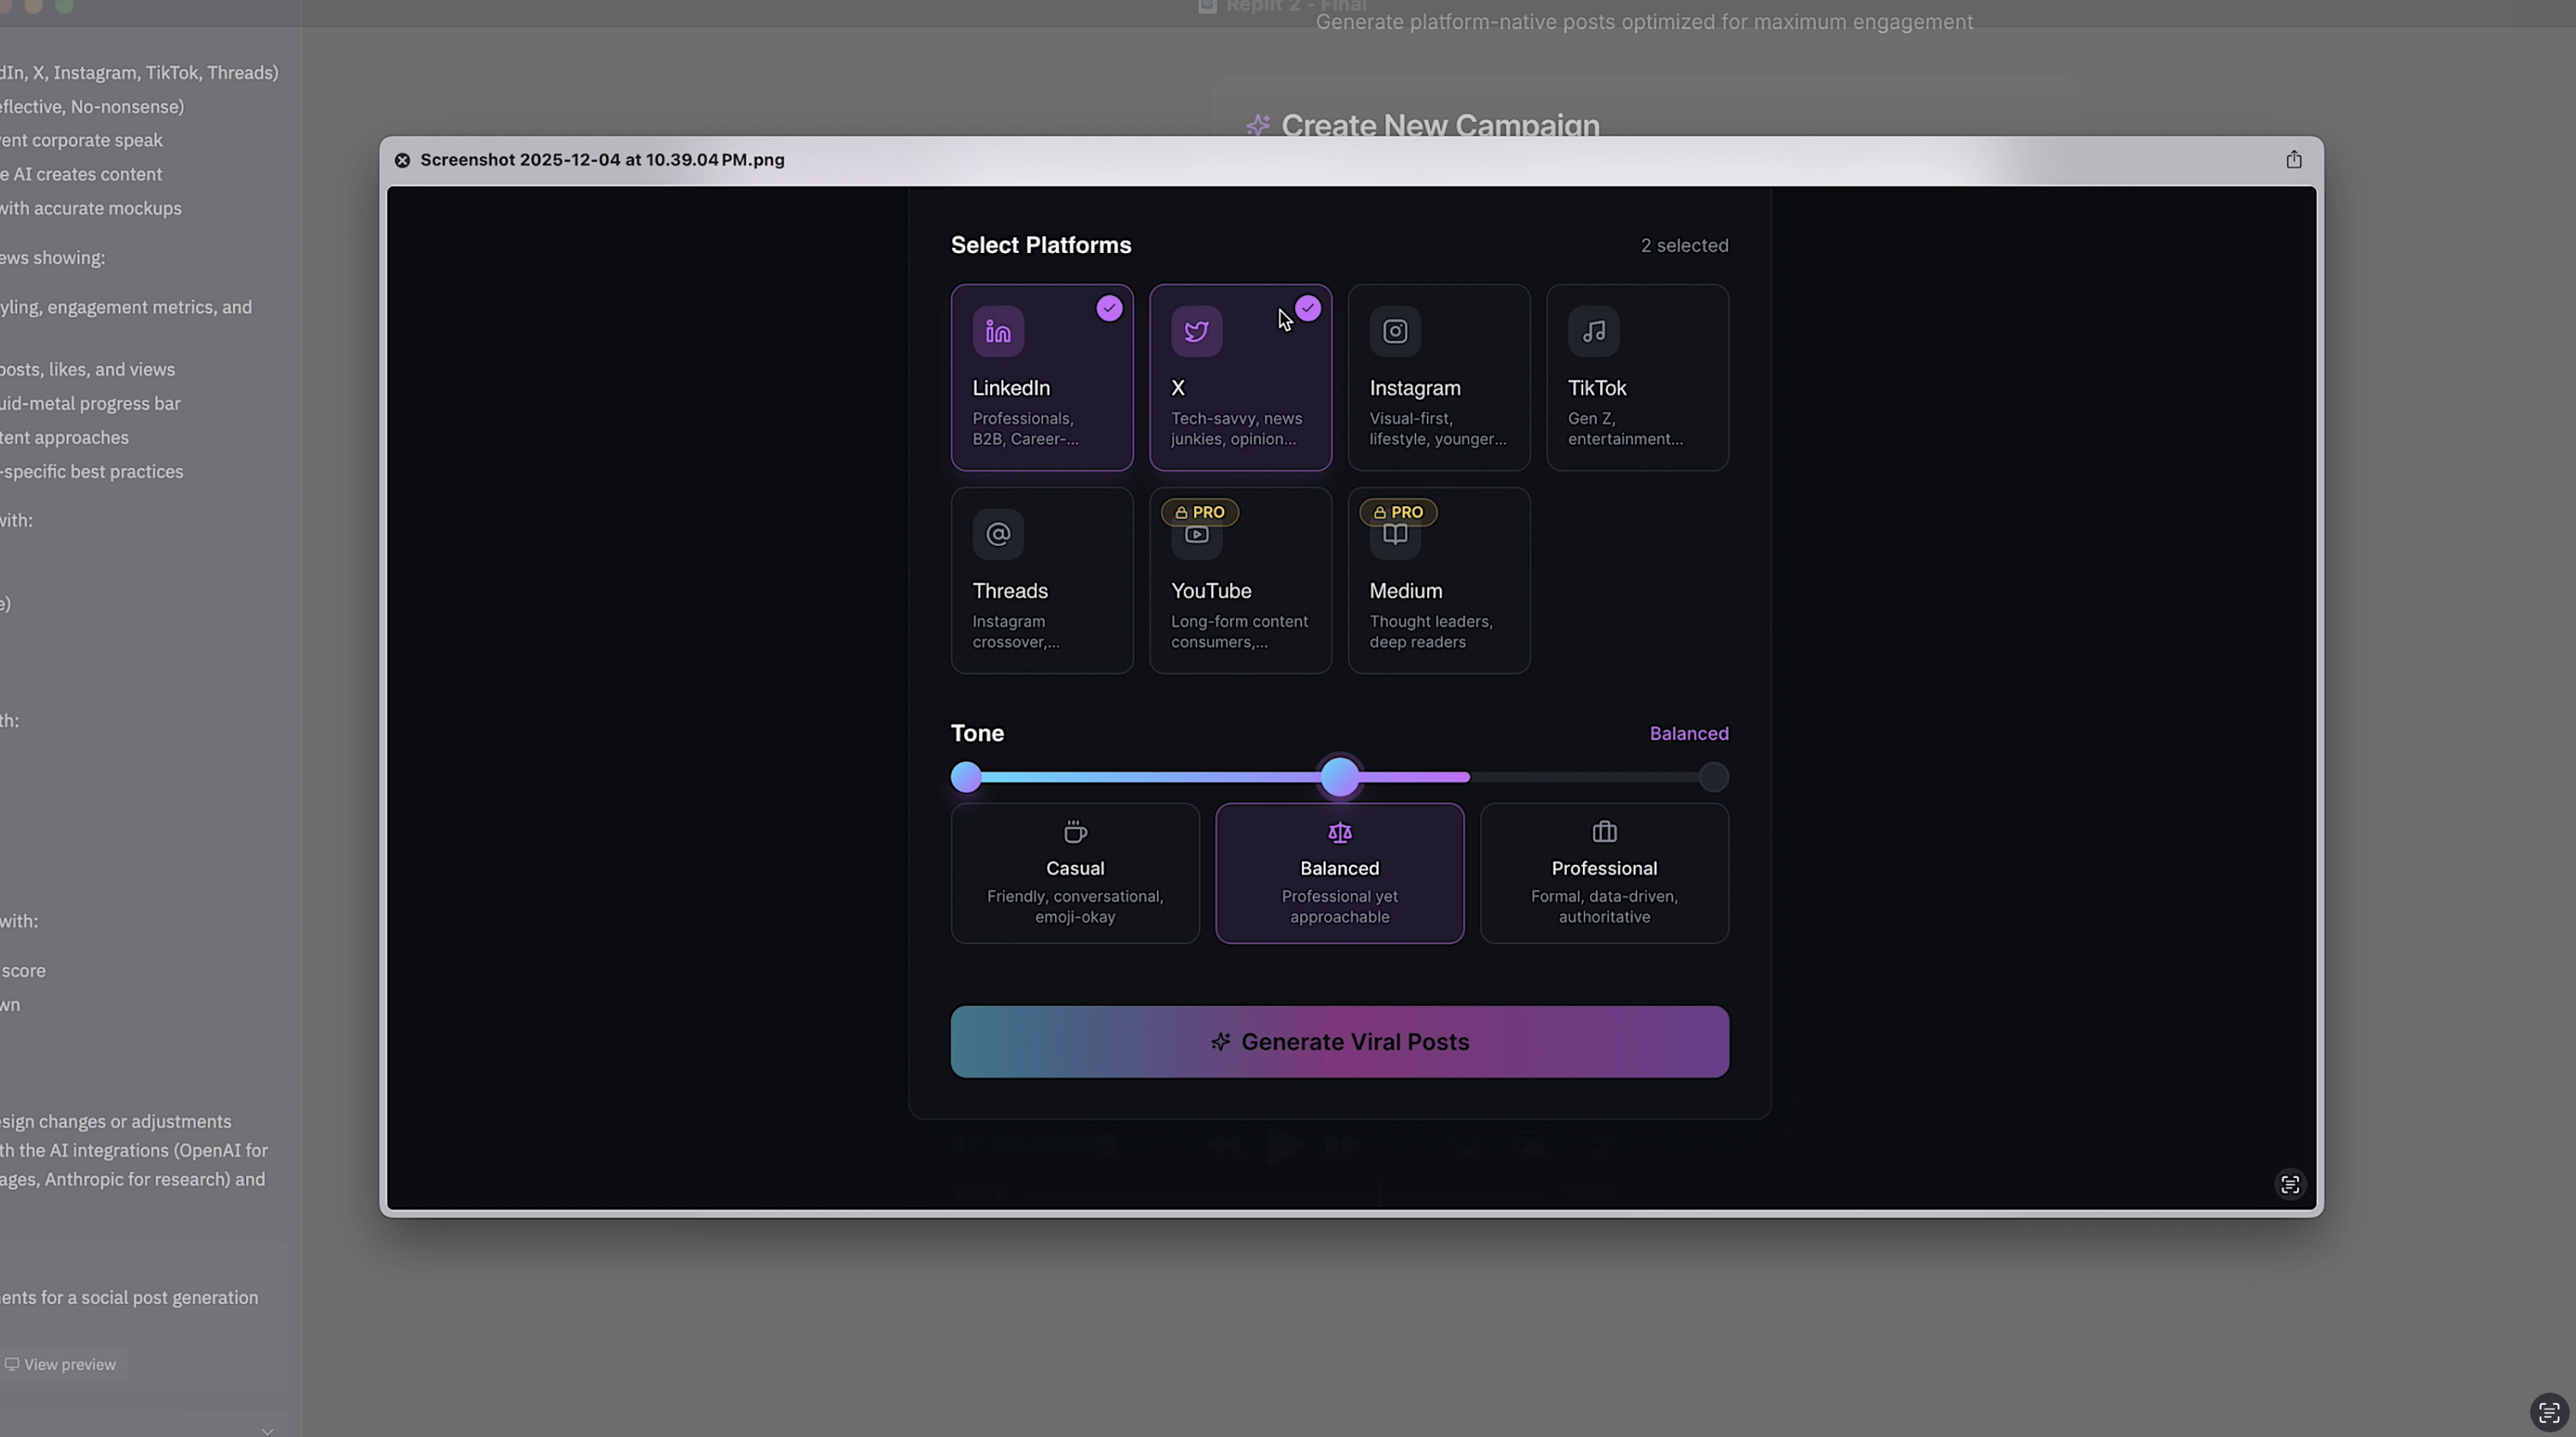
The pattern included a bit more contextual information for each platform, a clear checkmark to show which ones were selected, and a visual indicator for features locked behind a pro upgrade. I asked the agent to update the design so the platform list matched this style, including the ability to paywall certain platforms.
Within a moment, it regenerated the layout with those elements added.
Fixing the design
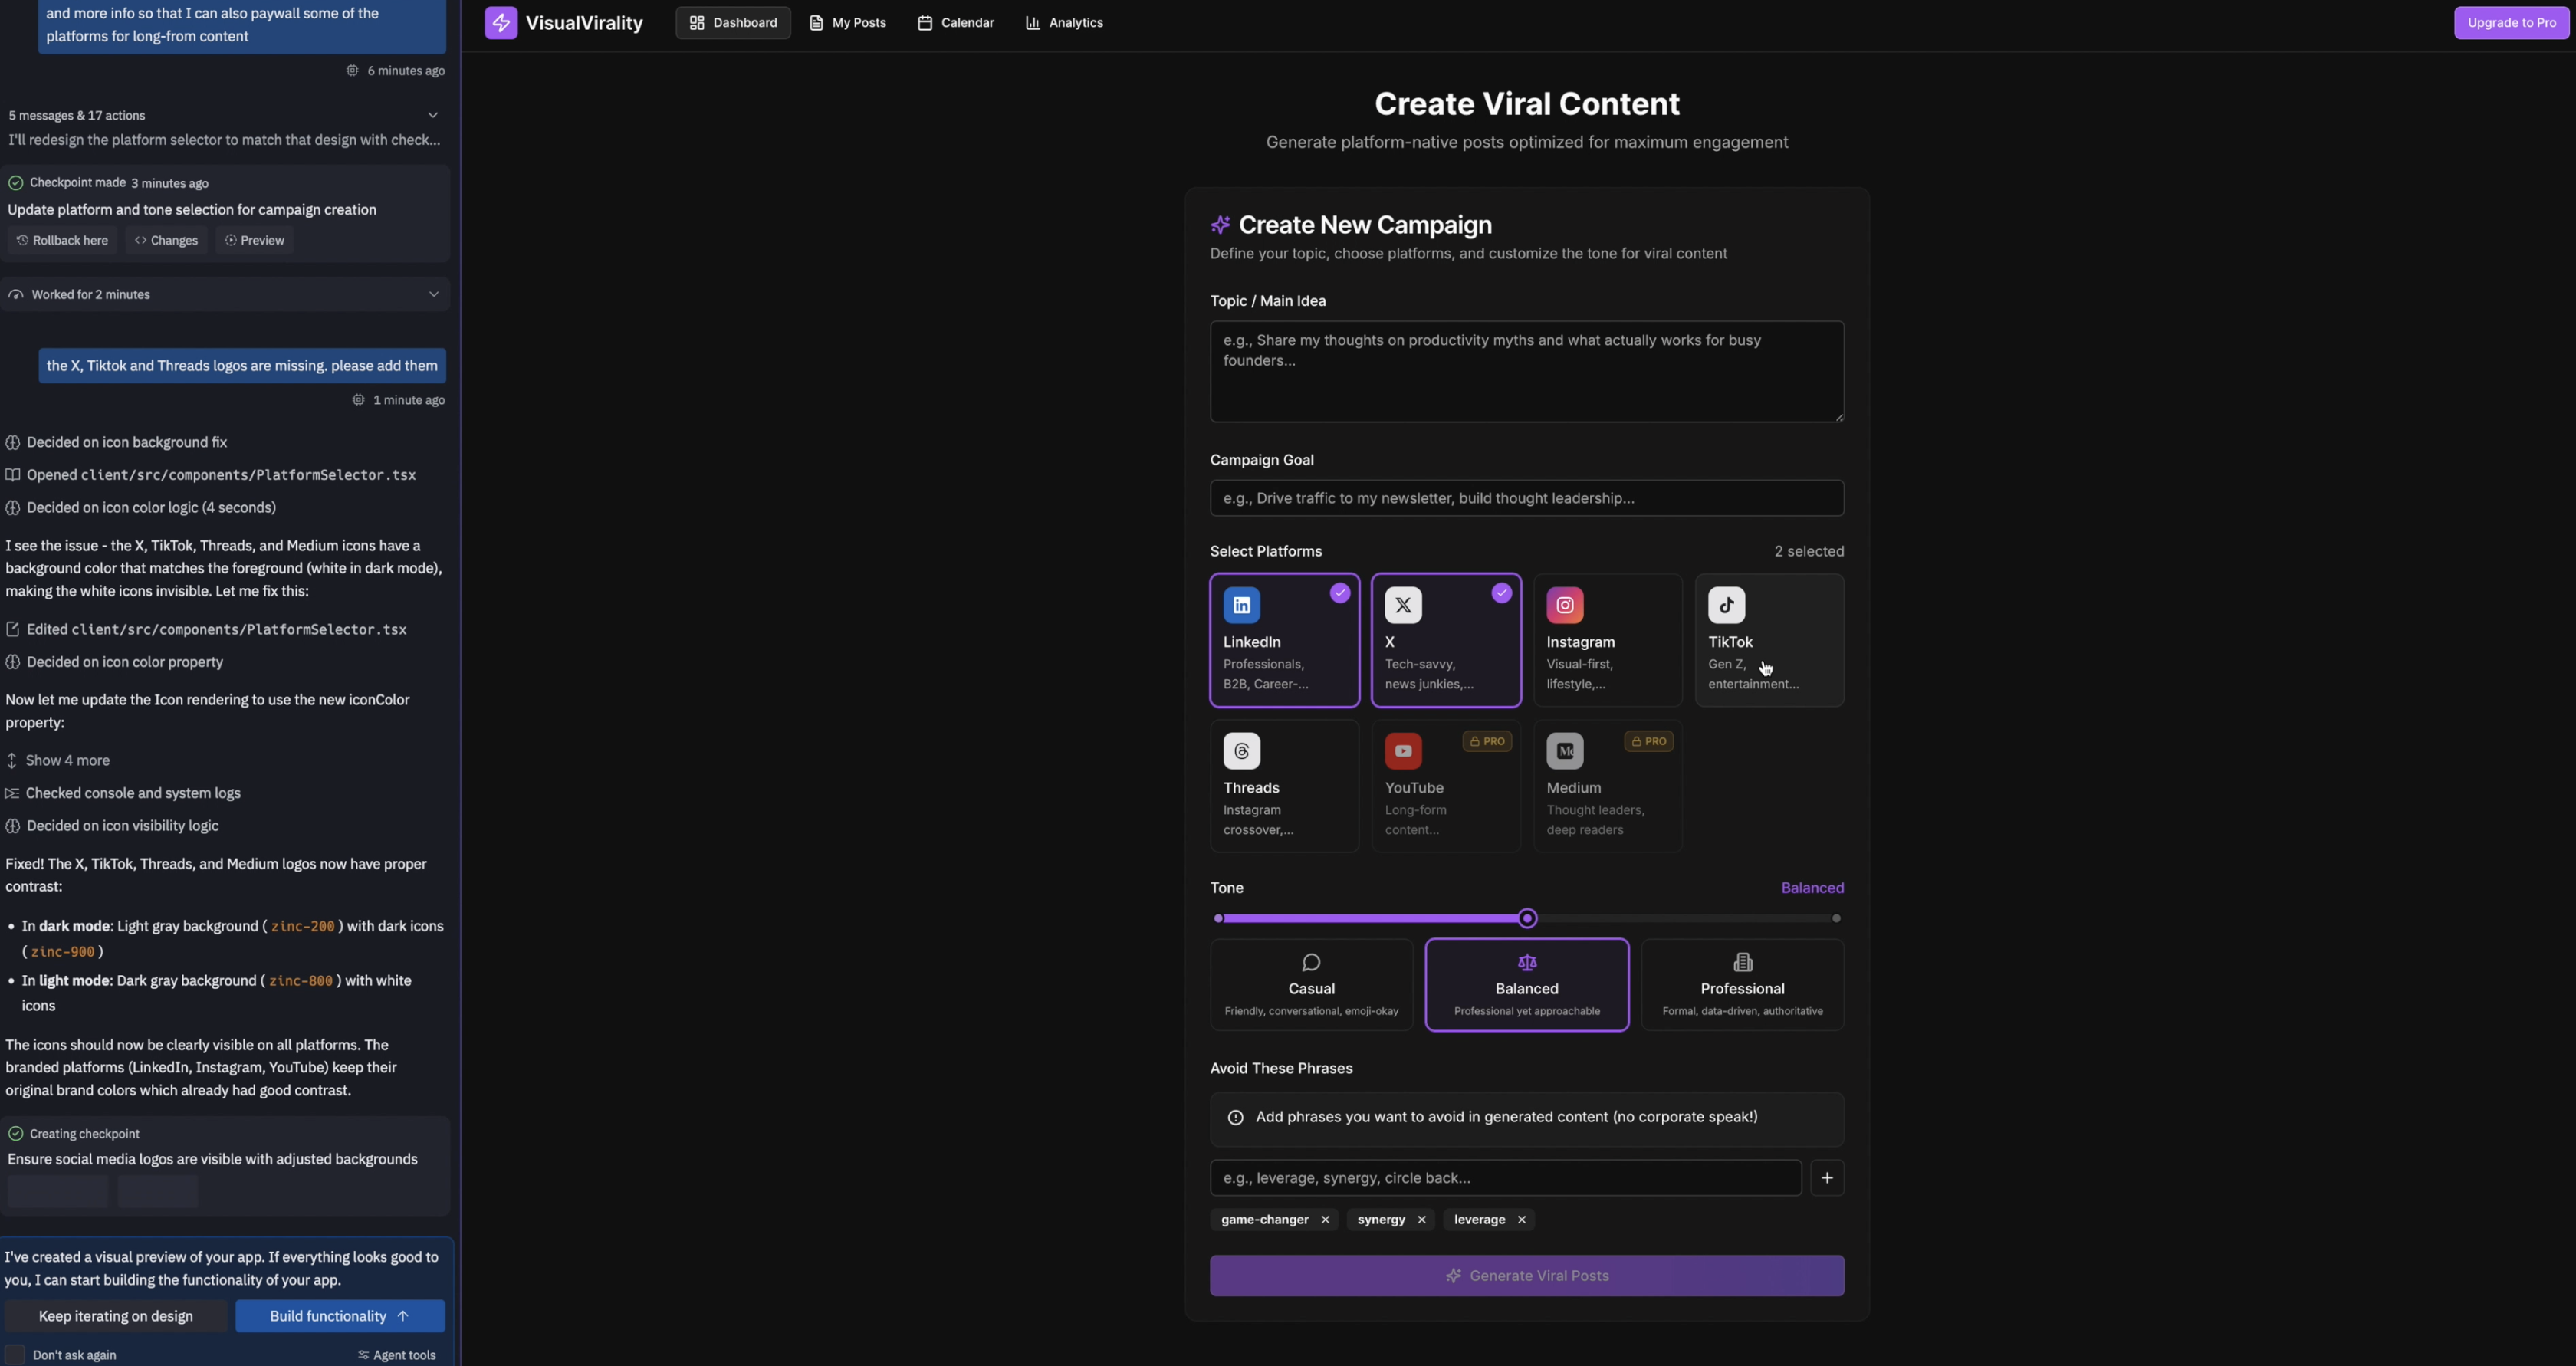
After making those changes however, I noticed the icons for X, TikTok, and Threads were missing. This is the sort of small inconsistency you only catch once you see the design in context, so I asked it to continue iterating.
These are the kinds of quirks that come up during early design exploration—little mismatches, missing pieces, or incomplete details—and they’re easy to correct once you spot them.
The agent actually found that the icons weren’t actually missing—their colors simply matched the background, making them invisible. The agent picked up on the issue, reasoned through what was happening, and corrected it. Once updated, the icons displayed properly.
At this stage, if you’re a designer or a product manager, this is an ideal moment to pause and share the prototype with your team. It gives everyone a chance to react to the direction, catch anything that feels off, and give early feedback before the build phase begins. It’s far easier to adjust concepts here than after everything is coded.
Building the app with a database
Once the prototype feels solid, it’s time to move into the actual build. At this point, all I need to do is click Build Functionality, and Replit begins assembling the real application. It generates the database, creates the underlying app structure, and wires in all of the integrations we added earlier and makes sure everything functions smoothly.
First version
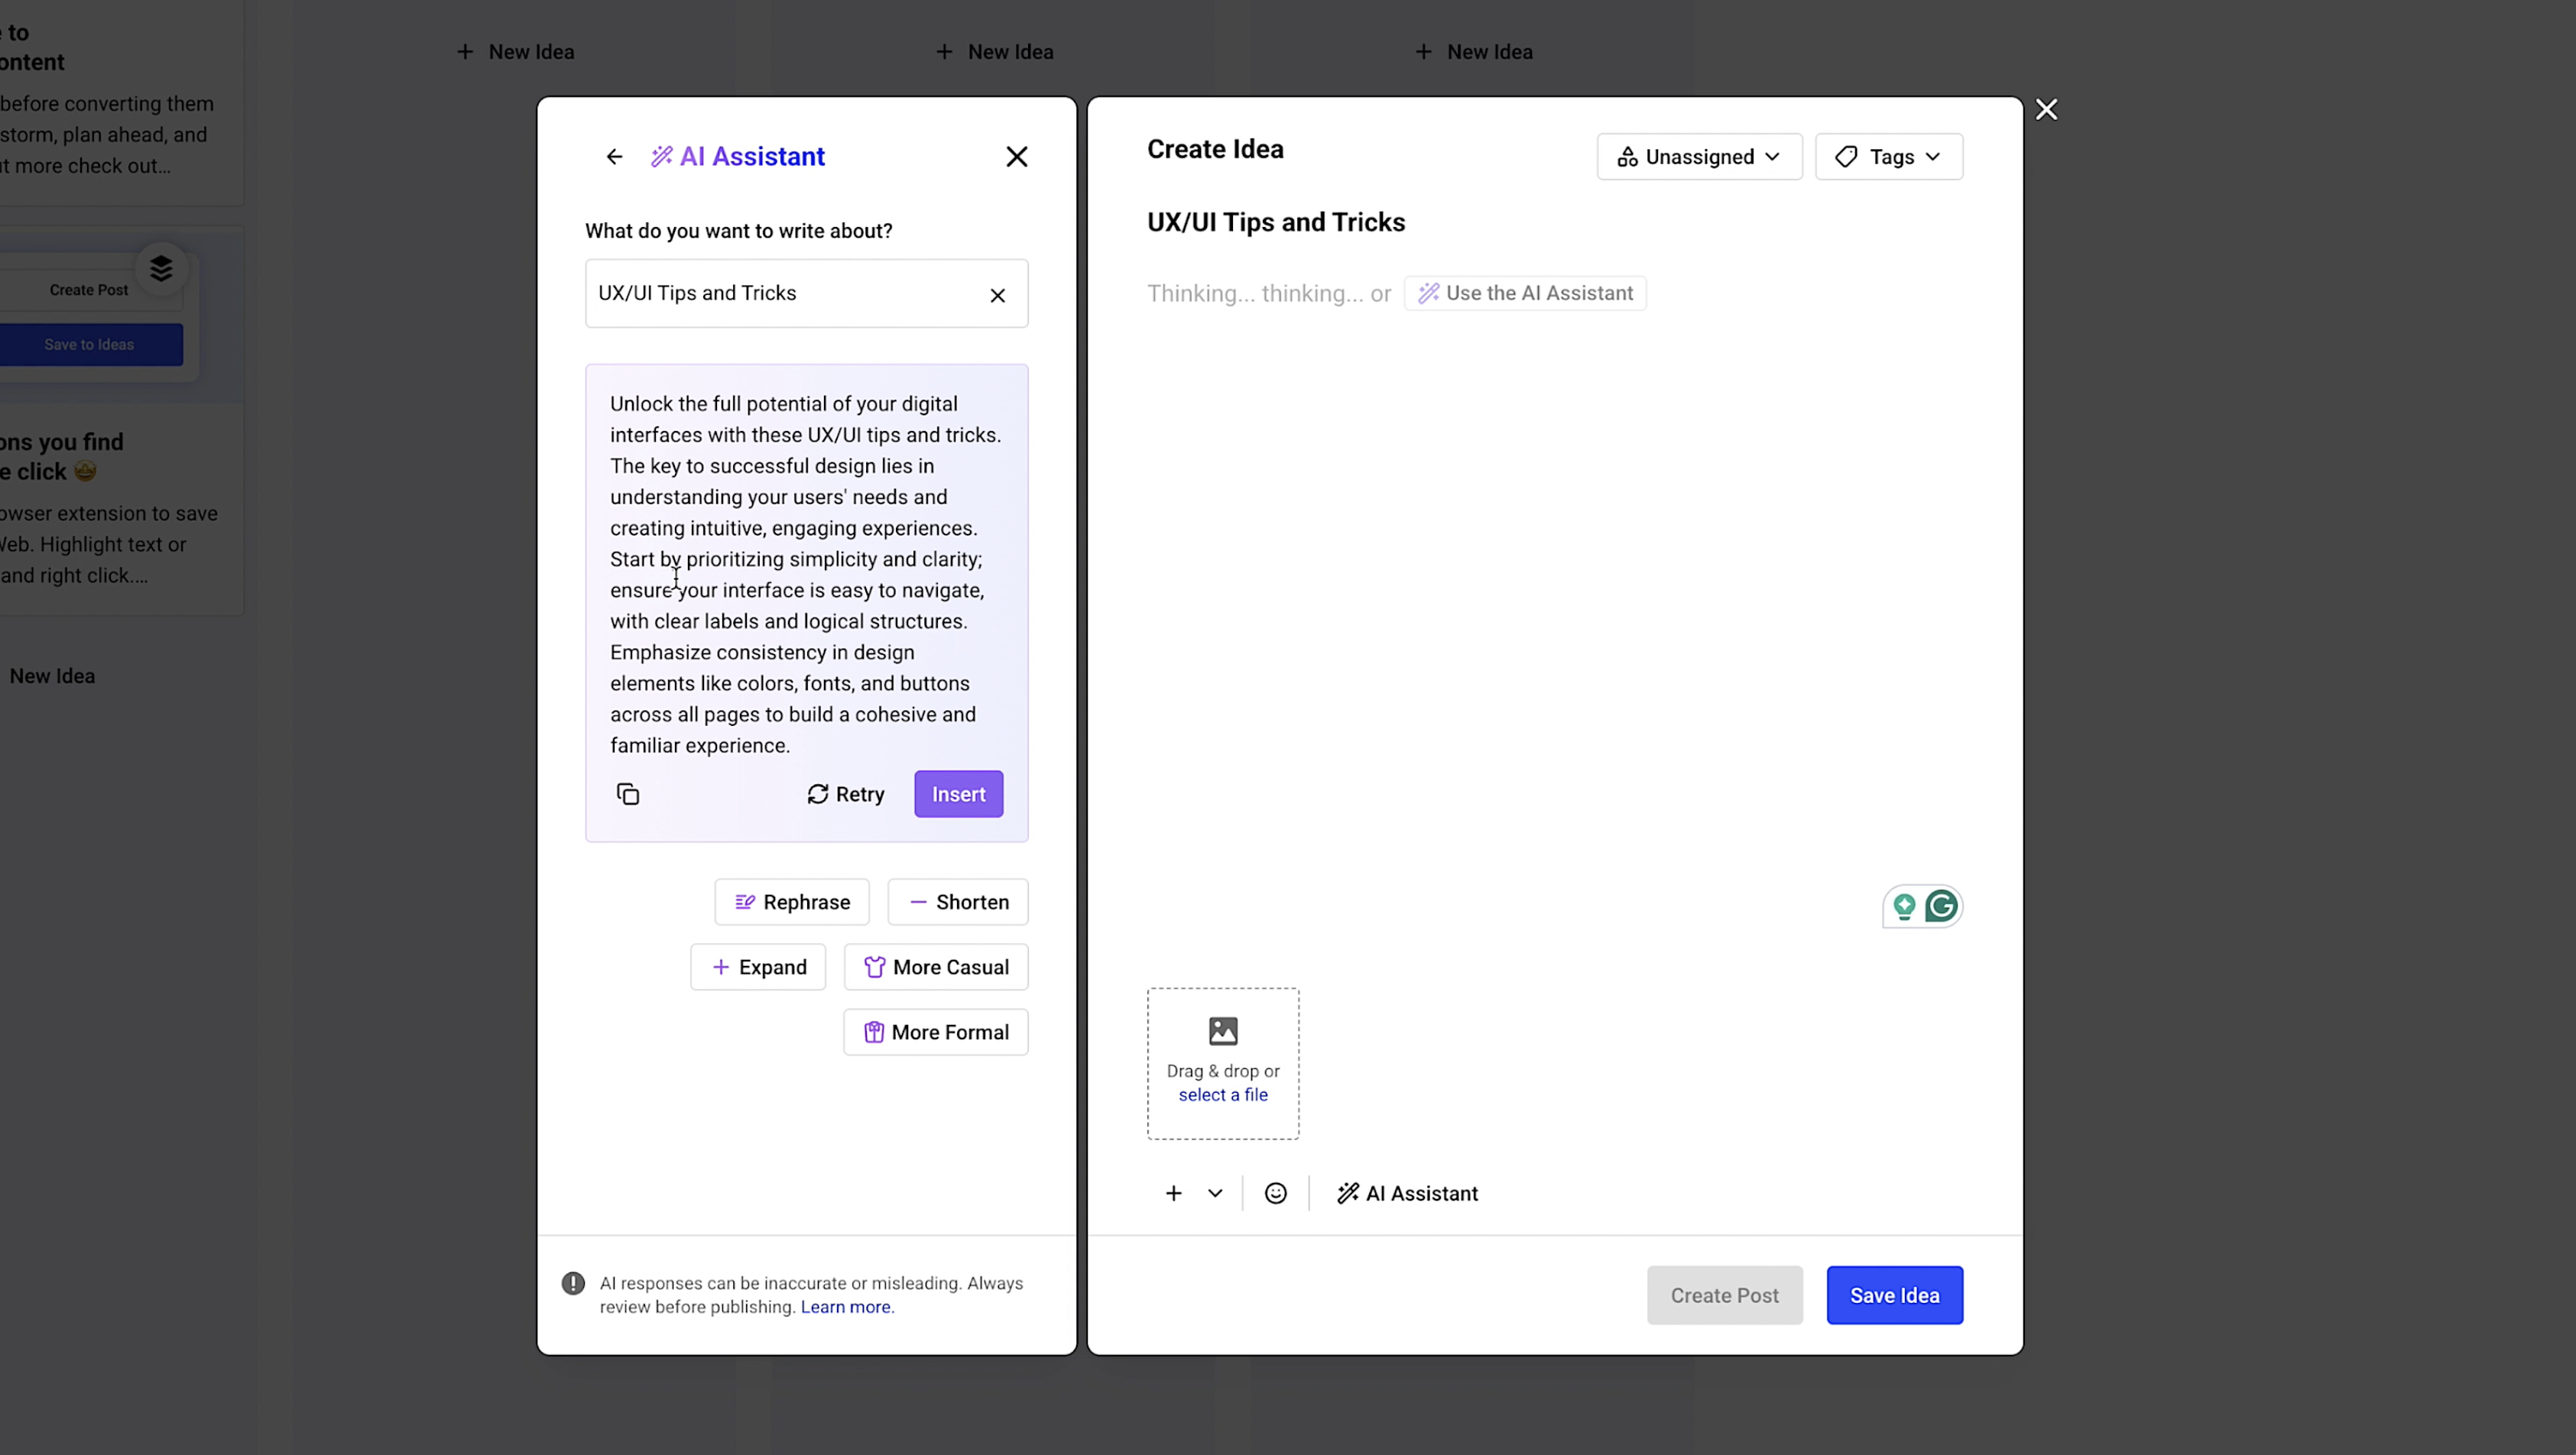
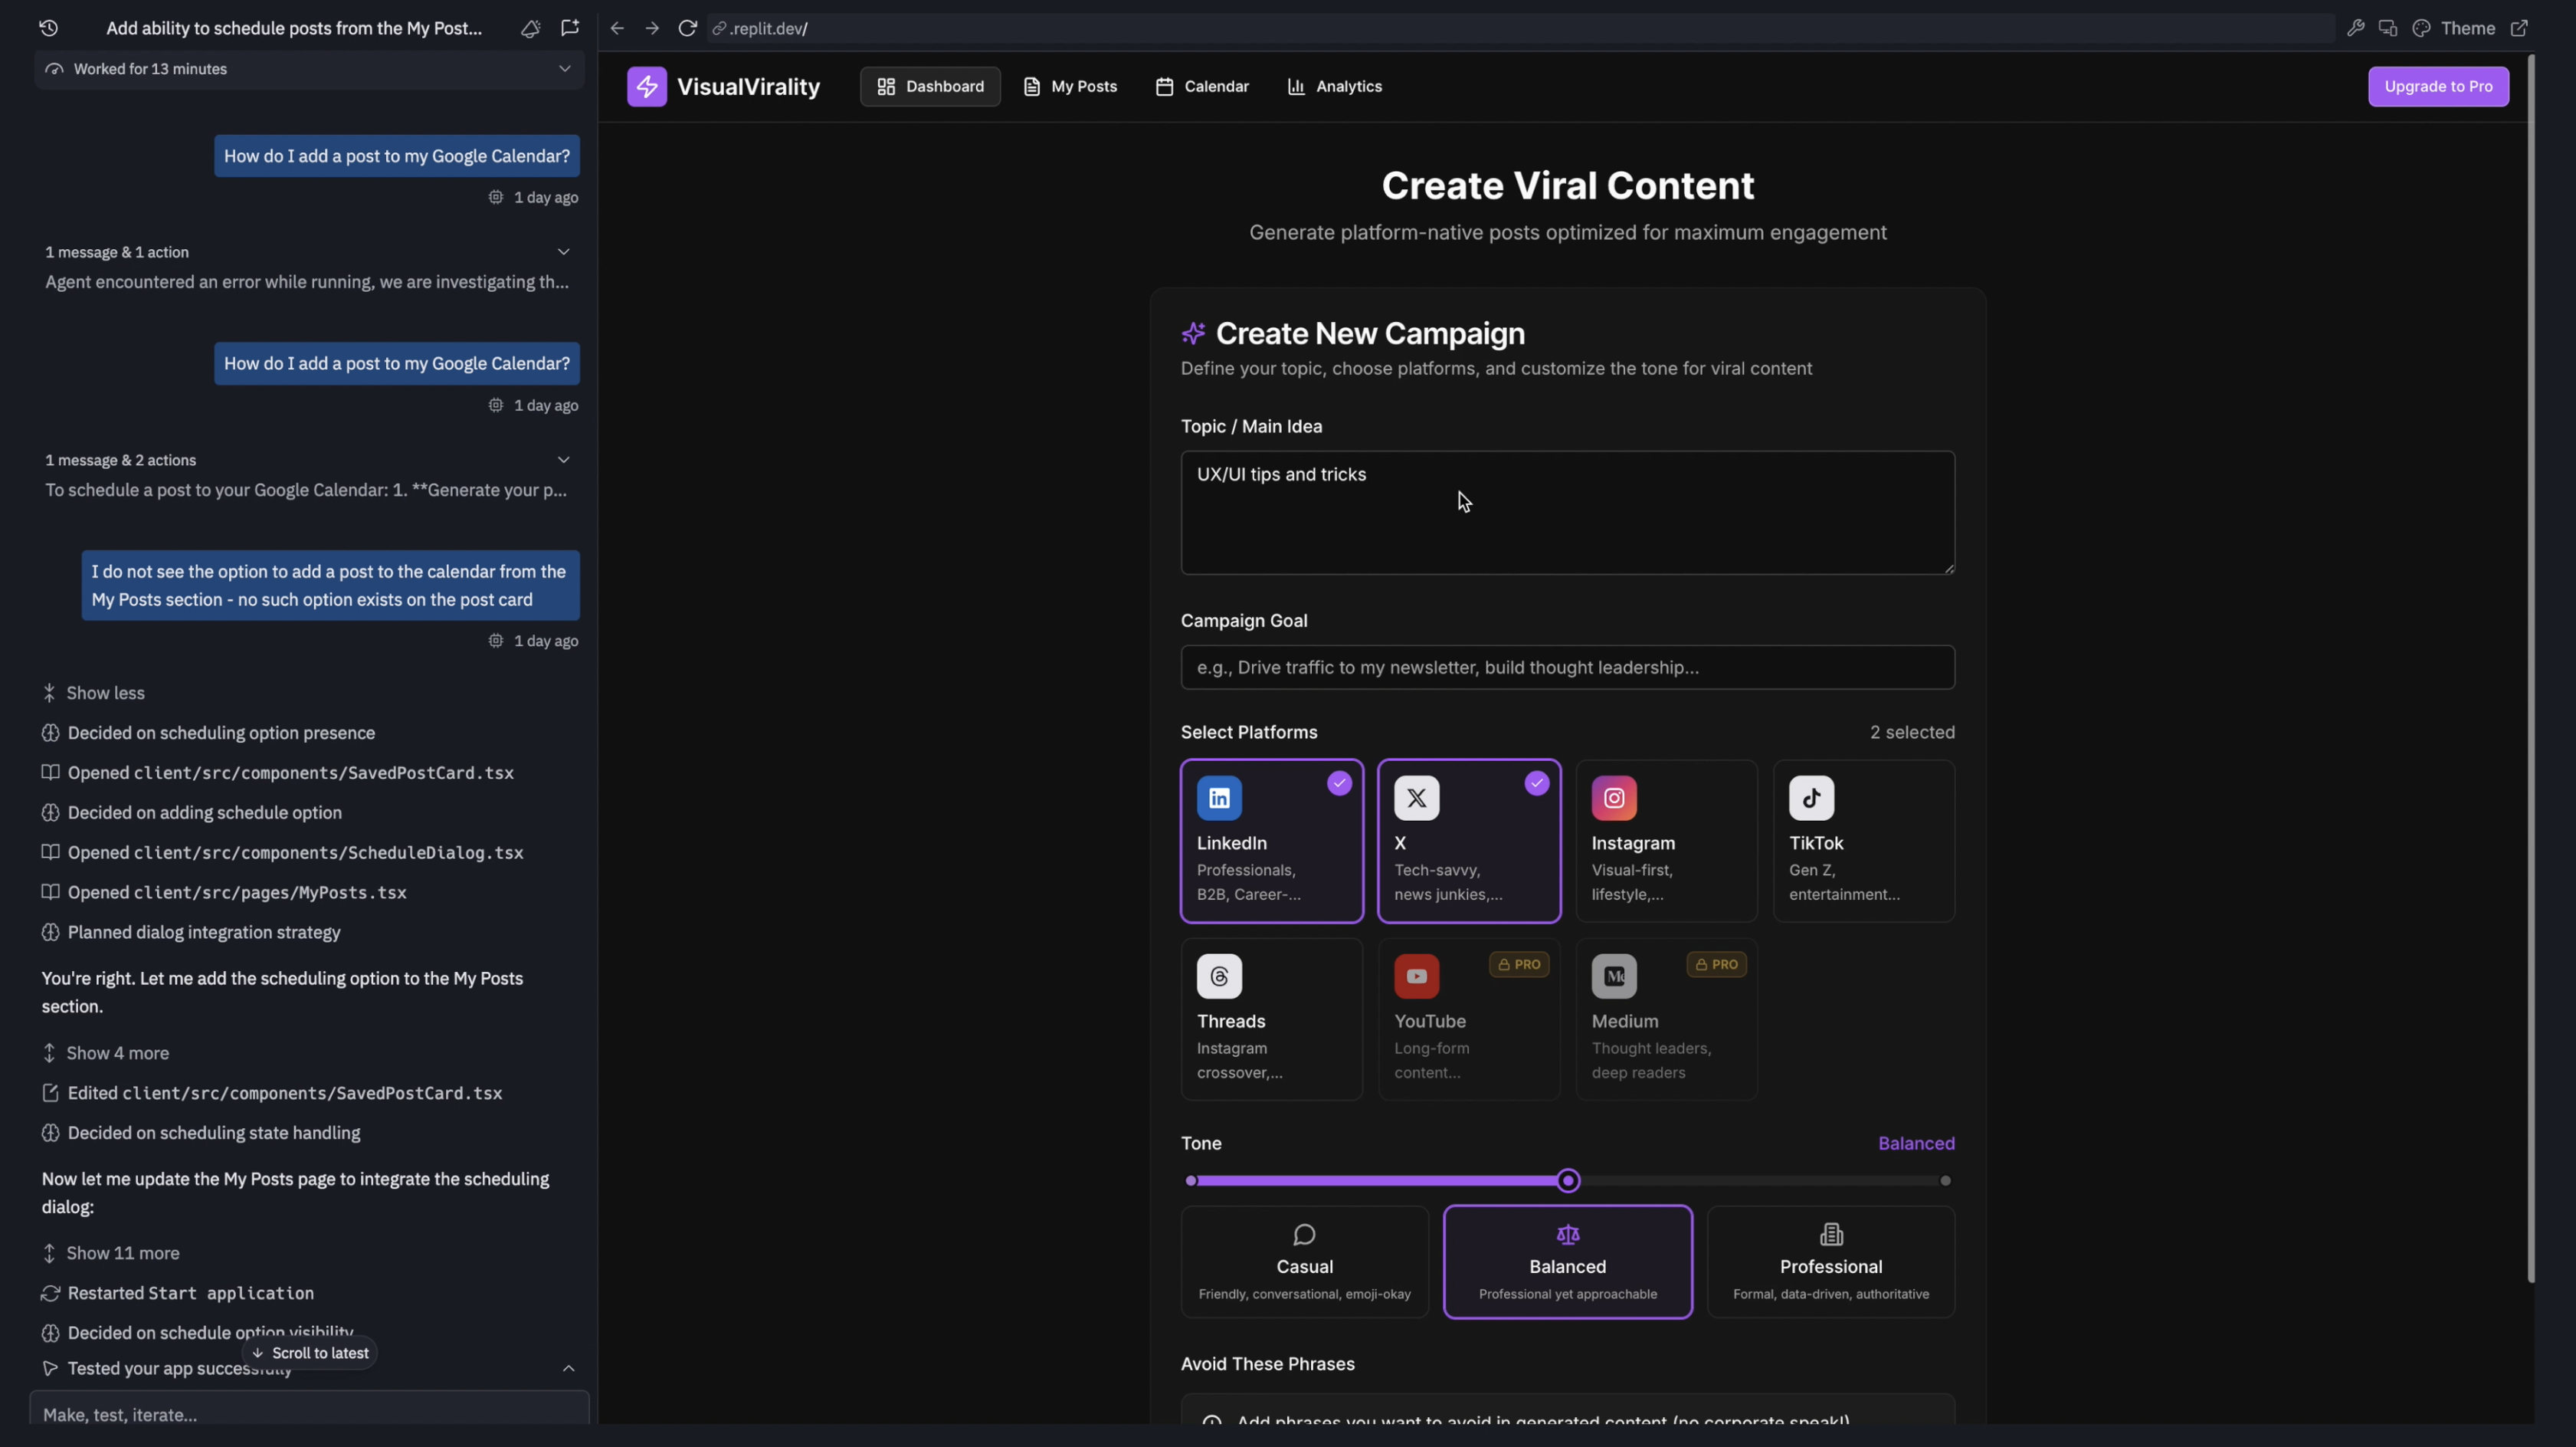
Once the build phase finished, Replit produced a working version of the app with all the elements from the prototype now fully functional. This is the moment where the real evaluation begins—testing how everything behaves, not just how it looks.
I started by entering a simple UX/UI topic, selected a few platforms, set the tone to something casual, and generated a batch of posts. The results were surprisingly solid—short, witty, and formatted in a way that genuinely resembles content I’d post on LinkedIn or see from other creators.
A few flow gaps stood out immediately. The app didn’t generate images for Instagram or TikTok, which means the image-generation flow still needs refinement. And on LinkedIn, I tend to prefer posts with more visual rhythm—emojis, line breaks, and shape. The structure of the content matters just as much as the words themselves.
To troubleshoot effectively, I started taking each platform one at a time. This step-by-step approach—one feature, one screen, one flow—is the only way to build something complex without getting overwhelmed. After guiding the model through a few refinements, the LinkedIn output improved dramatically: cleaner formatting, no strange characters, and much more personality.
Along the way, you’ll run into countless small adjustments like this. I recommend capturing them in a simple Kanban board—I use this one in Notion to keep track of bug fixes, design tweaks, and future enhancements.
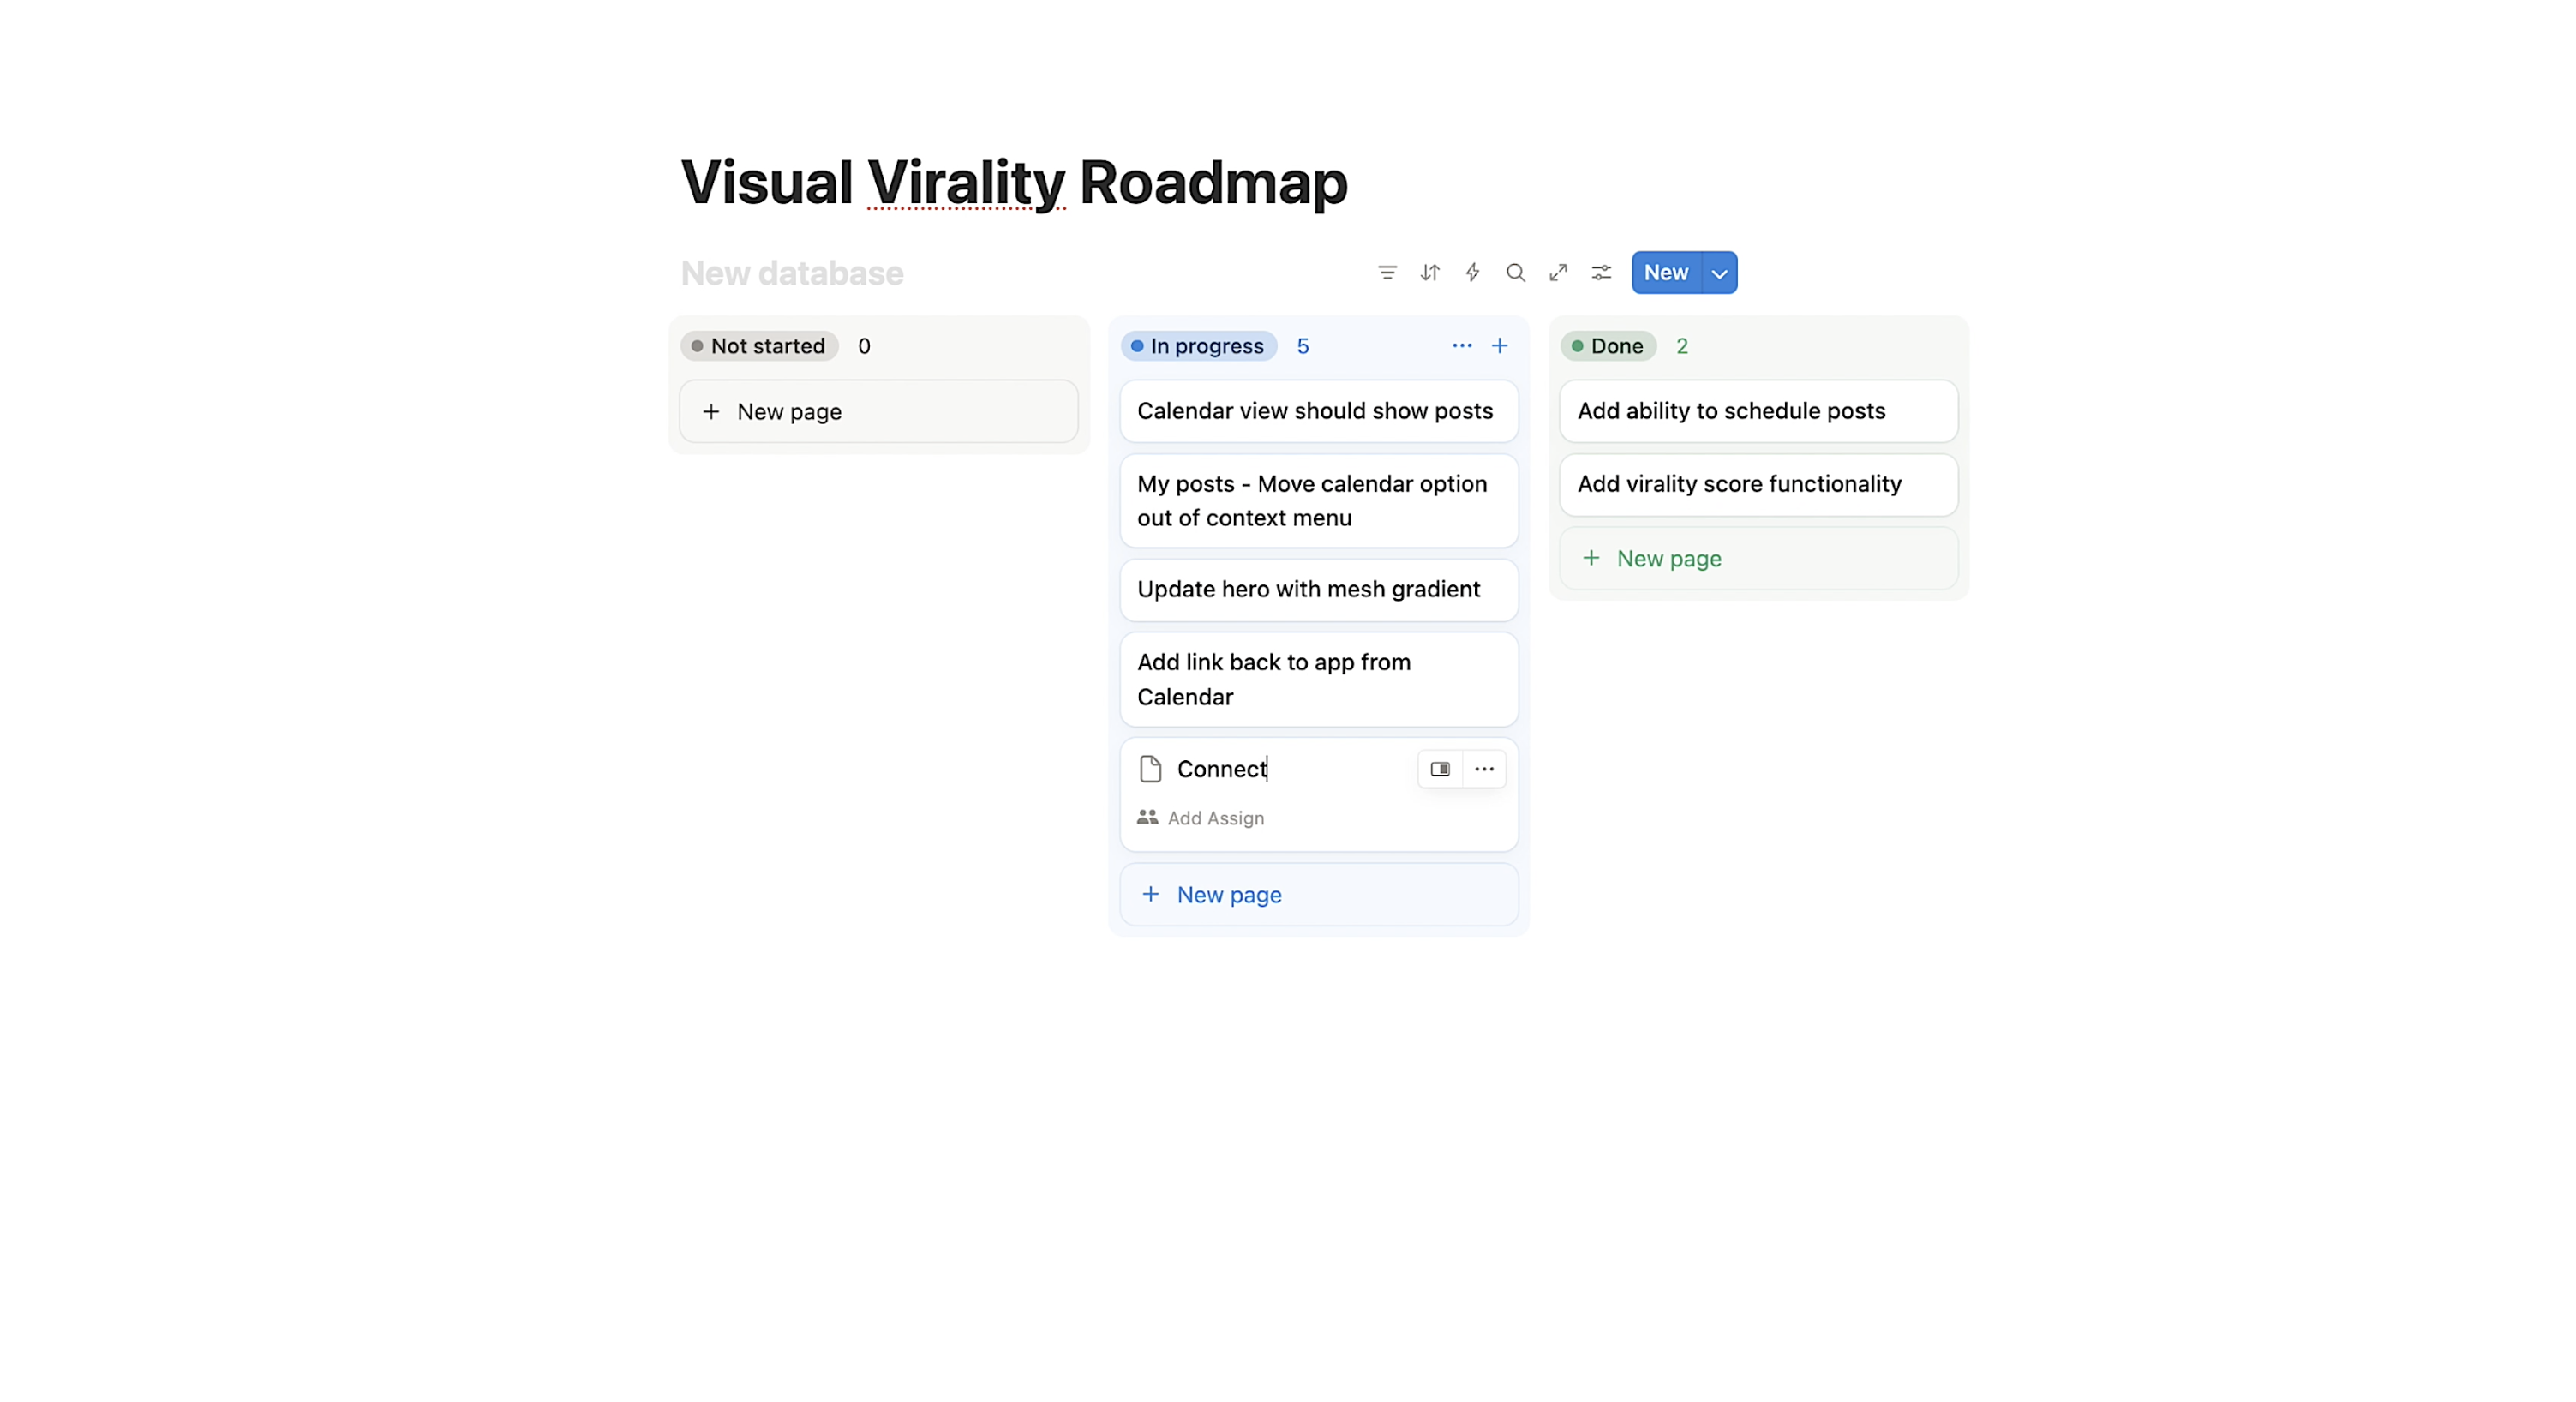
Having a place to store insights and edge cases keeps the process organized and prevents ideas from slipping through the cracks.
Adding Gemini 3 Image Generation
The next issue to address was the absence of images for platforms that rely heavily on visuals. None of the posts had accompanying graphics, so I asked the system to use Gemini 3 to generate a relevant image for each one.
Replit updated the plan accordingly: OpenAI would handle the written content, Gemini would create the graphics, and Anthropic would score the results. With that in place, I ran another test to see what the new outputs looked like.
The images were better than I expected—coherent, on-topic, and aligned with the tone of each post. There’s still room to refine them by specifying the exact style or visual identity I want, especially if I want everything to match a consistent brand aesthetic. But overall, the results felt contextual and integrated well with the surrounding text.
Step Four: Iterate and Improve
When you’re building with AI—especially with tools as capable as Replit—it’s tempting to aim for a fully featured product right away. But it’s always better to start small. Treat your idea like a product roadmap: add one feature, refine it, and iterate over time. The more intentional and focused you are at each step, the easier it becomes to maintain clarity as the project grows.
If you already have a sense of how you want the interface to look, tools like Mobbin are incredibly helpful for exploring real design patterns. Pulling from examples that have been tested in the wild gives you a stronger foundation and helps the agent understand the type of experience you're aiming for.
It also helps to use clear vocabulary when describing your vision to the agent. You don’t need to speak in highly technical terms, but being able to reference basic frameworks, animation styles, or thematic design elements makes a noticeable difference. It gives the AI stronger creative direction and results in a UI and user experience that feels intentional rather than generic..
Testing Google Calendar Connection
With the main features in place, I moved on to exploring the rest of the screens and testing how the app behaves end-to-end. The posts that were generated appear in a central dashboard where each one can be edited or copied. What I really wanted, though, was the ability to add a post directly to my Google Calendar.
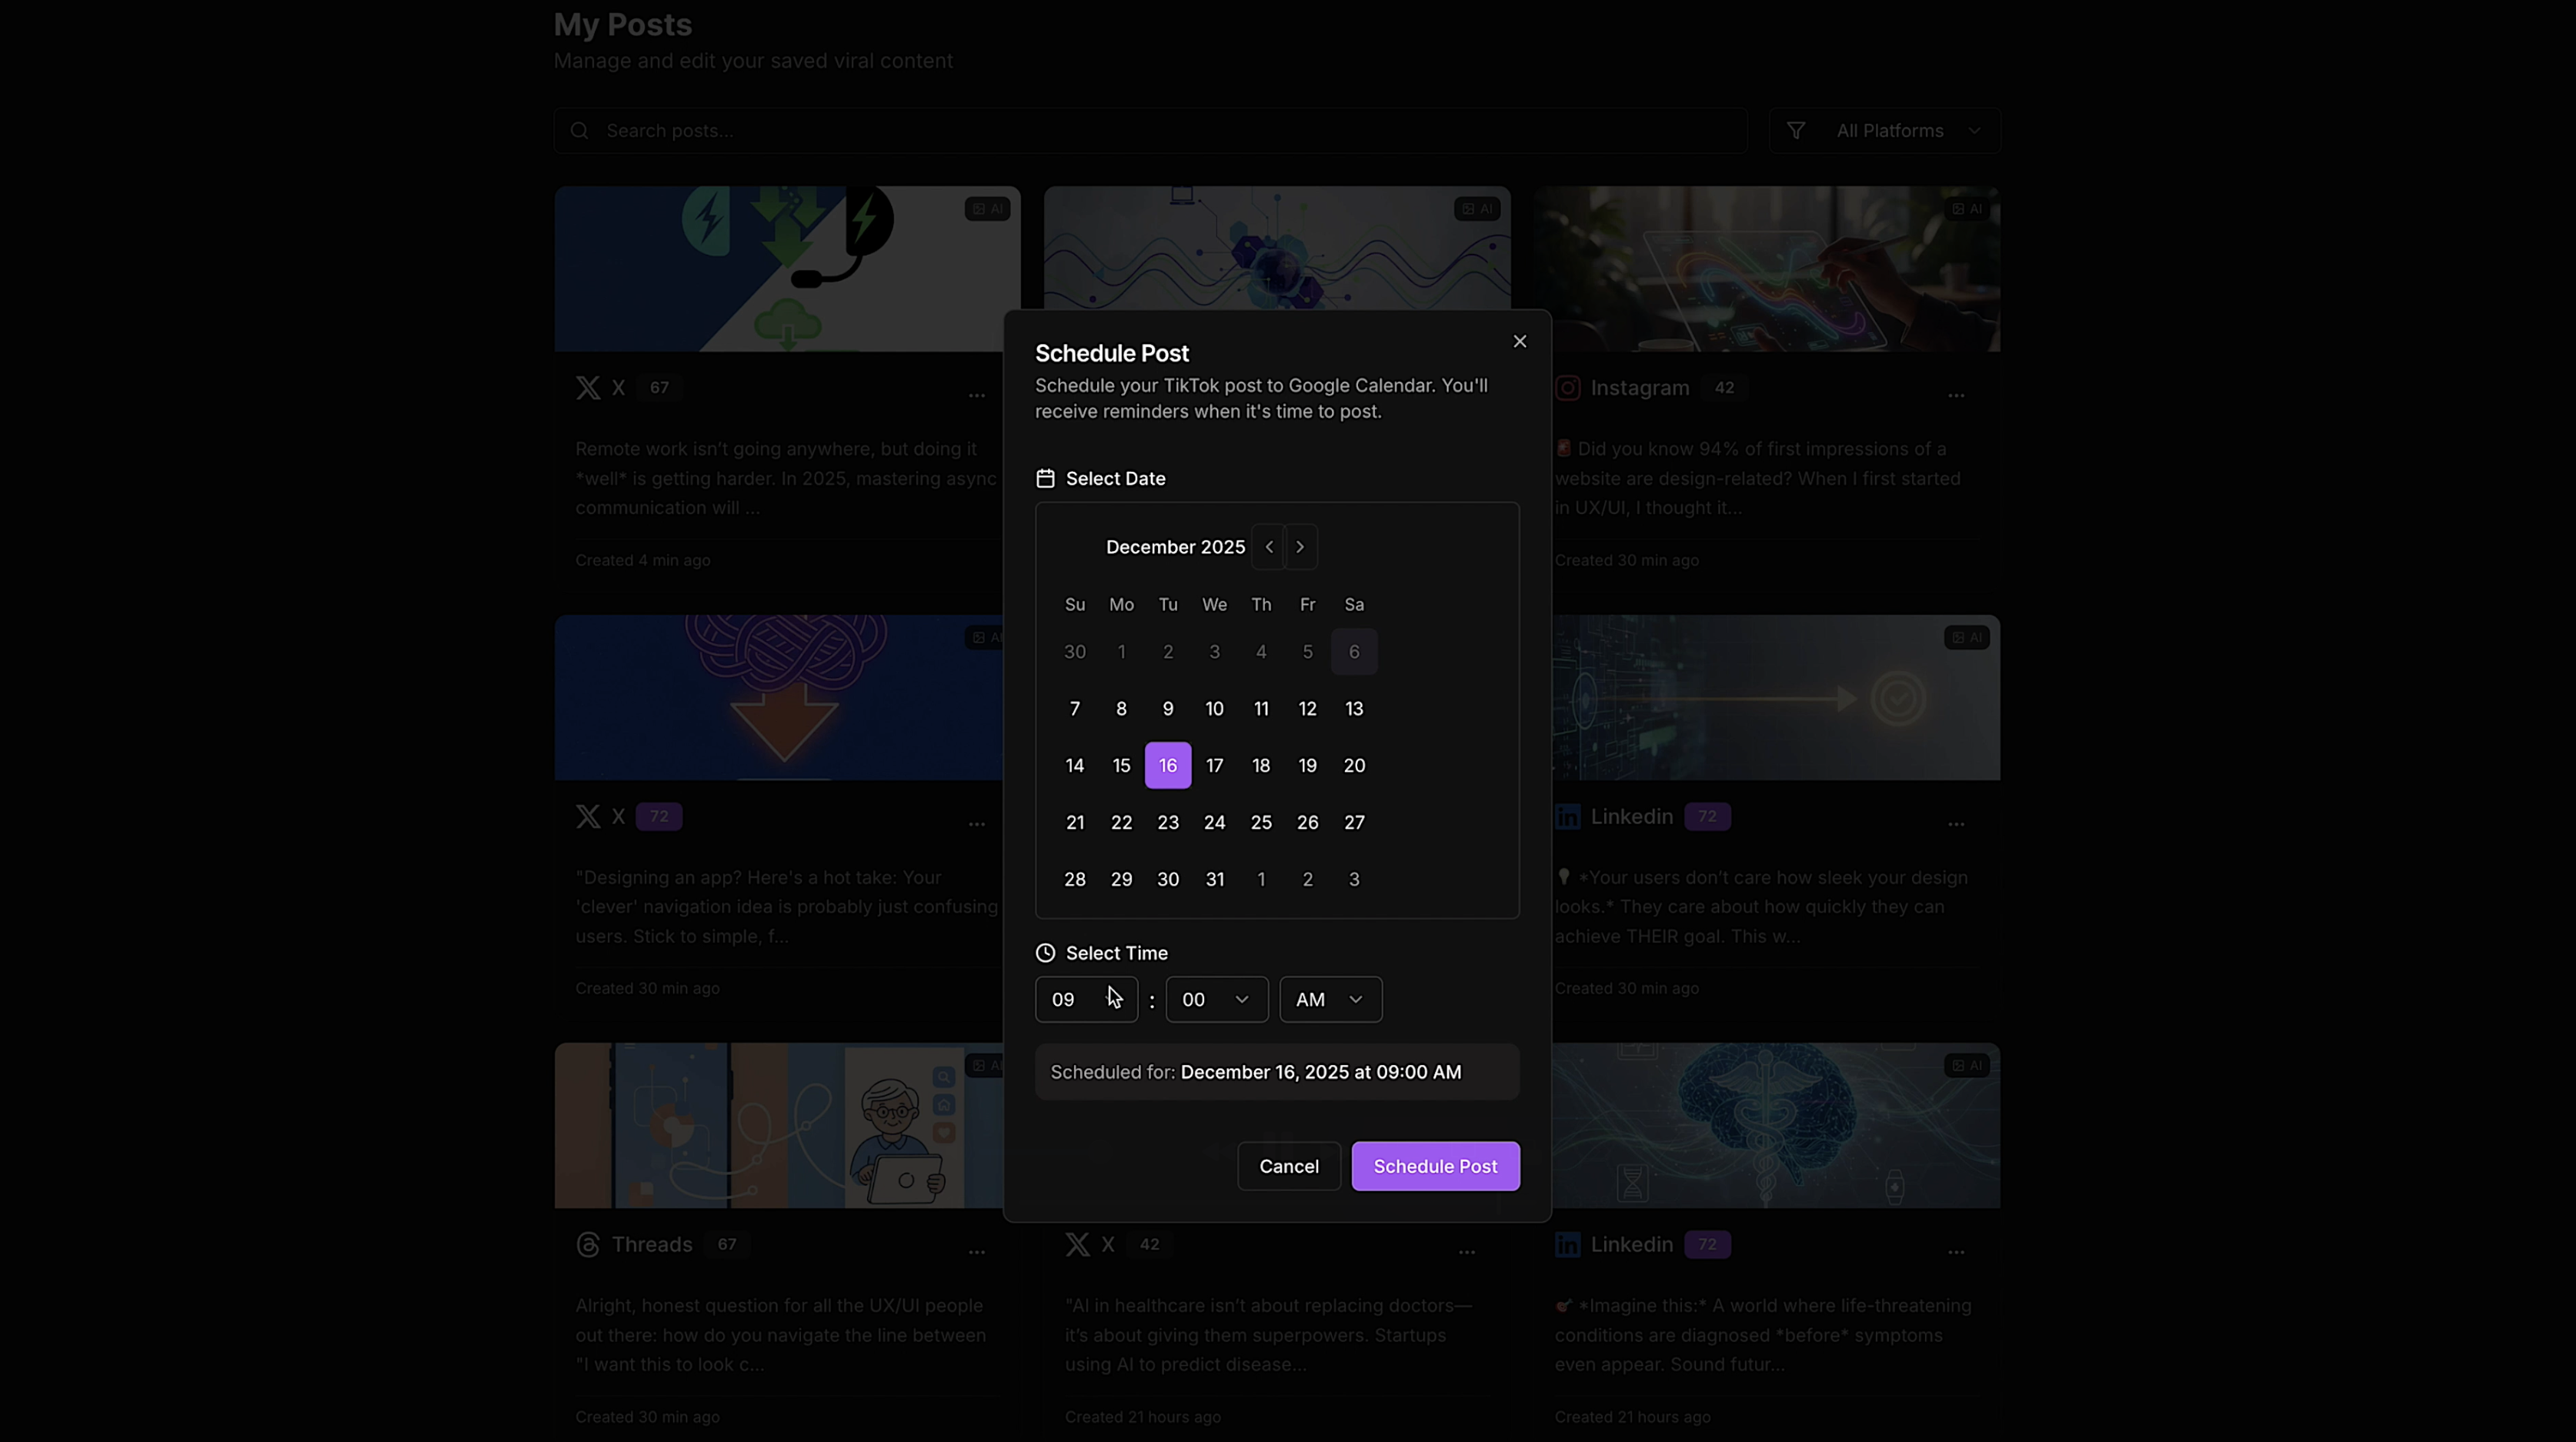
I asked the agent how to enable scheduling, and after running a quick set of fixes, it updated the interface. A new option appeared in the context menu, allowing me to choose a date and time—so I scheduled a post for 9:00 a.m. on Tuesday.
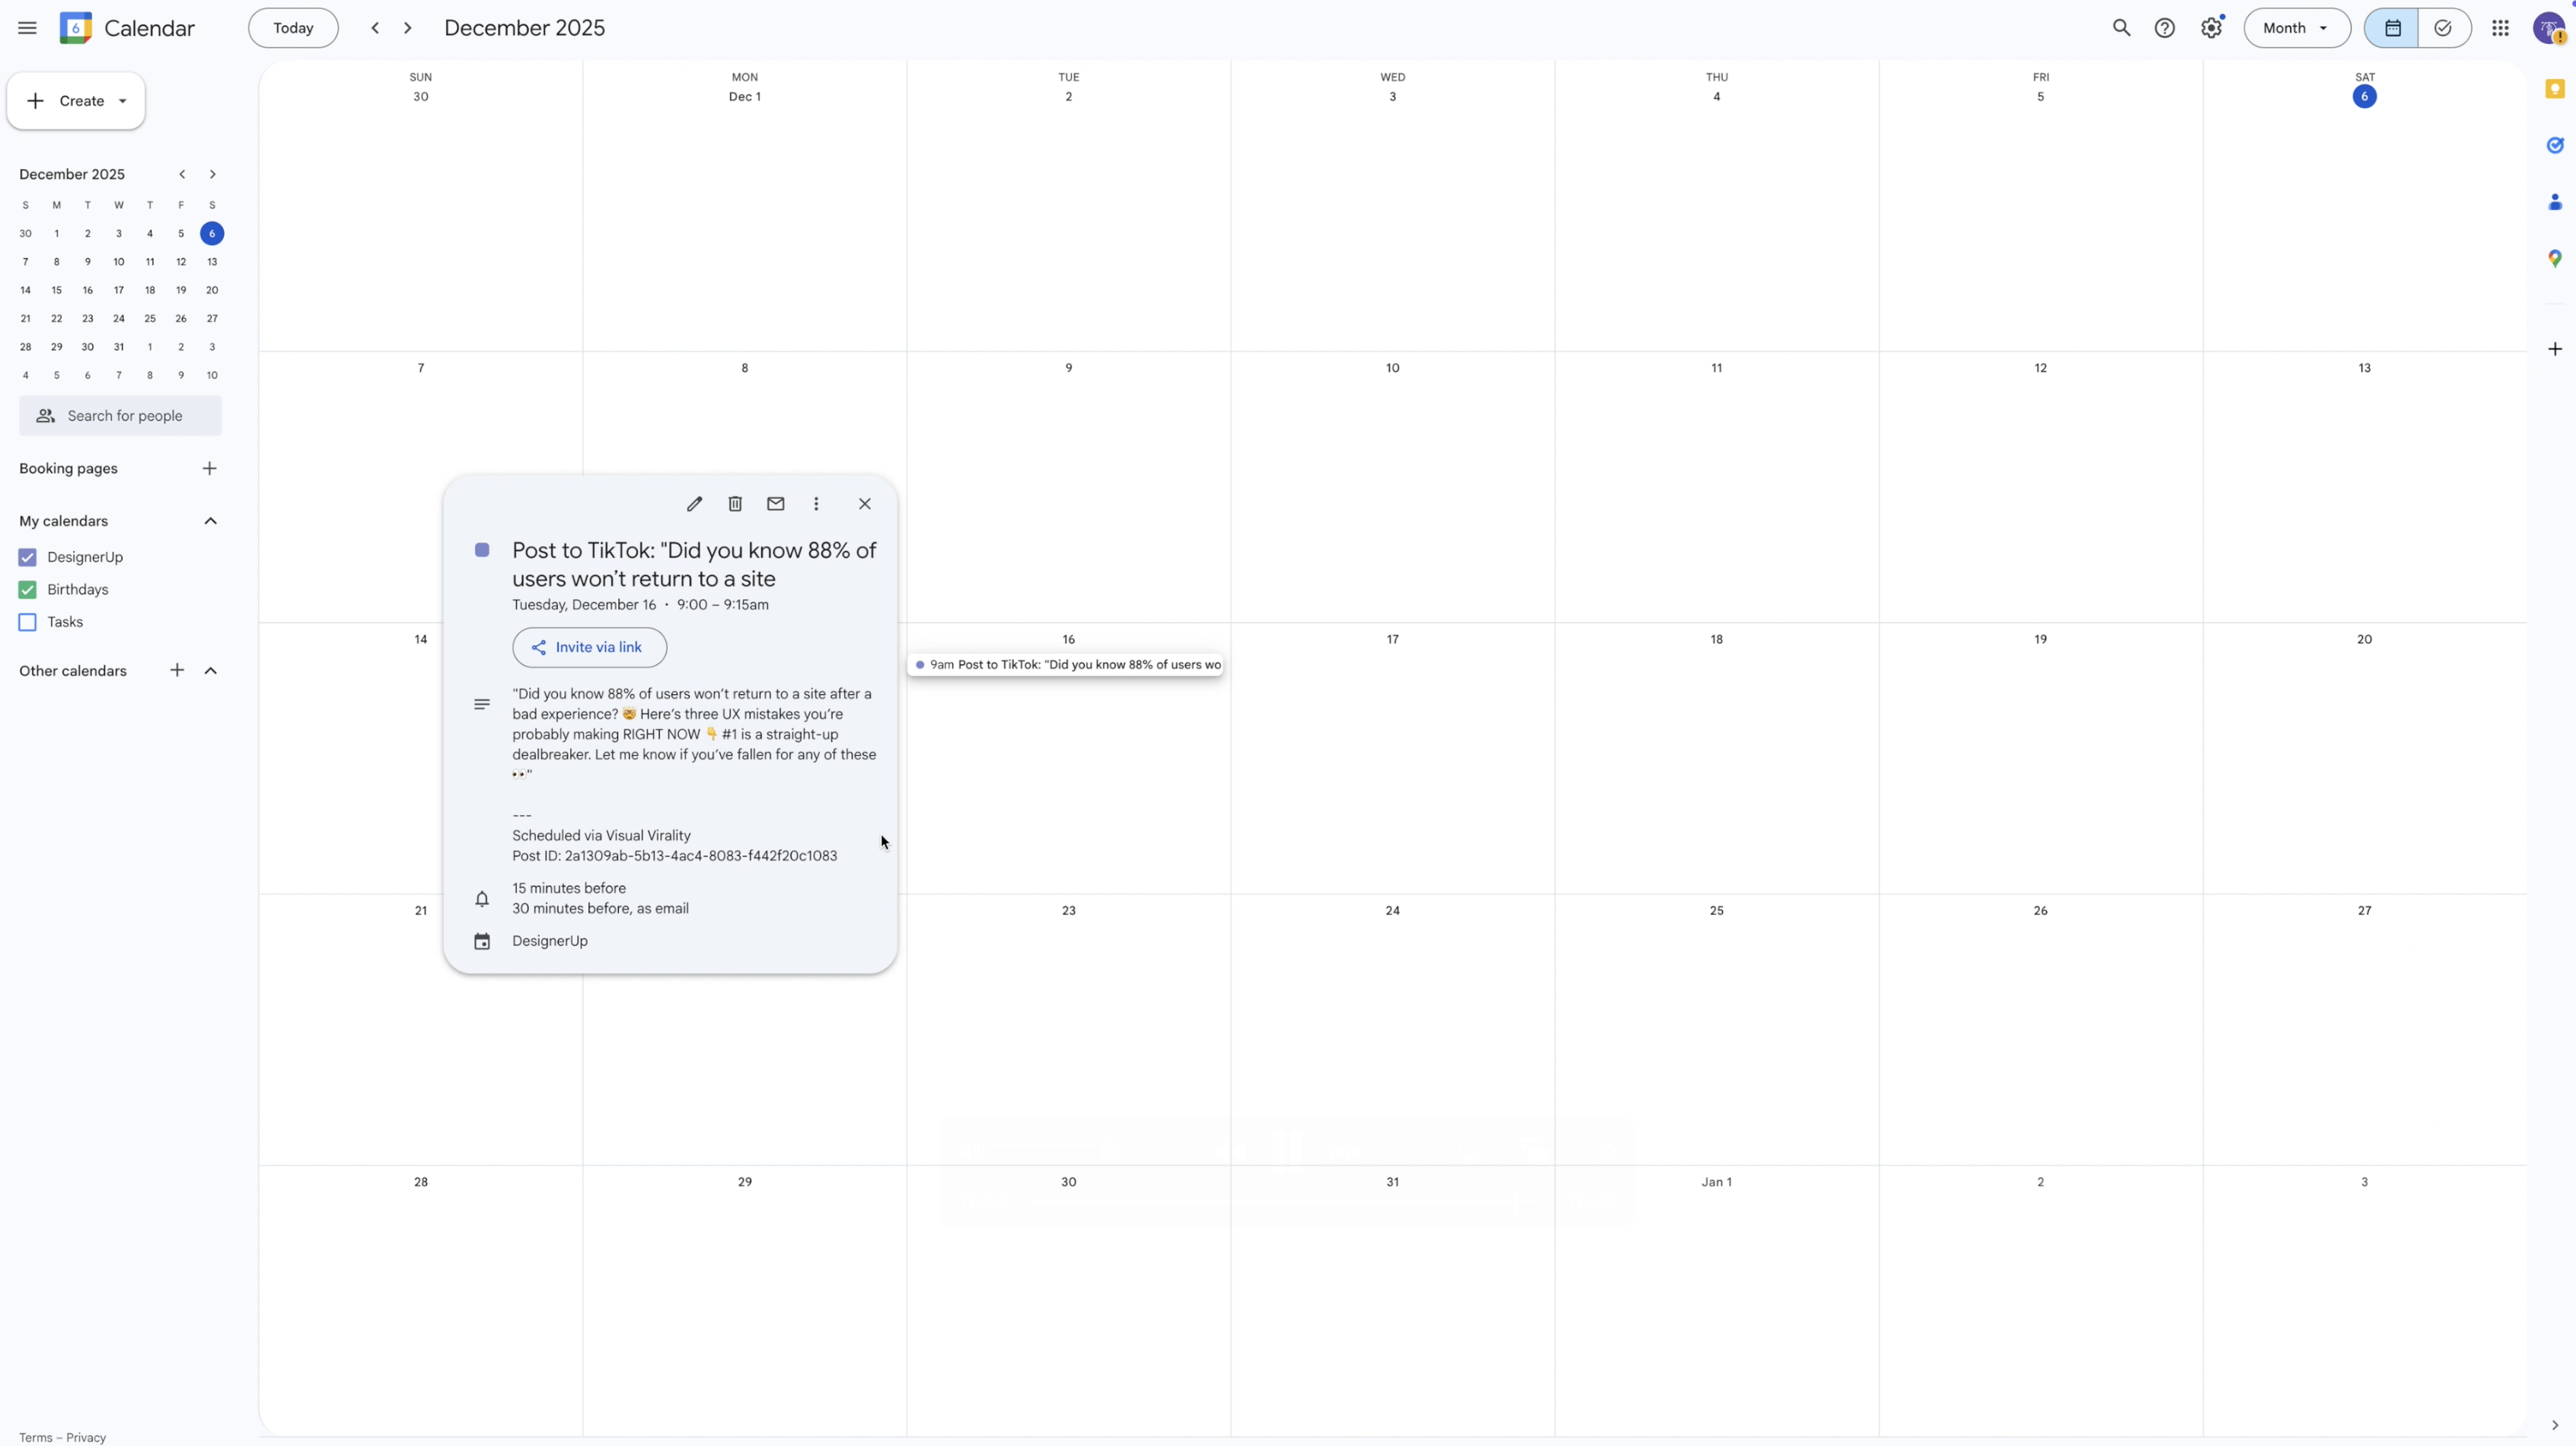
To my surprise, the moment I opened Google Calendar, the post was already there, automatically created through the integration. Seeing an app I’m actively building communicate with tools I use every day felt remarkably satisfying. It’s a small feature, but one that makes the project feel real.
This is also the kind of functionality that would be far more tedious to implement with most other AI-assisted coding tools. Replit handles it with almost no friction, which makes iterating on ideas significantly faster.
From here, the process becomes a loop:
- Build a feature.
- Test it in the real world.
- Share it with the people you interviewed earlier.
- Gather feedback.
- Adjust and refine.
That cycle is where the product actually becomes useful.
I’ve done other full builds with Replit as well, so if you’re curious about what deployment looks like or how different concepts evolve from prototype to production check that out. You’ll also find more Replit resources and a link to claim $10 in free Replit credits if you want to try building something yourself.
And if you're interested in learning how to research, design, and build thoughtful products—using tools like Replit while understanding the fundamentals of UX and UI—I teach all of this in my course.