
Starting from a blank artboard and ending up with final high-fidelity UI designs requires a variety of different skills and knowledge and sometimes it's hard to know if you should start with a sketch, jump right into wireframes or skip to final designs. I've broken down the entire UI design process into 6 simple stages that include what's involved and the purpose and goal of each stage.
It's important to keep in mind that in order to make your User Interface designs functional and useable, you'll need to start with good, insightful user research and data to back up your design decisions and have a strong understanding of visual design and interaction but for the scope of this article, we're going to focus on the visual side of the UI design process.
6 stages of UI design
Generally speaking, designing user interfaces is a process of figuring out how to visually represent the components, state changes and interactions that a user will face when they interact with your on-screen designs. While you may order these stages differently or exclude or include other phases, this outline will give you a good idea of the various steps that might be involved and when and why they might be used.
Stage 1 - Sketches
This is the quickest, lowest cost and lowest commitment way to kick off your designs. It gets the high-level, top of mind ideas out of your head and onto your paper or screen. Generally, these are roughly captured ideas and if they look pretty bad then you're probably on the right track. It's something you should be able to do in a very short amount of time on paper, a whiteboard or using a wireframing app. There is no right or wrong way to sketch but here are some common things it could include:
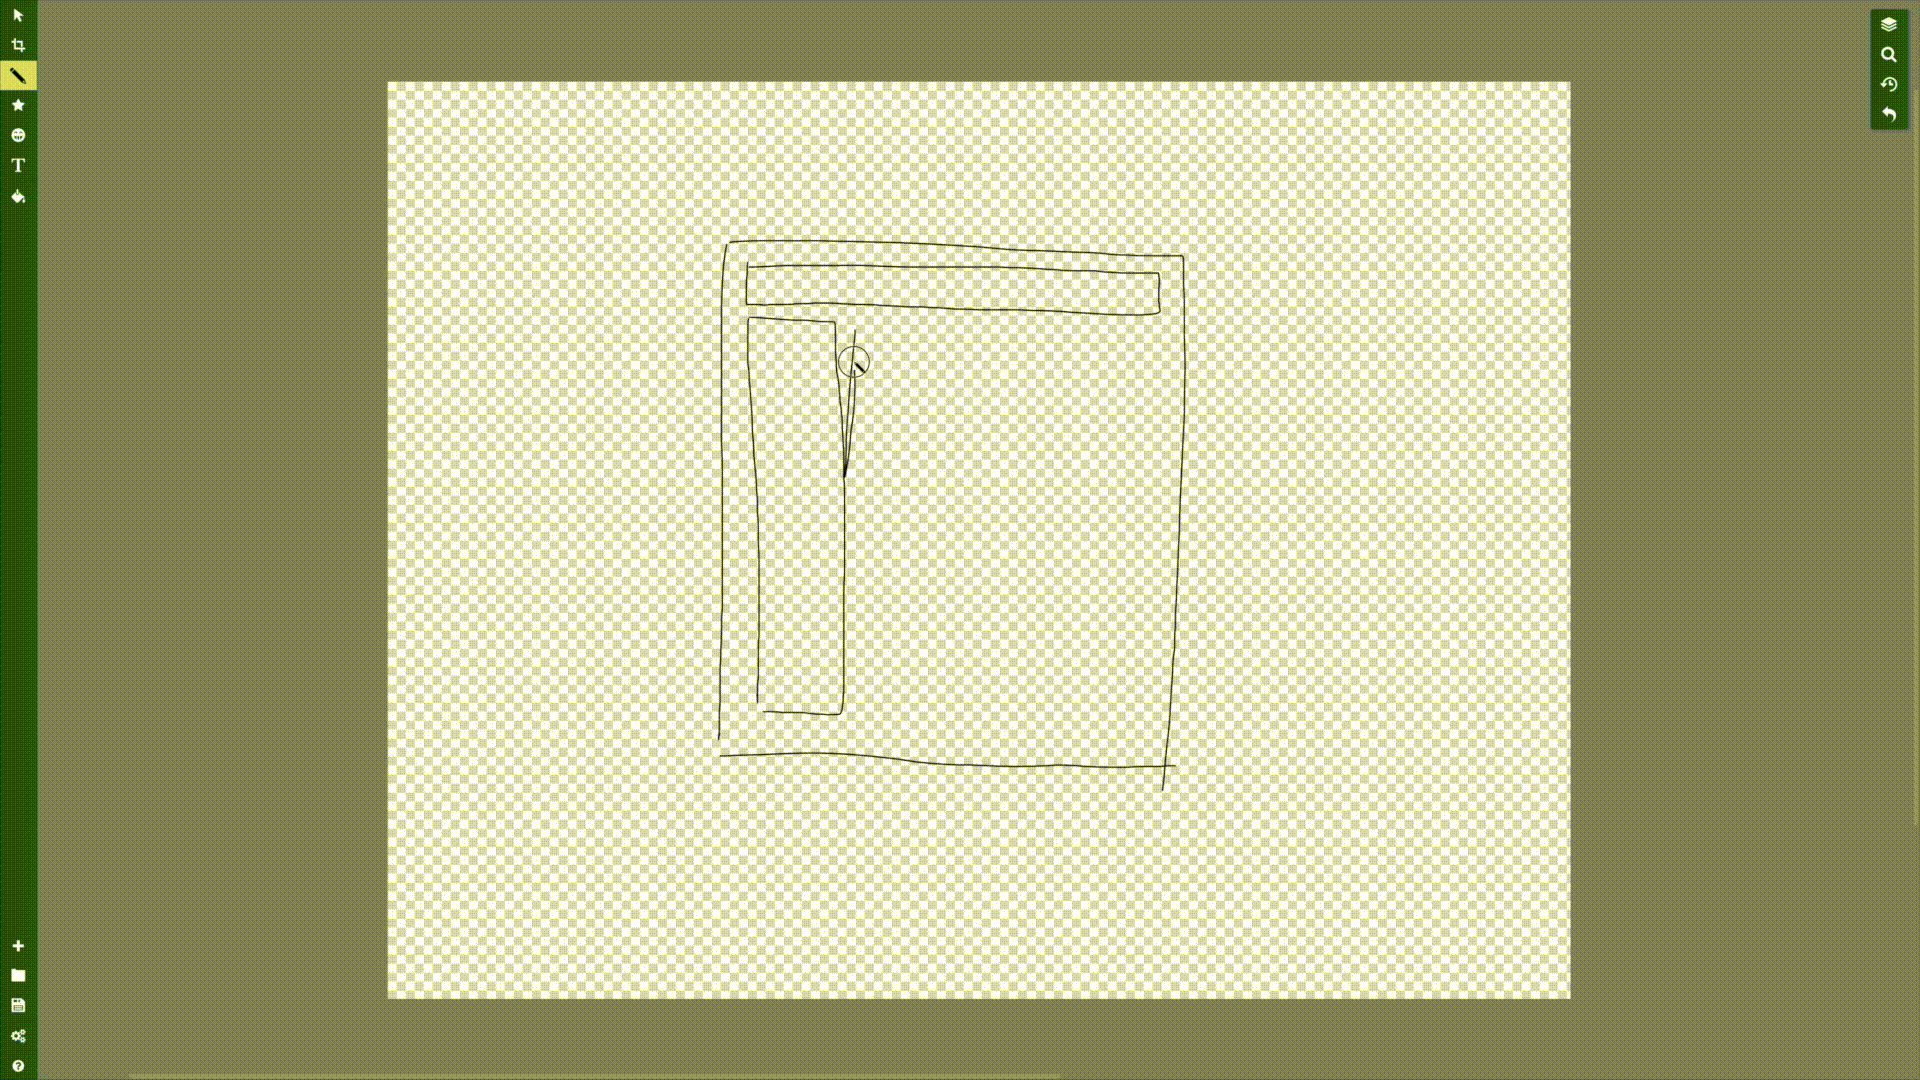
What's on it:
- Outlined boxes
- Place holder boxes to represent images, text and graphics
- Can be done in lo, mid-or hi fidelity depending on the project needs at this
Purpose:
- To start off the conversion about design needs and layout
- Helps to clarify and define features needed and change ideas quickly
- Helps visualize how screens might look on different device sizes and in different contexts
Recommended Tools:
Stage 2 - Wireframes or Gray boxing
Wireframes are created to show what things look like before visual design principles have been applied. It's where you can start to see the layout and elements taking shape.
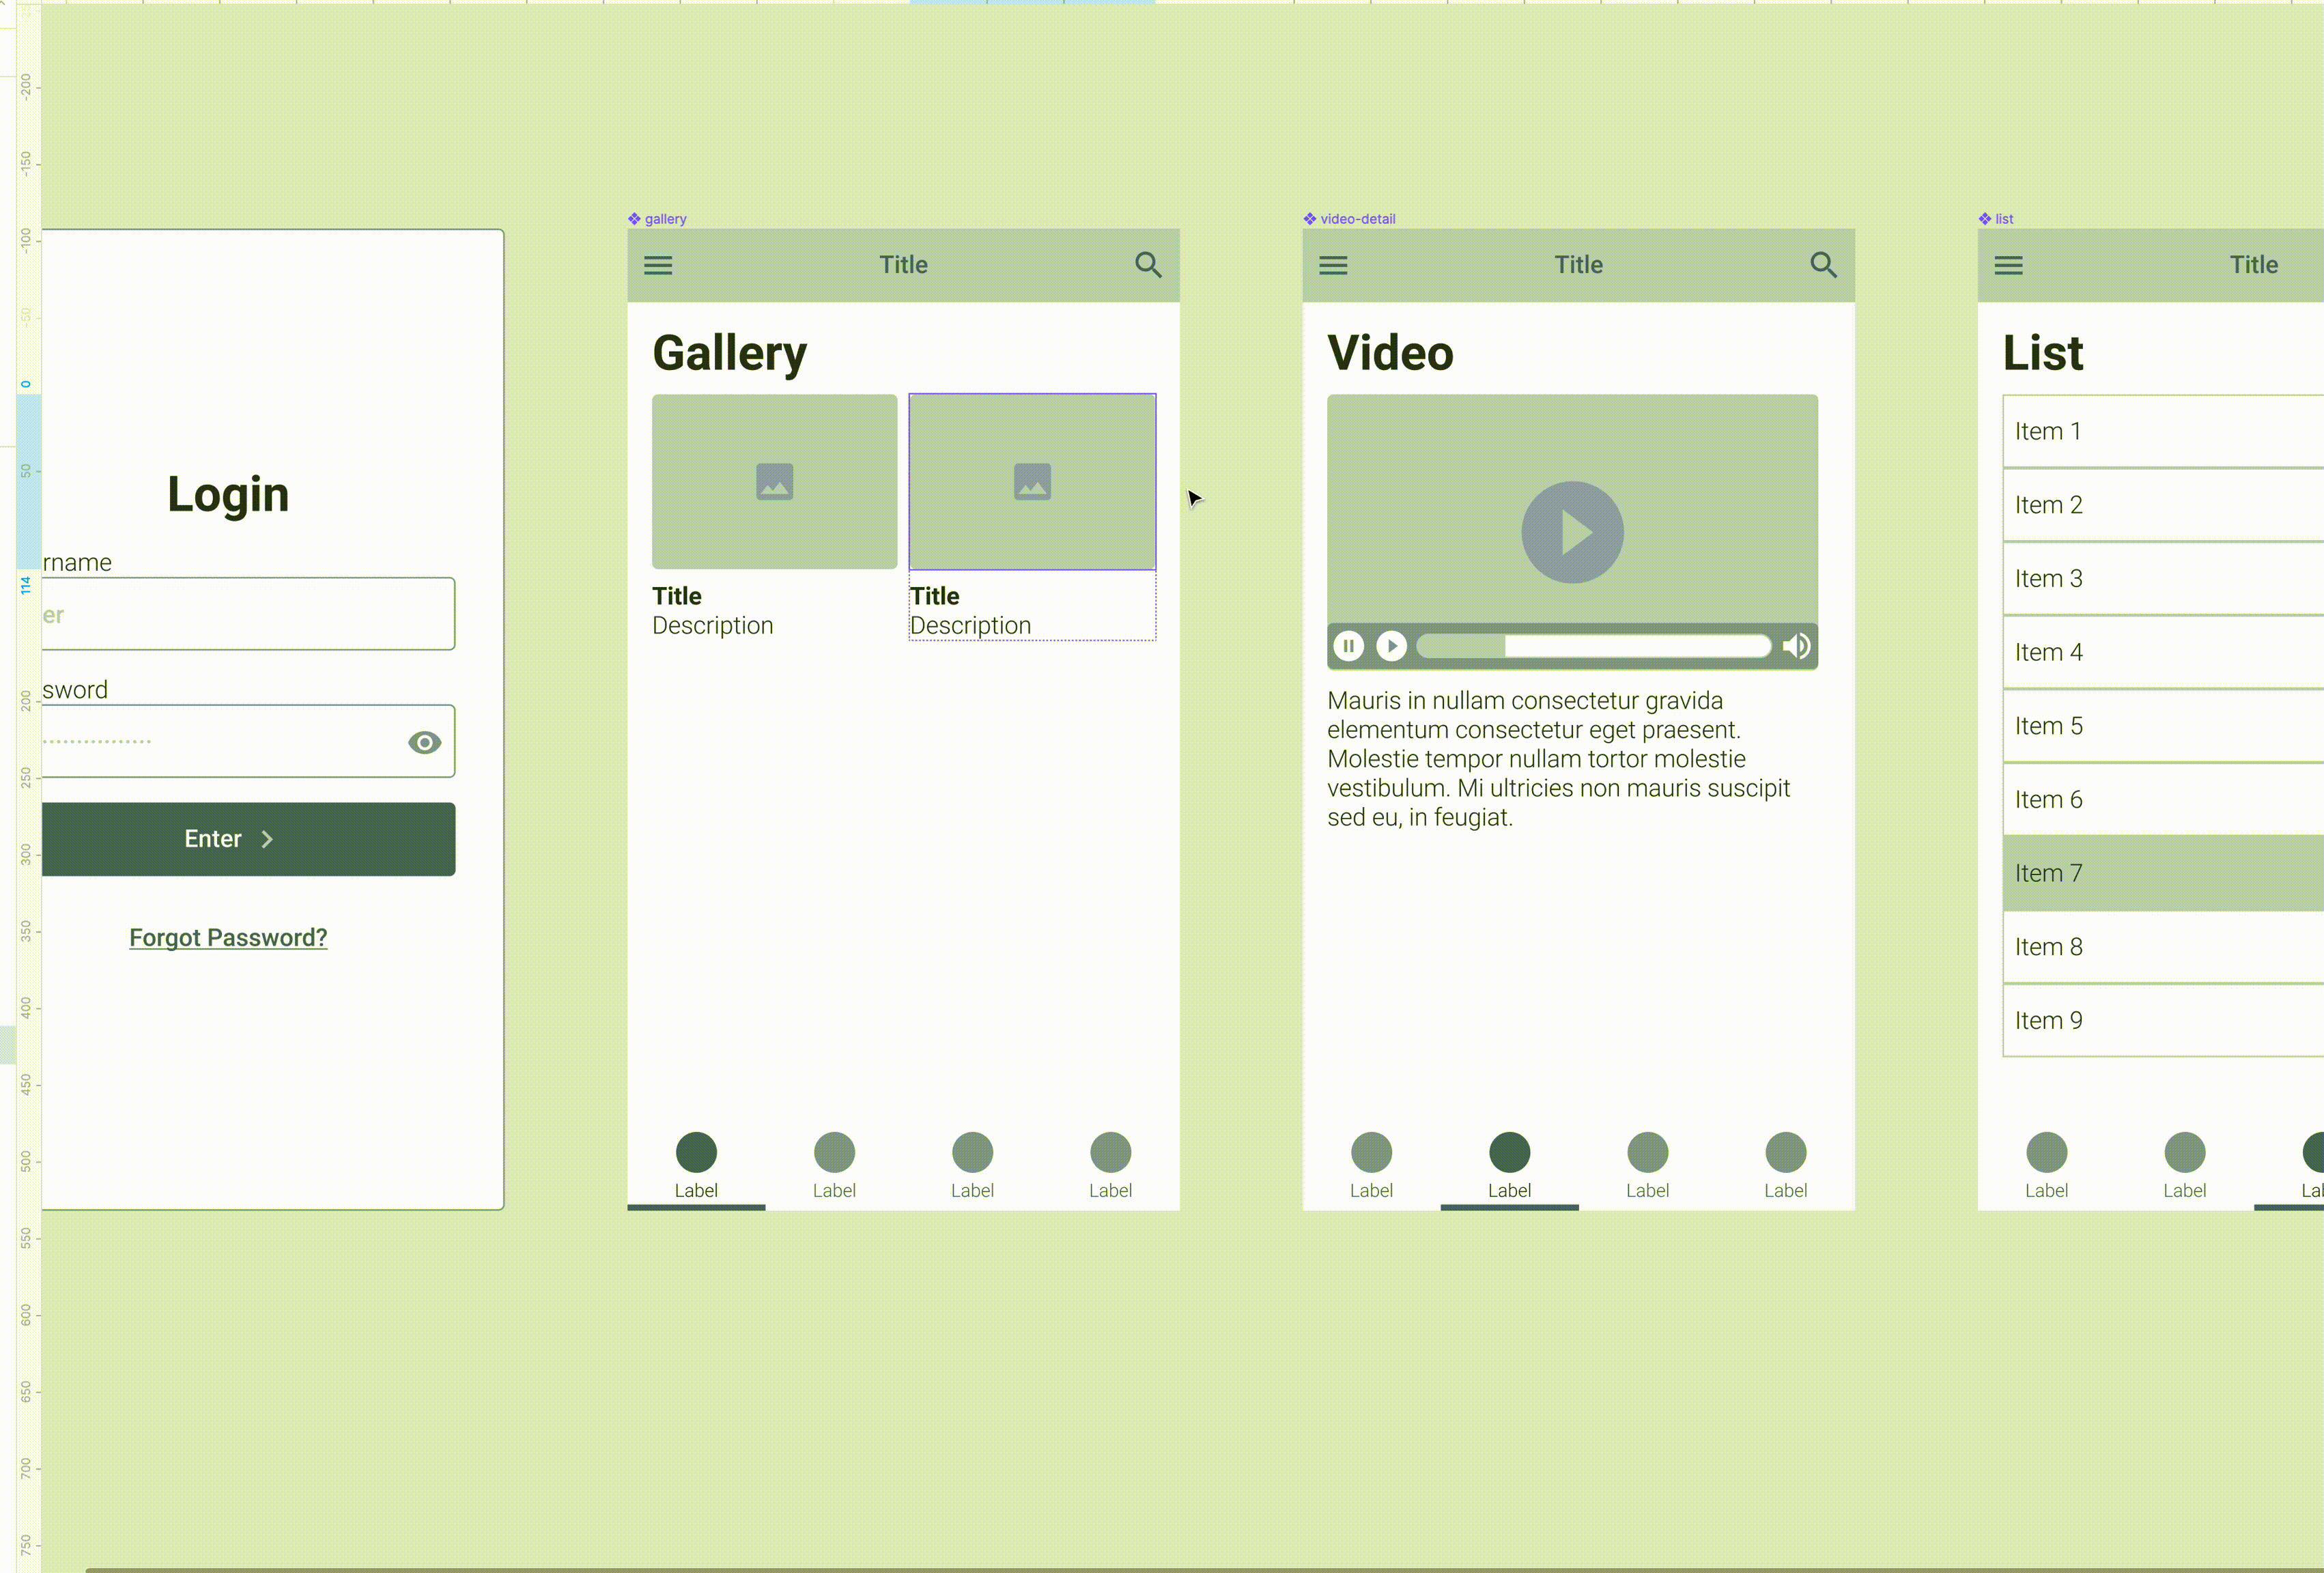
What's on it:
- Filler content
- Lorem ipsum or actual text which I highly recommend
- Placeholder images or stock images
- Usually can be done in your design software using an existing wireframing UI kit or done from scratch
Purpose:
- Visualize the general layout
- Establish correct proportions
- Build trust with stakeholders and help them see the idea more fleshed out
- Fast and cheap way to create initial ideas or to low-fidelity prototype
Recommended Tools:
- Justinmind's wireframing tool
- Existing Wireframe kits for your design app
- Balsamiq
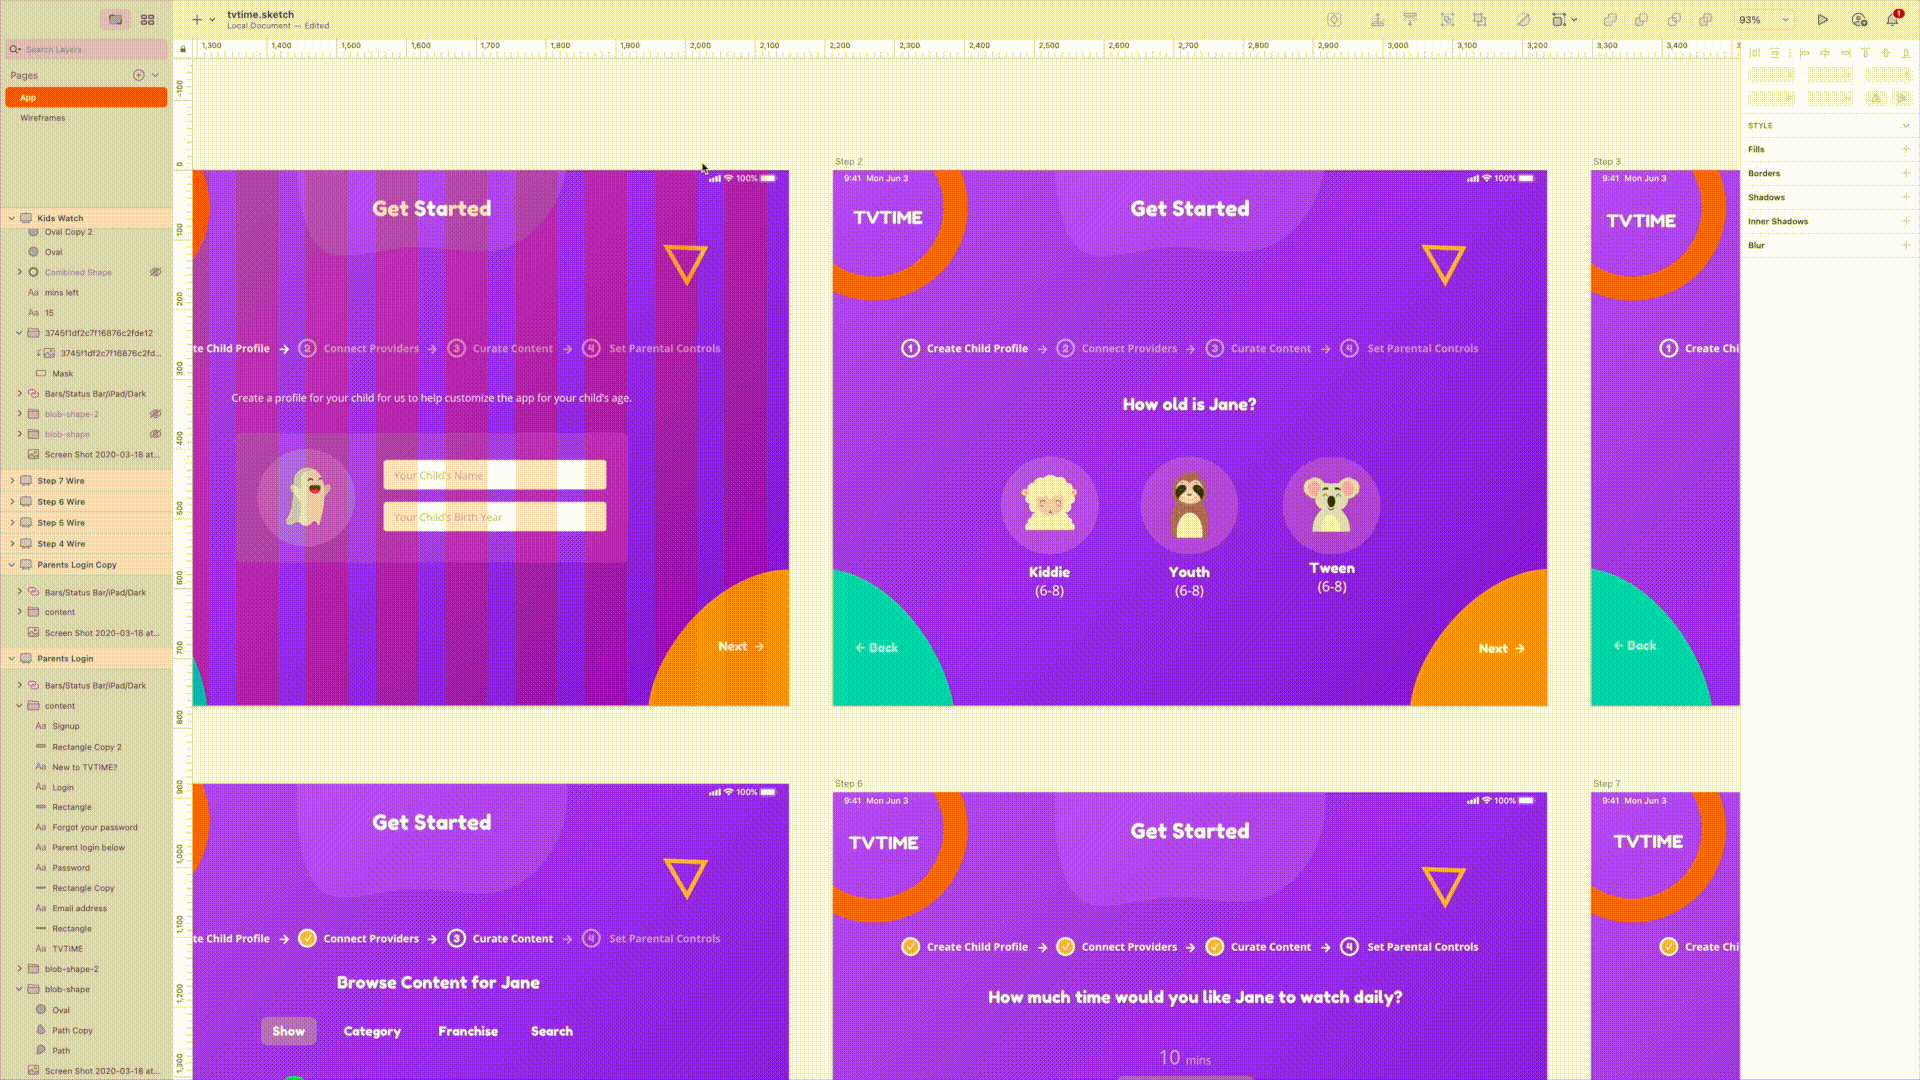
Stage 3 - Component design
Dynamic user interfaces (unlike static website landing pages or marketing sites) require you to think through states and conditionals. It also requires you to be consistent, apply good usability principles and decide the best way to layout and organize and disclose information and actions. This is where thinking in components and atomic elements and database views can really help.
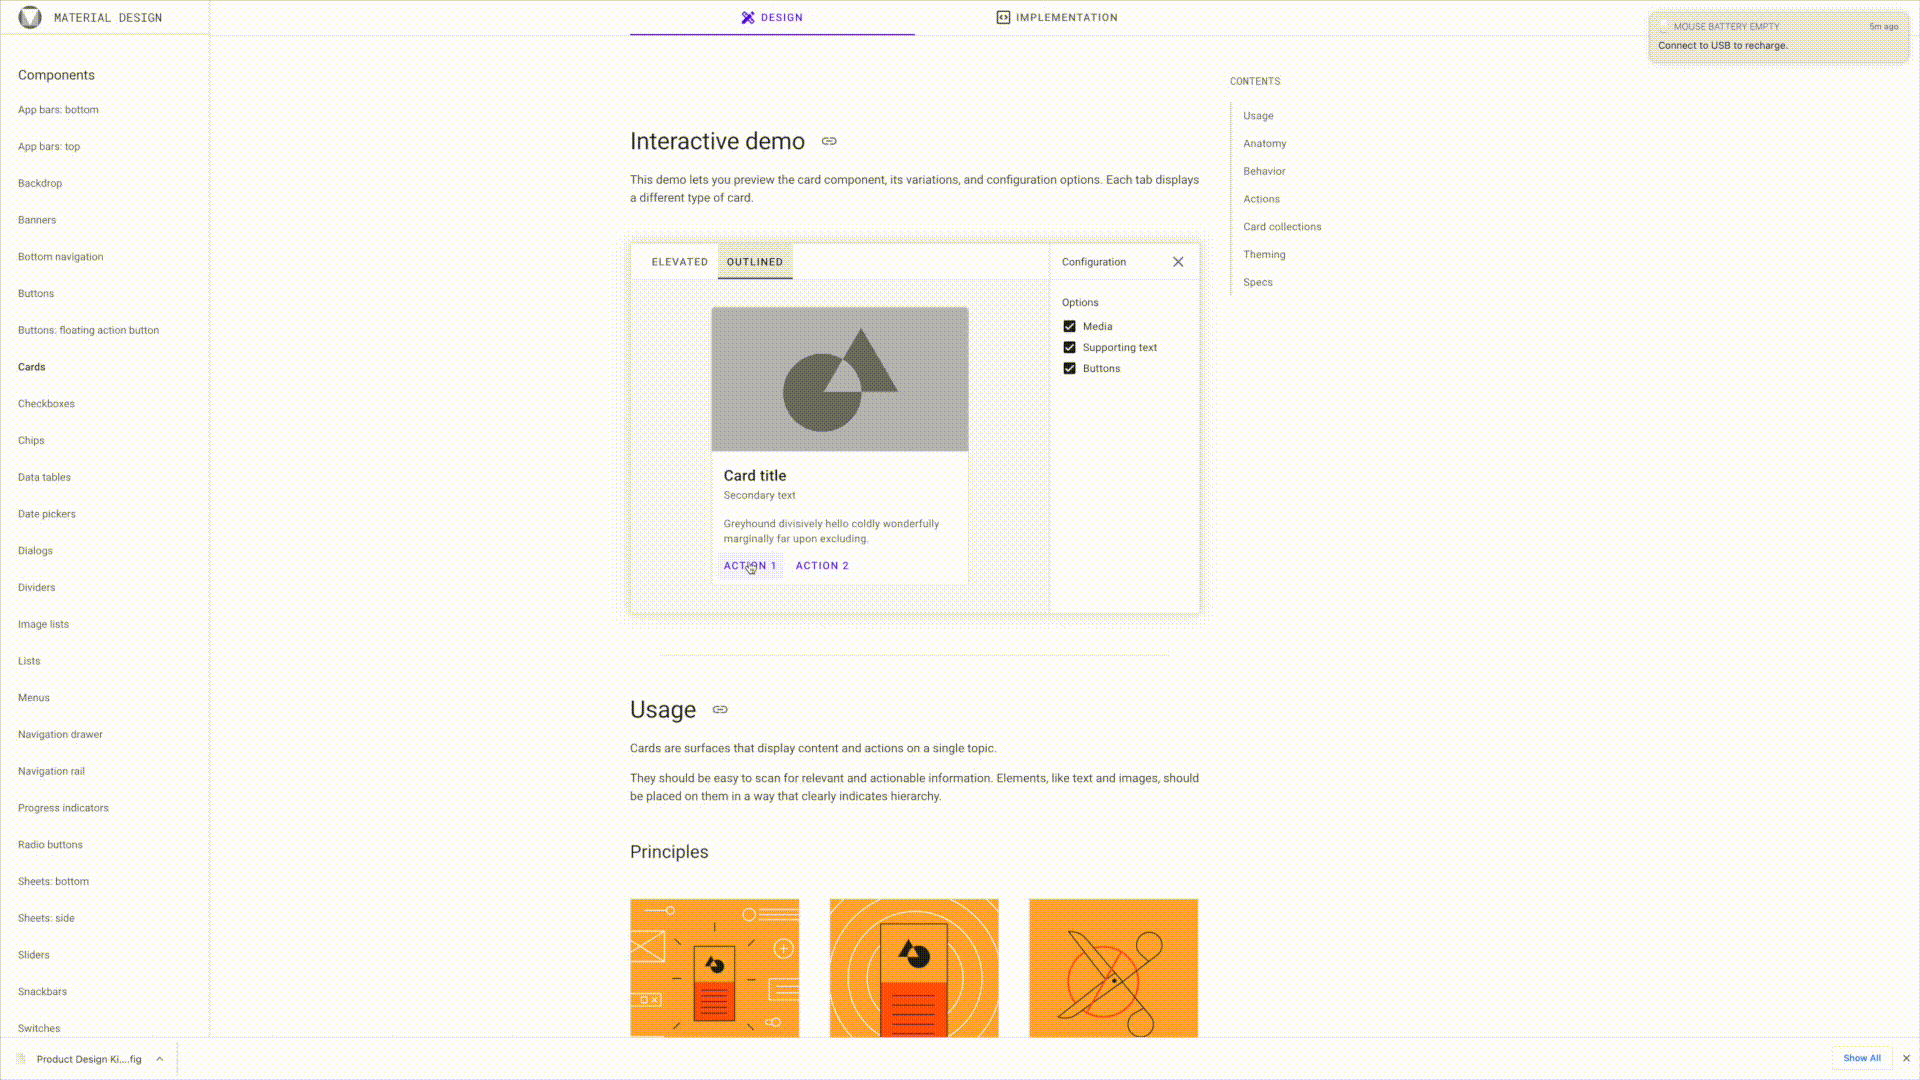
What's on it:
- UI kits
- Symbols (buttons, badges)
- Element states (hover state, clicked state)
- Components (like tables, lists, cards, forms)
- Actual text
Purpose:
- Discover and address usability issues,
- Uncover accessibility and responsive problems
- Translate ideas into consistent elements that can be shared with engineers and more easily and accurately discussed and shared across teams.
Recommended Tools:
Stage Phase 4 - User Flows and Task flows
Now it's time to decide how users will get from one screen to another.
What happens when they click on this or if they forget to add in some information here. This is about understanding the user's mental models and your system's model and the orchestration of the pathways and responses that your interface will provide.
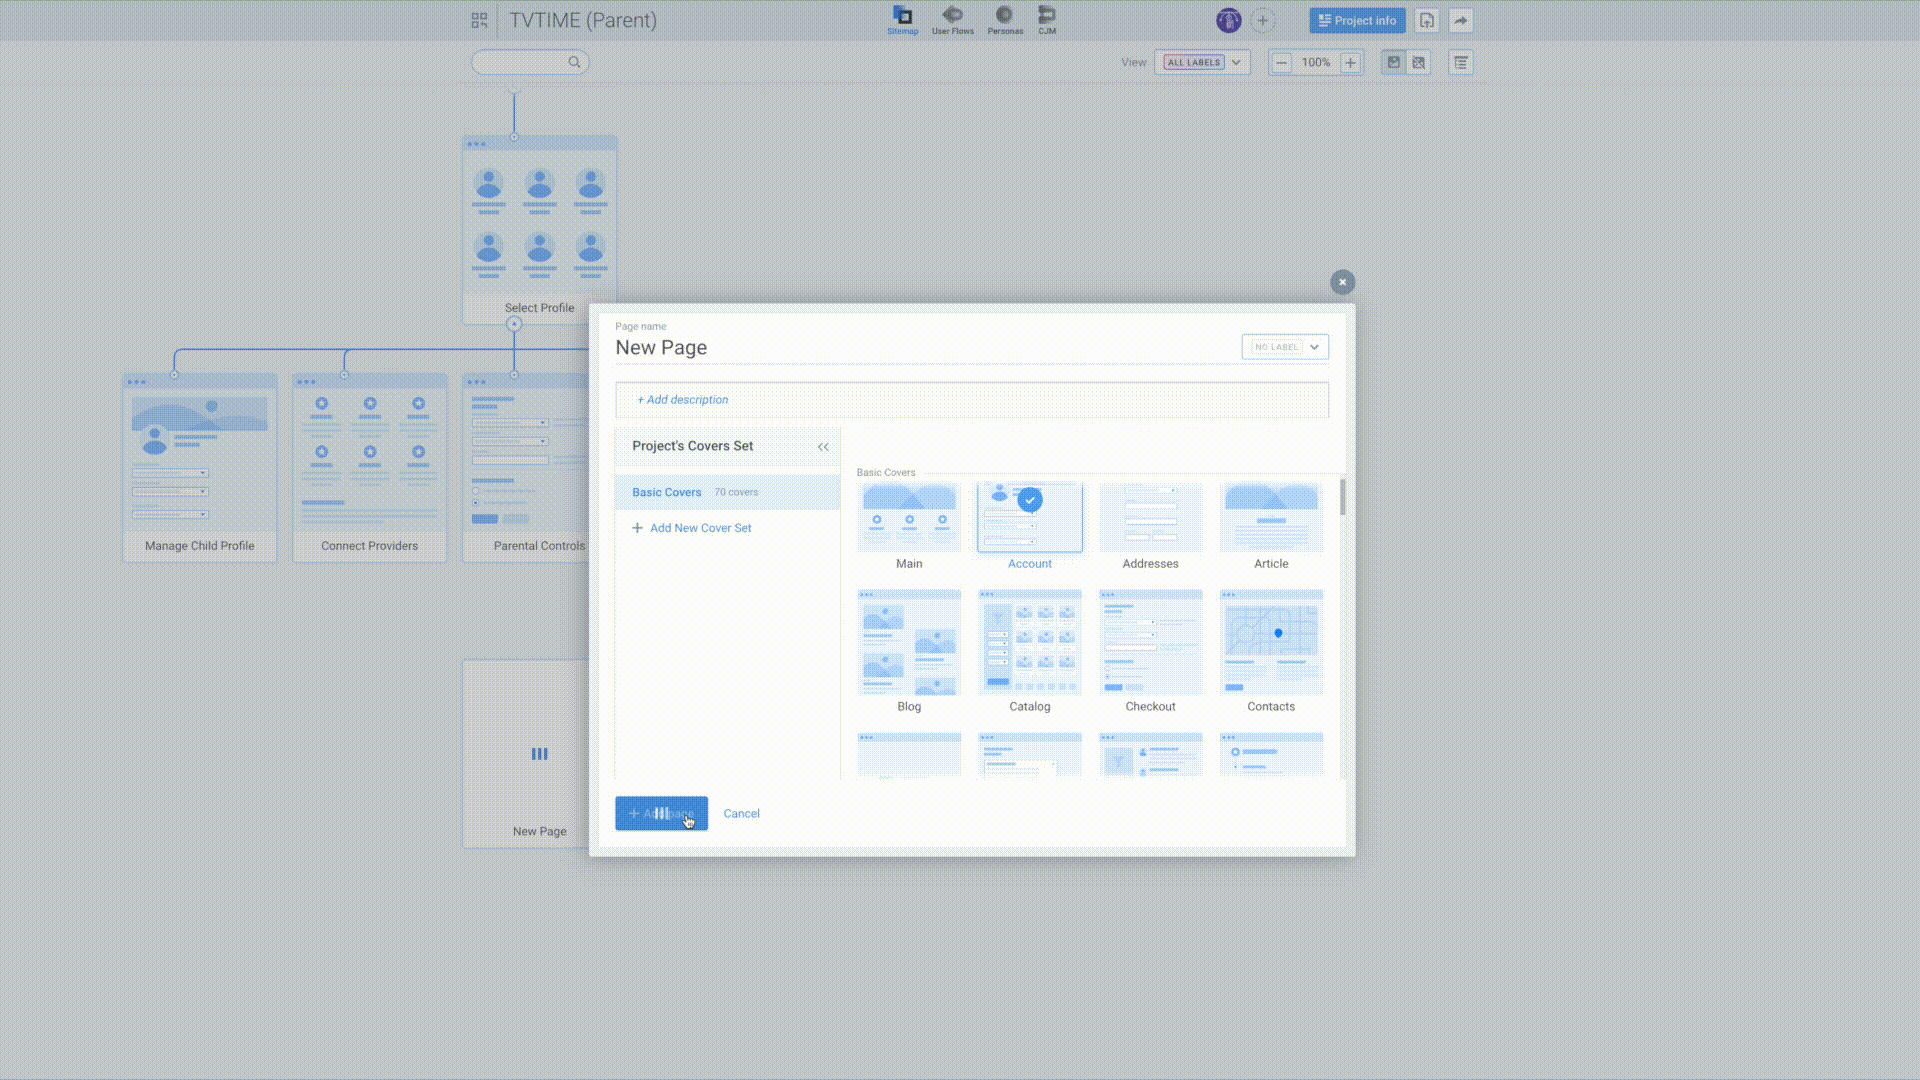
What's on it:
- Wireframes
- Flow charts
- Wireflows
- Arrows
- Conditionals
Purpose:
- To show navigation routes
- To check for missing states and information
- To visualize entry, exist and decision points for your user/customer journey
Recommended Tools:
Stage Phase 5 - High fidelity designs
Now that you have all the under the hood stuff worked out it's time to put your best graphic, copy and visual design skills to the test. This is where you make every pixel as perfect and measured as you can and where you can add your unique brand aesthetic and thematic elements.
What's on it:
This should show things exactly as they will appear in the final product.
Purpose:
- Create pixel perfection
- Create visual design consistency
- Add a sense of your brand
- Select final design assets
- Get final approval from stakeholders
Recommended Tools:
Stage Phase 6 - Prototype
This ties everything together and shows how the app is expected to look and behave.
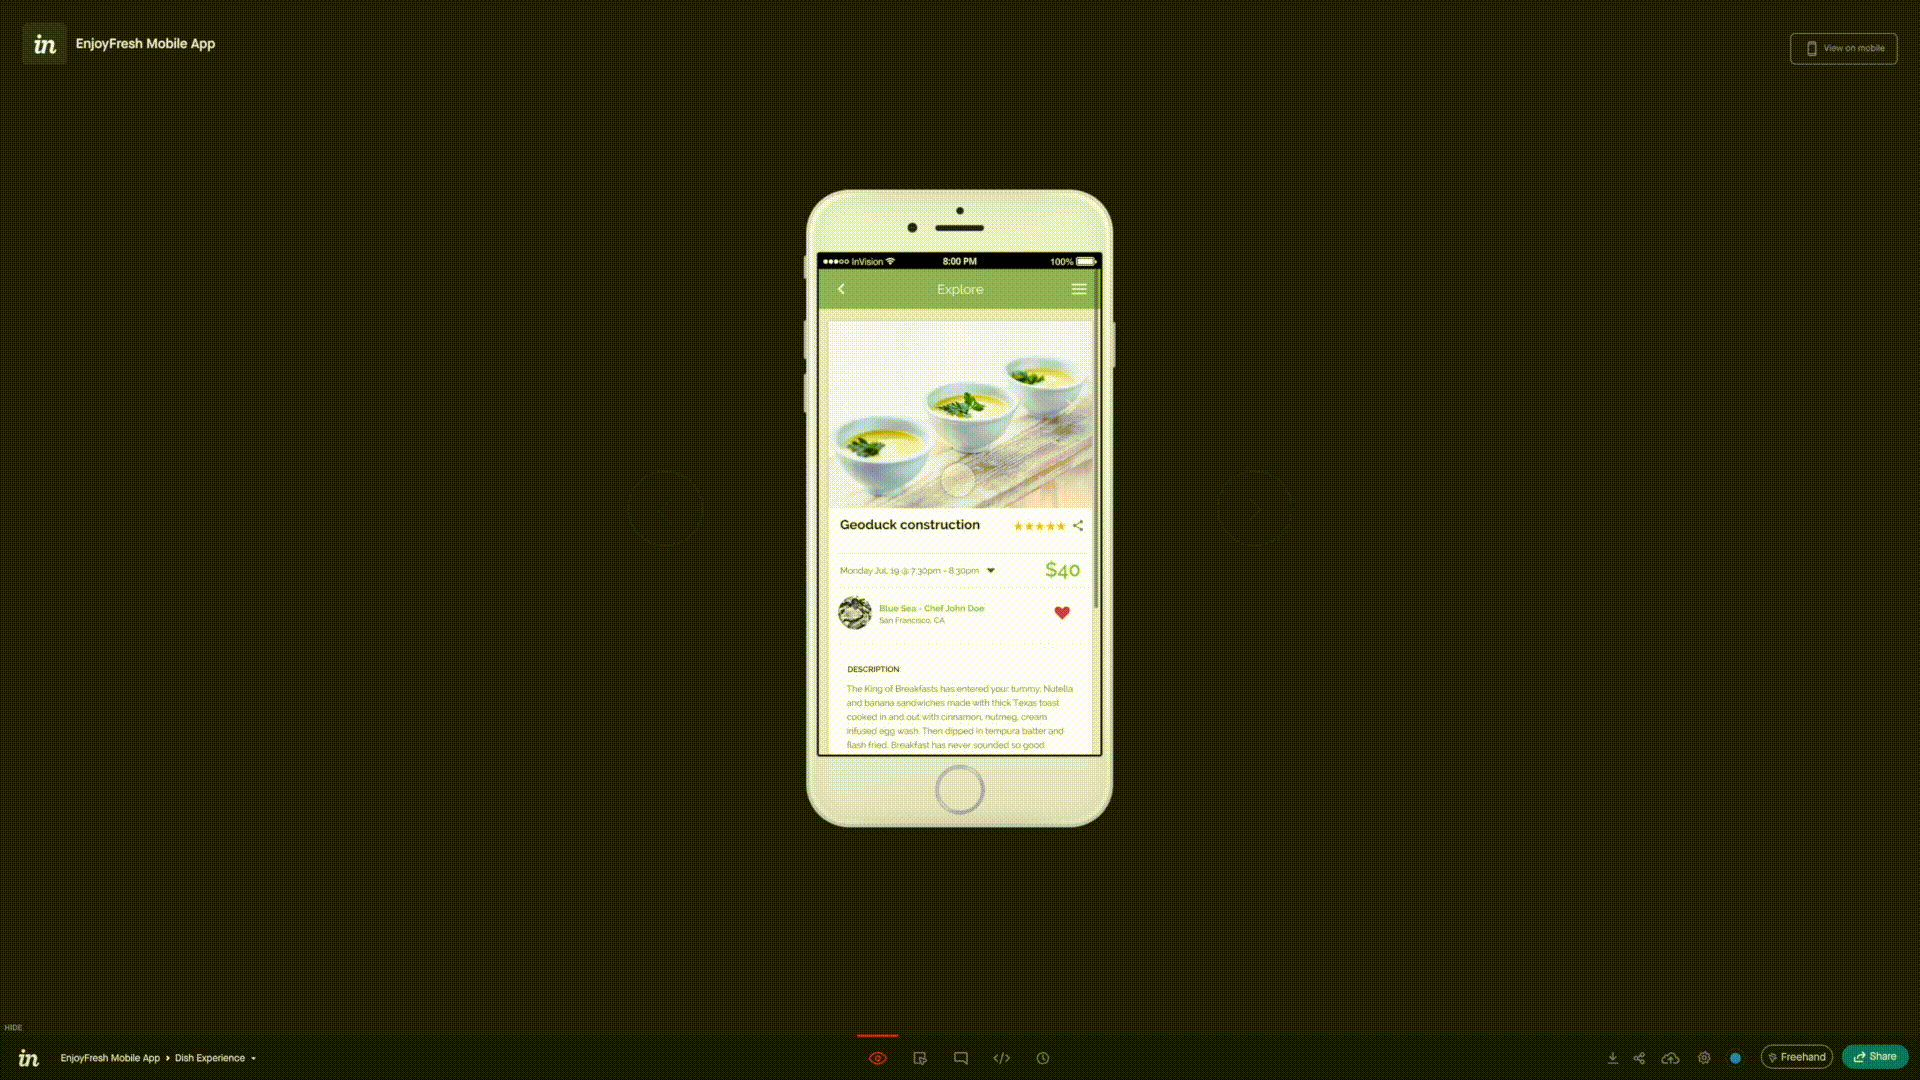
What's on it:
- All screens hi-fidelity
- Target points to mimic what it will be like when the user interacts with the real thing
Purpose:
- Links together all of the screen and flows in a simulated environment
- Ensures that everything looks good, work well and flows as intended before it goes to production.
- This can be considered the pre-code or no-code version of your product.
Recommended Tools:
Keep in mind that these stages are not necessarily a linear process, you may be asked to take the lo-fi wireframes from stage 2 and jump into stage 6 and create a prototype with them. It all depends on the budget and time requirements of the project you're working on. So getting familiar with all 6 stages and being comfortable jumping back and forth between them is key.
If you want to get better at doing this sort of thing and mastering UI and Product Check out our Product Design (UI/UX) Course.